(→Tips) |
|||
| (15 intermediate revisions by 5 users not shown) | |||
| Line 6: | Line 6: | ||
|raidgumball=[[Totem Warlock]] |
|raidgumball=[[Totem Warlock]] |
||
|raidspecial=Crystal, Soul Crystal +8 |
|raidspecial=Crystal, Soul Crystal +8 |
||
| + | |specific=y |
||
}} |
}} |
||
Complete this maze to get the [[Mage]] Gumball. |
Complete this maze to get the [[Mage]] Gumball. |
||
| Line 18: | Line 19: | ||
*To obtain his fragments, repeat the above, except that you do not need to pay coins. You can use the [[Alien Helmet]] from having Predator as main, or from the Strange Remains. |
*To obtain his fragments, repeat the above, except that you do not need to pay coins. You can use the [[Alien Helmet]] from having Predator as main, or from the Strange Remains. |
||
| + | ==Stages== |
||
| + | |||
| + | '''Soul Within the Relic '''- 15 floors (Difficulty 6) - {{Cost|1|Vigor}} |
||
| + | *You get Soul gem to unlock Soul-link (first one) on [[Alchemy Workshop]] for 3000 coins |
||
| + | *Strange Remains (Predator) always appear on floor 2 |
||
| + | '''Forward! The Pilgrim's Way!''' - 20 floors (Difficulty 7) - {{Cost|1|Vigor}} |
||
| + | *You get the formula for the [[Holy Water]] potion |
||
| + | *An specific elemental altar appears |
||
| + | *You unlock to create rank 2 ores on the [[Alchemy Workshop]] |
||
| + | '''Meteor! Guidance of the Sage! '''- 25 floors (Difficulty ) - {{Cost|1|Vigor}} |
||
| + | *Main reward its [[Mage]] gumball |
||
| + | *You get formula for [[Sage's Potion]] |
||
| + | *You get World tree branch to promote gumballs to rank 3 |
||
== Enemies == |
== Enemies == |
||
| + | ===Usual Enemies=== |
||
| − | {| class="article-table" width="100%" |
||
| + | {{Template:Monster General |
||
| − | !rowspan="2" width=100px|Enemy |
||
| + | |number of rows=5 |
||
| − | !rowspan="2" width=50%|Skill |
||
| + | |||
| − | !colspan="2" |Stealing List (use [[Bandit]], [[Kaito]], or [[Bloody Wolf]]) |
||
| ⚫ | |||
| ⚫ | |||
| ⚫ | |||
| − | !Common item |
||
| ⚫ | |||
| − | !Rare item |
||
| ⚫ | |||
| − | |- |
||
| ⚫ | |||
| ⚫ | |||
| ⚫ | |||
'''Guardian''': Resist damage for party members of other type |
'''Guardian''': Resist damage for party members of other type |
||
<br />'''Spiked Shell''': Reflect 30% of damage taken back to the attacker. |
<br />'''Spiked Shell''': Reflect 30% of damage taken back to the attacker. |
||
| − | | {{cost|1|Earth Crystal}} |
+ | |other1=May drop {{cost|1|Earth Crystal}} |
| + | |||
| ⚫ | |||
| ⚫ | |||
| − | |- |
||
| − | | |
+ | |class2=Elemental |
| − | + | |image2=[[File:水元素.png|thumb|left|x80px]] |
|
| − | |'''Elemental Creature (Water)''': Immune to Water spells |
+ | |skills2='''Elemental Creature (Water)''': Immune to Water spells |
| + | '''Tranquil Rain''': Increase the HP of all allies every 2 rounds |
||
| ⚫ | |||
| + | |||
| + | |name3=Fire Elemental |
||
| ⚫ | |||
| ⚫ | |||
| ⚫ | |||
| ⚫ | |||
| ⚫ | |||
| + | |||
| + | |name4=Air Elemental |
||
| + | |class4=Elemental |
||
| ⚫ | |||
| ⚫ | |||
| + | '''Dodge''': Possess high dodge (25%) |
||
| ⚫ | |||
| + | |||
| ⚫ | |||
| + | |class5=Elemental |
||
| ⚫ | |||
| ⚫ | |||
| + | |other5= |
||
| + | |||
| ⚫ | |||
| + | |class6=Elemental |
||
| ⚫ | |||
| ⚫ | |||
| + | |other6=Boss |
||
| ⚫ | |||
| + | To see more title or gumball-specific monster information, look at [[Lost Temple/Specific]]. |
||
| + | |||
| + | ===Special Enemies=== |
||
| + | {{Template:Monster General C |
||
| + | |number of rows=4 |
||
| + | |||
| + | |name1=Rock Golem |
||
| + | |class1=Elemental |
||
| + | |image1=[[File:岩石傀儡.png|thumb|left|x80px]] |
||
| + | |skills1='''Throwing''': Launches and attack once every 2 rounds |
||
| + | <br> '''???''': Invulnerable |
||
| + | |other1=Summoned by Boss when Fury is full |
||
| + | |||
| ⚫ | |||
| + | |class2=Elemental |
||
| + | |image2=[[File:土元素.png|thumb|left|x80px]] |
||
| + | |skills2='''Elemental Creature (Earth)''': Immune to earth spell |
||
| + | '''Guardian''': Resist damage for party members of other type |
||
| + | <br />'''Spiked Shell''': Reflect 30% of damage taken back to the attacker. |
||
| + | |other2=Drops [[Lord of Earth Elemental's Heart]] |
||
| ⚫ | |||
| ⚫ | |||
| + | |||
| + | |name3=Lord of Water Elemental |
||
| + | |class3=Elemental |
||
| + | |image3=[[File:水元素.png|thumb|left|x80px]] |
||
| + | |skills3='''Elemental Creature (Water)''': Immune to Water spells |
||
'''Tranquil Rain''': Increase the HP of ally every 2 rounds |
'''Tranquil Rain''': Increase the HP of ally every 2 rounds |
||
| + | |other3=Drops [[Lord of Water Elemental's Heart]] |
||
| − | | {{cost|1|Water Crystal}} |
||
| + | Found in the <b>Altar Ruins</b> once per run, exclusive with other Lords. |
||
| − | | {{cost|3|Water Crystal}} |
||
| + | <br>Better stats and bigger picture than the matching elemental |
||
| − | |- |
||
| + | |||
| ⚫ | |||
| + | |name4=Lord of Fire Elemental |
||
| ⚫ | |||
| + | |class4=Elemental |
||
| ⚫ | |||
| + | |image4=[[File:火元素.png|thumb|left|x80px]] |
||
| ⚫ | |||
| + | |skills4='''Elemental Creature (Fire)''': Immune to Fire spell |
||
| ⚫ | |||
| + | '''Burning''': Counter attacks inflicts ''Burning'' effect (lose HP each round, lasts 3 round) |
||
| − | | {{cost|3|Fire Crystal}} |
||
| + | |other4=Drops [[Lord of Fire Elemental's Heart]] |
||
| − | |- |
||
| + | Found in the <b>Altar Ruins</b> once per run, exclusive with other Lords. |
||
| ⚫ | |||
| + | <br>Better stats and bigger picture than the matching elemental |
||
| ⚫ | |||
| + | |||
| ⚫ | |||
| + | |name5=Lord of Air Elemental |
||
| + | |class5=Elemental |
||
| + | |image5=[[File:气元素.png|thumb|left|x80px]] |
||
| + | |skills5='''Elemental Creature (Air)''': Immune to air spells |
||
'''Dodge''': Possess high dodge (25%) |
'''Dodge''': Possess high dodge (25%) |
||
| + | |other5=Drops [[Lord of Air Elemental's Heart]] |
||
| ⚫ | |||
| + | Found in the <b>Altar Ruins</b> once per run, exclusive with other Lords. |
||
| − | | {{cost|3|Air Crystal}} |
||
| + | <br>Better stats and bigger picture than the matching elemental |
||
| − | |- |
||
| + | }} |
||
| ⚫ | |||
| + | |||
| ⚫ | |||
| ⚫ | |||
| − | | EP |
||
| − | | [[Quenching Essence]] |
||
| − | |- |
||
| ⚫ | |||
| ⚫ | |||
| ⚫ | |||
| − | Same skills as the corresponding Elemental. |
||
| ⚫ | |||
| − | |Lord of [[Lord of Earth Elemental's Heart|Earth]]/[[Lord of Fire Elemental's Heart|Fire]]/[[Lord of Air Elemental's Heart|Air]]/[[Lord of Water Elemental's Heart|Water]] Elemental's Heart |
||
| − | | |
||
| − | |- |
||
| ⚫ | |||
| ⚫ | |||
| ⚫ | |||
| − | | [[Crystal Skull]] |
||
| − | |Lord of [[Lord of Earth Elemental's Heart|Earth]]/[[Lord of Fire Elemental's Heart|Fire]]/[[Lord of Air Elemental's Heart|Air]]/[[Lord of Water Elemental's Heart|Water]] Elemental's Heart |
||
| ⚫ | |||
===Boss (Stone Colossus)=== |
===Boss (Stone Colossus)=== |
||
[[File:石巨像.png|thumb|200px]] |
[[File:石巨像.png|thumb|200px]] |
||
{| class="article-table" |
{| class="article-table" |
||
| + | |+Stone Colossus |
||
| + | |+''Elemental'' |
||
| ⚫ | |||
!Floor |
!Floor |
||
!Attack |
!Attack |
||
!HP |
!HP |
||
| − | !Physical |
+ | !Physical<br />Resistance |
| + | !Spell<br />Resistance |
||
| − | Resistance (X) |
||
| − | !Spell |
||
| − | Resistance (Y) |
||
|- |
|- |
||
|30 |
|30 |
||
| Line 122: | Line 176: | ||
|9510 |
|9510 |
||
|40% |
|40% |
||
| − | | |
+ | |20% |
|- |
|- |
||
|90 |
|90 |
||
| Line 137: | Line 191: | ||
|} |
|} |
||
'''Skills:''' |
'''Skills:''' |
||
| − | |||
*'''Statue's Fury: '''Cast once every 3 rounds (Summon Rock Golem when Anger is full. Otherwise, cause 300% damage to Gumball) |
*'''Statue's Fury: '''Cast once every 3 rounds (Summon Rock Golem when Anger is full. Otherwise, cause 300% damage to Gumball) |
||
| − | |||
*'''Demonized Armor: '''Physical Resistance +X%, Spell Resistance + Y%. Increase Fury when Suffering Spell Damage |
*'''Demonized Armor: '''Physical Resistance +X%, Spell Resistance + Y%. Increase Fury when Suffering Spell Damage |
||
| Line 145: | Line 197: | ||
| − | + | <u>Piles of Rubble in Boss Room</u> |
|
| + | |||
| − | There are 6 piles of rubble in the boss room, which are used by the boss to summon an invulnerable Rock Golem when the boss' Fury is full. |
+ | There are 6 piles of rubble in the boss room, which are used by the boss to summon an invulnerable '''Rock Golem''' when the boss' Fury is full. |
Upon defeating the boss, the bottom left pile of rubble can be tapped. Keep tapping and you will destroy the rubble, netting you some extra boss rewards of EP, elemental crystals, ores and Elemental Runes. There are 4 Elemental Runes:[[Fire Elemental Rune|Fire]], [[Earth Elemental Rune|Earth]], [[Water Elemental Rune|Water]] and [[Air Elemental Rune|Air]]. These runes are obtainable one per boss floor, once per run and allows the Elemental Altar to attack two enemies when the corresponding type of elemental crystal is inserted. |
Upon defeating the boss, the bottom left pile of rubble can be tapped. Keep tapping and you will destroy the rubble, netting you some extra boss rewards of EP, elemental crystals, ores and Elemental Runes. There are 4 Elemental Runes:[[Fire Elemental Rune|Fire]], [[Earth Elemental Rune|Earth]], [[Water Elemental Rune|Water]] and [[Air Elemental Rune|Air]]. These runes are obtainable one per boss floor, once per run and allows the Elemental Altar to attack two enemies when the corresponding type of elemental crystal is inserted. |
||
| − | == |
+ | ==Maze Occurrences== |
=== Elemental Altars === |
=== Elemental Altars === |
||
[[File:Elemental Altar.png|thumb|right|80px]] |
[[File:Elemental Altar.png|thumb|right|80px]] |
||
| − | Altars appear |
+ | Altars appear adjacent or diagonal to the entry point on every non-special floor (Even though, after doing [[S/L 30|S/L]] it may appear far away from the entry). You can insert 3 crystals to get an effect. |
| − | The first 2 inserted crystals will also damage a random enemy |
+ | The first 2 inserted crystals will also deal magic damage to a random enemy, the damage is affected by power. Be aware however that if the random target enemy is an elemental matching the crystal inserted, it will be immune to that damage. |
====Altar Results Table==== |
====Altar Results Table==== |
||
| Line 428: | Line 481: | ||
*As shown above, it is possible to get a full [[Apprentice Suit]] and a full [[Knight's Suit]] using the altar. |
*As shown above, it is possible to get a full [[Apprentice Suit]] and a full [[Knight's Suit]] using the altar. |
||
| + | *Elementals summoned 100% drops two crystals of the corresponding element, and as doing so cost one of each other crystal, this works like a 3 for 2 exange |
||
====Workshop==== |
====Workshop==== |
||
| Line 452: | Line 506: | ||
{{Clr}} |
{{Clr}} |
||
====Unique Elemental Altar==== |
====Unique Elemental Altar==== |
||
| − | These come in 4 variants: Water, Air, Fire, Earth: |
+ | They appear instead of the common altar. In the same floor it also appears a mine wich gives you 2 crystals of the same element of the altar.These come in 4 variants: Water, Air, Fire, Earth: |
| − | *Use three of the matching element crystals to unlock a portal |
+ | *Use three of the matching element crystals to unlock a portal (Each crystal of another element will be destroyed and do nothing) |
*Once unlocked, the altar transforms into '''Altar Ruins''' that you can enter. |
*Once unlocked, the altar transforms into '''Altar Ruins''' that you can enter. |
||
*Fight a giant elemental to get it's [[Elemental Heart]], some crystals, some spells and three items from the matching elemental set |
*Fight a giant elemental to get it's [[Elemental Heart]], some crystals, some spells and three items from the matching elemental set |
||
*Only one appears each run, totally at random |
*Only one appears each run, totally at random |
||
| − | *You can use [[S/L 30]] if you need a different one for DP quests |
+ | *You can use [[S/L 30]] if you need a different one for DP quests |
| + | *Unlike the common altar, it damages a random enemy each time a correct crystal is insterted (even the third one) |
||
{| |
{| |
||
|[[File:Earth Altar.png|thumb|80px]] |
|[[File:Earth Altar.png|thumb|80px]] |
||
| Line 464: | Line 519: | ||
Tip: Don't miss it as these altars are necessary for what are probably the most annoying DP quests of this Maze. |
Tip: Don't miss it as these altars are necessary for what are probably the most annoying DP quests of this Maze. |
||
| + | |||
| + | Tip 2: You should always enter here even if (for some reason) you dont want the Heart and the items because you can just take the crystals form the mines (you get around 6, more than the 3 you nedded) without killing the giant elemental and get out. |
||
{{Clr}} |
{{Clr}} |
||
| Line 475: | Line 532: | ||
====Covert Cave==== |
====Covert Cave==== |
||
[[File:Cave_Vines.png|thumb|right|80px]] |
[[File:Cave_Vines.png|thumb|right|80px]] |
||
| − | Upon entering the cave, you will see 4 crystals in 2 columns and 1 Crystal Pillar in the center. This is a lamp puzzle whereby you have to light up all crystals to destroy the Crystal Pillar. When you tap one crystal, you turn on/off all of the lamps in the same column and the same row |
+ | Upon entering the cave, you will see 4 crystals in 2 columns and 1 Crystal Pillar in the center. This is a lamp puzzle whereby you have to light up all crystals to destroy the Crystal Pillar. When you tap one crystal, you turn on/off all of the lamps in the same column and the same row. |
| + | |||
| + | '''Solution to puzzle''': Tap the third crystal on the left column and the second crystal of the right column in any order. All crystals will be lit in these two taps. |
||
| + | |||
| + | When all crystals are lit, you can destroy the Crystal Pillar, which will also destroy all the crystals. The crystals would end up dropping a mix of Elemental Crystals, EP, Scrolls and 1 Elemental Book (6 star treasure). The Crystal Pillar will give {{Cost|3|gem}} (Probably limited). |
||
===Corpses=== |
===Corpses=== |
||
Revision as of 17:31, 2 June 2020
| Lost Temple | |
|---|---|

| |
| Type | Maze |
| Source/Unlock | Unlock with at least 10 dp after clearing Hero's Village |
| Normal reward | Mage & Predator gumball |
| Raid boost | Totem Warlock |
| Raid reward | Crystal, Soul Crystal +8 |
| Gumball Specific | Gumball specific infos |
Complete this maze to get the Mage Gumball.
Hidden Gumball

To get the Predator gumball
- Find the Alien Helmet from Strange Remains. (You may have to S/L 30 if you get the Predator Gene instead)
- After 50F, Predator Gumball will appear on a random non-boss floor. If you are not wearing the Alien Helmet, he will appear in grayscale and cannot be interacted with.
- Wear the Helmet and pay him 500,000
 to recruit.
- To obtain his fragments, repeat the above, except that you do not need to pay coins. You can use the Alien Helmet from having Predator as main, or from the Strange Remains.
Stages
Soul Within the Relic - 15 floors (Difficulty 6) - 1 ![]()
- You get Soul gem to unlock Soul-link (first one) on Alchemy Workshop for 3000 coins
- Strange Remains (Predator) always appear on floor 2
Forward! The Pilgrim's Way! - 20 floors (Difficulty 7) - 1 ![]()
- You get the formula for the Holy Water potion
- An specific elemental altar appears
- You unlock to create rank 2 ores on the Alchemy Workshop
Meteor! Guidance of the Sage! - 25 floors (Difficulty ) - 1 ![]()
- Main reward its Mage gumball
- You get formula for Sage's Potion
- You get World tree branch to promote gumballs to rank 3
Enemies
Usual Enemies
| Enemy | Skill | Other info |
|---|---|---|
| Earth Elemental
Elemental 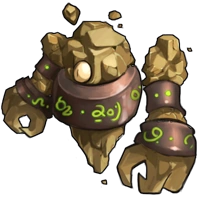  |
Elemental Creature (Earth): Immune to earth spell
Guardian: Resist damage for party members of other type
|
May drop 1 |
| Water Elemental
Elemental   |
Elemental Creature (Water): Immune to Water spells
Tranquil Rain: Increase the HP of all allies every 2 rounds |
May drop 1 |
| Fire Elemental
Elemental   |
Elemental Creature (Fire): Immune to Fire spell
Burning: Counter attacks inflicts Burning effect (lose HP each round, lasts 3 round) |
May drop 1 |
| Air Elemental
Elemental 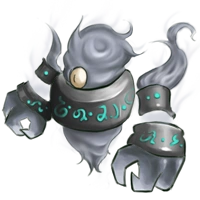  |
Elemental Creature (Air): Immune to air spells
Dodge: Possess high dodge (25%) |
May drop 1 |
| Rock Golem
Elemental   |
Throwing: Launches and attack once every 2 rounds |
To see more title or gumball-specific monster information, look at Lost Temple/Specific.
Special Enemies
| Enemy | Skill | Other info |
|---|---|---|
| Rock Golem
Elemental |
Throwing: Launches and attack once every 2 rounds
|
Summoned by Boss when Fury is full |
| Lord of Earth Elemental
Elemental |
Elemental Creature (Earth): Immune to earth spell
Guardian: Resist damage for party members of other type
|
Drops Lord of Earth Elemental's Heart
Found in the Altar Ruins once per run, exclusive with other Lords.
|
| Lord of Water Elemental
Elemental |
Elemental Creature (Water): Immune to Water spells
Tranquil Rain: Increase the HP of ally every 2 rounds |
Drops Lord of Water Elemental's Heart
Found in the Altar Ruins once per run, exclusive with other Lords.
|
| Lord of Fire Elemental
Elemental |
Elemental Creature (Fire): Immune to Fire spell
Burning: Counter attacks inflicts Burning effect (lose HP each round, lasts 3 round) |
Drops Lord of Fire Elemental's Heart
Found in the Altar Ruins once per run, exclusive with other Lords.
|
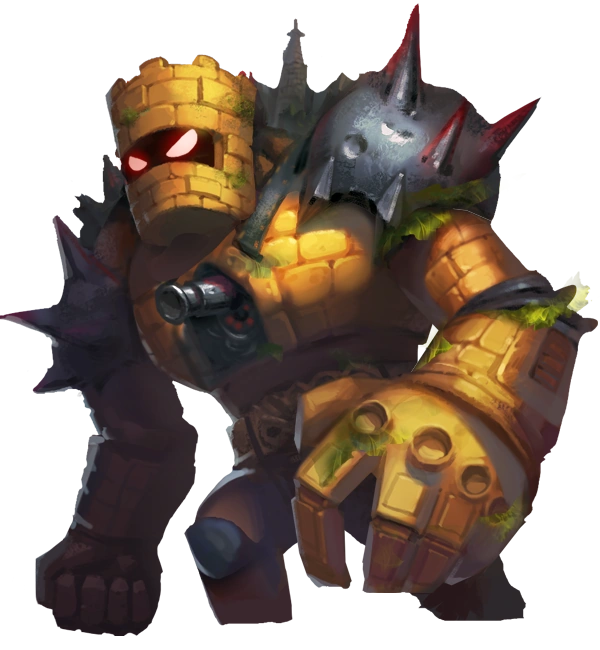
Boss (Stone Colossus)

| Floor | Attack | HP | Physical Resistance |
Spell Resistance |
|---|---|---|---|---|
| 30 | 20 | 382 | 30% | 10% |
| 40 | 36 | 771 | 30% | 10% |
| 50 | 62 | 1501 | 30% | 10% |
| 60 | 109 | 2825 | 40% | 20% |
| 70 | 177 | 5228 | 40% | 20% |
| 80 | 240 | 9510 | 40% | 20% |
| 90 | 540 | 17132 | 50% | 30% |
| 100 | 913 | 29010 | 50% | 30% |
Skills:
- Statue's Fury: Cast once every 3 rounds (Summon Rock Golem when Anger is full. Otherwise, cause 300% damage to Gumball)
- Demonized Armor: Physical Resistance +X%, Spell Resistance + Y%. Increase Fury when Suffering Spell Damage
Note: Fury is generated on PER HIT of spells, not on PER CAST. This means for spells like Meteor Shower EACH hit will generate fury. Some other things will also generate fury like the automatic arrow shot from Great Elf King or active skills like Batto-Jutsu.
Piles of Rubble in Boss Room
There are 6 piles of rubble in the boss room, which are used by the boss to summon an invulnerable Rock Golem when the boss' Fury is full.
Upon defeating the boss, the bottom left pile of rubble can be tapped. Keep tapping and you will destroy the rubble, netting you some extra boss rewards of EP, elemental crystals, ores and Elemental Runes. There are 4 Elemental Runes:Fire, Earth, Water and Air. These runes are obtainable one per boss floor, once per run and allows the Elemental Altar to attack two enemies when the corresponding type of elemental crystal is inserted.
Maze Occurrences
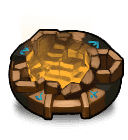
Elemental Altars


Altars appear adjacent or diagonal to the entry point on every non-special floor (Even though, after doing S/L it may appear far away from the entry). You can insert 3 crystals to get an effect. The first 2 inserted crystals will also deal magic damage to a random enemy, the damage is affected by power. Be aware however that if the random target enemy is an elemental matching the crystal inserted, it will be immune to that damage.
Altar Results Table
Legend: Fire=RED=R Earth=ORANGE=O Water=BLUE=B Air=GREEN=G
| Combination | Result | Type |
|---|---|---|
| OOO( |
MP +15 | Enhancement |
| BBB( |
HP +15 | Enhancement |
| RRR( |
Attack +1 | Enhancement |
| GGG( |
Power +1 | Enhancement |
| OOB( |
Receive Knight's Helmet | Treasure |
| BBR( |
Cast Recovering | Spell |
| RRG( |
Cast Blade of Ruin | Spell |
| GGO( |
Receive Lightning Boots | Treasure |
| OOR( |
Receive Apprentice's Amulet | Treasure |
| BBG( |
Receive Water Spirit's Cape | Treasure |
| RRO( |
Cast Armageddon | Spell |
| GGB( |
Receive 3 Star Mints | Item |
| OOG( |
Receive Granite Gloves | Treasure |
| BBO( |
Cast Aurora Barrier | Spell |
| RRB( |
Cast Implosion | Spell |
| GGR( |
Receive 5 Vanilla Flour | Item |
| OBO( |
Summon Workshop | Shop |
| BRB( |
Summon Fountain | Misc |
| RGR( |
Receive 3 Fantasy Fruits | Item |
| GOG( |
Receive 100 EP | Enhancement |
| ORO( |
Receive 5 Magic Irons | Item |
| BGB( |
Receive 3 Fairy Spring | Item |
| ROR( |
Receive Apprentice's Ring | Treasure |
| GBG( |
Summon Scroll Shop | Shop |
| OGO( |
Receive 5 Lizard's Spawn | Item |
| BOB( |
Receive Knight's Armor | Treasure |
| RBR( |
Summon Treasure Shop | Shop |
| GRG( |
Cast Fist of Heaven | Spell |
| OBB( |
Cast Feature Erasing | Spell |
| BRR( |
Cast Recovering | Spell |
| RGG( |
Receive 5 Cream Berry | Item |
| GOO( |
Receive 1000 |
Item |
| ORR( |
Receive 3 Dark Steels | Item |
| BGG( |
Receive 5 Magic Bean Pods | Item |
| ROO( |
Cast Armageddon | Spell |
| GBB( |
Cast Timestill | Spell |
| OGG( |
Cast Gravity | Spell |
| BOO( |
Cast Aurora Barrier | Spell |
| RBB( |
Cast Feature Erasing | Spell |
| GRR( |
Cast Chain Lightning | Spell |
| OBR( |
Cast Super Earthquake | Spell |
| BRG( |
Receive 3 Soul Crystals | Item |
| RGO( |
Receive 1000 |
Item |
| GOB( |
Receive Knight's Belt | Treasure |
| ORB( |
Cast Implosion | Spell |
| BGO( |
Cast Hex | Spell |
| RBG( |
Receive Fire Warlock's Necklace | Treasure |
| GOR( |
Receive Apprentice's Boots | Treasure |
| OGB( |
Receive 3 Blue Crystal Gel | Item |
| BRO( |
Receive 5 Crystals | Item |
| ROG( |
Cast Blade of Ruin | Spell |
| GBR( |
Cast Chain Lightning | Spell |
| OGR( |
Cast Super Earthquake | Spell |
| BOG( |
Cast Fist of Heaven | Spell |
| RBO( |
Summon Air Elemental | Enemy |
| GRB( |
Cast Timestill | Spell |
| OBG( |
Cast Gravity | Spell |
| BGR( |
Summon Earth Elemental | Enemy |
| ROB( |
Receive Knight's Gloves | Treasure |
| GRO( |
Cast Hex | Spell |
| ORG( |
Summon Water Elemental | Enemy |
| BOR( |
Receive Apprentice's Cape | Treasure |
| RGB( |
Receive 100 EP | Enhancement |
| GBO( |
Summon Fire Elemental | Enemy |
- As shown above, it is possible to get a full Apprentice Suit and a full Knight's Suit using the altar.
- Elementals summoned 100% drops two crystals of the corresponding element, and as doing so cost one of each other crystal, this works like a 3 for 2 exange
Workshop


Generated by the Altar (![]()
![]()
![]() ), this building lets you can upgrade equipment. Each workshop lets you upgrade one item of your choice from any of the Melee or Magic Suits (Knight's Suit, Apprentice Suit...). The upgrade costs some EP based on the rank of the upgraded item. The result is the corresponding item from the next suit higher up the chain.
), this building lets you can upgrade equipment. Each workshop lets you upgrade one item of your choice from any of the Melee or Magic Suits (Knight's Suit, Apprentice Suit...). The upgrade costs some EP based on the rank of the upgraded item. The result is the corresponding item from the next suit higher up the chain.
Fountain of Fortune
Generated by the altar, this building lets you spend 100 EP to upgrade a random attribute
Other Encounters
Elemental Caves
|
They come in 4 versions: Fire, Water, Air , Earth.
|
  Water Cave |
  Water Mine |
Unique Elemental Altar
They appear instead of the common altar. In the same floor it also appears a mine wich gives you 2 crystals of the same element of the altar.These come in 4 variants: Water, Air, Fire, Earth:
- Use three of the matching element crystals to unlock a portal (Each crystal of another element will be destroyed and do nothing)
- Once unlocked, the altar transforms into Altar Ruins that you can enter.
- Fight a giant elemental to get it's Elemental Heart, some crystals, some spells and three items from the matching elemental set
- Only one appears each run, totally at random
- You can use S/L 30 if you need a different one for DP quests
- Unlike the common altar, it damages a random enemy each time a correct crystal is insterted (even the third one)
  |
  |
Tip: Don't miss it as these altars are necessary for what are probably the most annoying DP quests of this Maze.
Tip 2: You should always enter here even if (for some reason) you dont want the Heart and the items because you can just take the crystals form the mines (you get around 6, more than the 3 you nedded) without killing the giant elemental and get out.
Statue of Aioria (looks like grim reaper)
- Shadowy outline, look carefully
- Must wear Alien Helmet to interact
- (1st attempt) Teleports to a floor with 25 gems and crafting materials (300 soul, 100 arcane, 30 holy crystals).
- Floor 51+ (Found on floor 52 and 63)
Covert Cave


Upon entering the cave, you will see 4 crystals in 2 columns and 1 Crystal Pillar in the center. This is a lamp puzzle whereby you have to light up all crystals to destroy the Crystal Pillar. When you tap one crystal, you turn on/off all of the lamps in the same column and the same row.
Solution to puzzle: Tap the third crystal on the left column and the second crystal of the right column in any order. All crystals will be lit in these two taps.
When all crystals are lit, you can destroy the Crystal Pillar, which will also destroy all the crystals. The crystals would end up dropping a mix of Elemental Crystals, EP, Scrolls and 1 Elemental Book (6 star treasure). The Crystal Pillar will give 3 ![]() (Probably limited).
(Probably limited).
Corpses
| Corpse | Regular Loot | Farplane Ranger loot |
|---|---|---|
Adventurer's Remains
(on F1)  |
Jones' Diary and a Crystal Skull | Jone's Soul: Receive 1 Elemental crystal each floor |
Strange Remains (Predator) (1x, before F30) |
Alien Helmet | Predator's Soul: Hunting Ceremony Status (causes extra 300% damage when attacking a Boss. Lasts 1 floor) |
| Predator Gene | ||
Bear Grylls's Corpse (1x)
 |
Ragged Recipe | Bear Grylls's Soul: Immune to all abnormal condition |
Pilgrim's Remains (Multiple)  |
Spells, Pieces of Mage's Suit or Elemental crystals | Complete Pilgrim's Soul: Attack+1 Power+1 or Broken Pilgrim's Soul: Recover 20 HP and MP |
Strange Remains (Alien) (1x) |
Alien Spawn | Alien's Soul: Cause extra 10% damage when attacking elemental |
Woman's Remains (1x) |
Desert Eagle | Laura's Soul: Desert Eagle power enhanced |
Out-of-Maze Loot
Get these items in the maze and use them outside:
- Dragon's Rib (boss loot)
- Fragments for Cloak of Holy Rune Master, Amulet of Light Arbiter, Armor of Light Bishop
- Elf's Dust, Evil Pumpkin, Crystal Egg
- Gumball Pot as boss loot
- Star Mint (high chance), Fairy Spring, Blue Crystal Gel
- With the Altar: Coins, Rank1 and Rank2 Ingredients
- 5
 once with God of Thieves and a Mechanical gumball as main.
 - And all the usual (Fruit of World Tree, main and hidden Gumball fragments, coins, whatever you can get with your Compass, whatever you can get from your gumballs exclusive skills, Rare Enemies and Divine Dragon Wishes ...)
For raid results, see Bandit's Raid#Result Table
Title specific loots
For items available here through the God of Thieves title, see here.
Tips
- Damage from crystals used at the altar is based on power stat
- Beams from placing crystals count as a spell of their element, and will be buffed by associated talents. For example, water beams from blue crystals will be boosted if Poseidon is in the current party.
- Soul Reaper's Talent will not work since Elementals are not alive enemies.
- The Fountain is also considered a "Building" for purposes of the DP quest
- It is possible to obtain high level armor by summoning low level armor and the workshop. (I obtained a full suit of Oracle armor at floor 28)
- Once the boss is defeated you can usually click one of the remaining rocks around him multiple times (ca. 20x) and thus shatter it in order to receive an elemental rune (buffs altar permanently) and some other minor rewards
Quests/DP
| Description | DP | Notes | |
|---|---|---|---|
| S | Get Ragged Recipe x3 | 2 | Found by searching Bear Gryll's corpse (once per run) |
| S | Get Alien Helmet x3 | 3 | Found by searching predator's corpse (50/50 chance, once per run) |
| S | Get Predator Gene x3 | 2 | Found by searching predator's corpse (50/50 chance, once per run)
Can also be found in a cave with God of Thieves title. |
| S | Get Alien Spawn x3 | 2 | Found by searching alien's corpse (once per run) |
| S | Get Lord of Earth Elemental's Heart x2 | 2 | Use Bandit or Kaito to steal from the boss or wait for the special altar and use three of the same element crystals. You can use the S/L 30 method to push the altar further into the maze and change the element.
Note: Steals are also possible with Future Cat and Bloody Wolf but you are unlikely to wait to get them before completing this maze DP quests and their steals are less reliable anyway. |
| S | Get Lord of Fire Elemental's Heart x2 | 2 | "" |
| S | Get Lord of Water Elemental's Heart x2 | 2 | "" |
| S | Get Lord of Air Elemental's Heart x2 | 2 | "" |
| S | Kill enemy with Desert Eagle x20 | 2 | Get if by searching Lara Croft's corpse (once per run) |
| G | Kill Earth Elemental x60 | 1 | |
| G | Kill Water Elemental x60 | 1 | |
| G | Kill Fire Elemental x60 | 1 | |
| G | Kill Air Elemental x60 | 1 | |
| G | Kill Rock Golem x30 | 1 | |
| G | First Boss Kill | 3 | |
| G | Kill Boss x3 | 3 | |
| G | Clear Earth Elemental Cave x3 | 1 | |
| G | Clear Water Elemental Cave x3 | 1 | |
| G | Clear Fire Elemental Cave x3 | 1 | |
| G | Clear Air Elemental Cave x3 | 1 | |
| S | Reach floor 40 | 1 | |
| S | Reach floor 50 | 2 | |
| S | Reach floor 60 | 3 | |
| G | Search Pilgrim's Remains x10 | 2 | |
| G | Use Holy Alter to kill enemy x150 | 3 | |
| G | Place Water Crystal x80 | 2 | |
| G | Place Earth Crystal x80 | 2 | |
| G | Place Fire Crystal x80 | 2 | |
| G | Place Air Crystal x80 | 2 | |
| G | Summon Elemental with Altar x20 | 2 | |
| G | Get Ingredients with Altar x20 | 2 | |
| G | Get Equipment with Altar x20 | 1 | |
| G | Summon Building with Altar x20 | 2 | |
| G | Enhance Attribute with Altar x40 | 2 | |
| G | Cast Spell with Altar x20 | 2 | |
| G | Get Coins with Altar x10 | 2 | |
| G | Get EP with Altar x20 | 2 | |
| G | Activate all Diary records | 3 | |
| G | Disenchant Equipment x20 | 2 | |
| G | Basic Power reaches 20 | 2 | |
| G | Get Hidden Gumball | 5 | See hidden gumball section |
External Links
- Video Walkthrough (Abyss)
- Video Walkthrough (new)(Canas)
- Video Walkthrough (speedrun) (Aoluwei)