| (38 intermediate revisions by 3 users not shown) | |||
| Line 6: | Line 6: | ||
|raidgumball=[[Kusanagi Warrior]] |
|raidgumball=[[Kusanagi Warrior]] |
||
|raidspecial=Gumball Pots +1 |
|raidspecial=Gumball Pots +1 |
||
| + | |specific=y |
||
}} |
}} |
||
| − | "There is a huge island on the southern end of the mainland. People live here without much competition. Nowadays, a group of evil spirits break the tranquility of the island..." |
+ | ''"There is a huge island on the southern end of the mainland. People live here without much competition. Nowadays, a group of evil spirits break the tranquility of the island..."'' |
| + | Spend {{Cost|50|gem}} to unlock Cloud Island maze. Obtain {{Cost|150|Fruit of World Tree}} upon purchase (Clear [[Saint's Tower]] to unlock). |
||
| − | Complete the Story Mode to get [[Momotaro]] Gumball |
||
| + | Complete the Story Mode to get [[Momotaro]] Gumball |
||
| − | ==Access== |
||
| − | *Introduced in update version 2.6.2 |
||
| − | *Requirement: Clear [[Saint's Tower]] |
||
| − | *Costs {{Cost|50|gem}} to unlock |
||
| − | *After purchase, get {{Cost|150|Fruit of World Tree}} |
||
==Hidden Gumball== |
==Hidden Gumball== |
||
[[File:Orochi.png|thumb|]] |
[[File:Orochi.png|thumb|]] |
||
| − | + | To get [[Orochi]]: |
|
| − | *Buy every single [[Sake]] from Rooftop Shop you encounter, you will need 8 Sakes |
+ | *Buy every single [[Sake]] from Rooftop Shop you encounter, you will need 8 Sakes in total. |
*Offer a Sake to the Vasuki statue on every floor ending with a 9 when it appears. You need to do it 8 times. |
*Offer a Sake to the Vasuki statue on every floor ending with a 9 when it appears. You need to do it 8 times. |
||
*You can skip giving Sake to the statue without messing up getting [[Orochi]]. |
*You can skip giving Sake to the statue without messing up getting [[Orochi]]. |
||
| Line 27: | Line 24: | ||
*Vasuki statue will appear until you offer alcohol to it 8 times per run (Portal of Earth can be used to revisit the statues on previous floors). |
*Vasuki statue will appear until you offer alcohol to it 8 times per run (Portal of Earth can be used to revisit the statues on previous floors). |
||
*Repeat the same process to get 20 Orochi fragments in maze runs. |
*Repeat the same process to get 20 Orochi fragments in maze runs. |
||
| + | |||
== Story Quests == |
== Story Quests == |
||
| + | '''The birth from Peach''' Floors 30 (Difficulty 34) - 2 Vigors |
||
| − | |||
| − | |||
| − | <u>'''The birth from Peach'''</u> |
||
| − | <br />Floors 30 (Difficulty 34) - 2 Vigors |
||
<br />Rewards : |
<br />Rewards : |
||
* In maze: one [[Artisan]], formula for [[Peach Juice]], some [[Momotaro]] fragments (up to 10) |
* In maze: one [[Artisan]], formula for [[Peach Juice]], some [[Momotaro]] fragments (up to 10) |
||
* Post completion ''Maze Reward'': 1 {{Gem}} |
* Post completion ''Maze Reward'': 1 {{Gem}} |
||
| − | + | '''Let's go! Momotaro!''' Floors 35 (Difficulty 35) - 2 Vigors |
|
| − | <br />Floors 35 (Difficulty 35) - 2 Vigors |
||
<br />Rewards : |
<br />Rewards : |
||
* In maze: one [[Artisan]], formula for [[Weiss Potion]], some [[Momotaro]] fragments (up to 10) |
* In maze: one [[Artisan]], formula for [[Weiss Potion]], some [[Momotaro]] fragments (up to 10) |
||
* Post completion ''Maze Reward'': 1 {{Gem}} |
* Post completion ''Maze Reward'': 1 {{Gem}} |
||
| − | + | '''Devil's Orgy''' Floors 35 (Difficulty 36) - 2 Vigors |
|
| − | <br />Floors 35 (Difficulty 36) - 2 Vigors |
||
* In maze: one [[Artisan]], formula for [[Chimpanzee Potion]], some [[Momotaro]] fragments (up to 10) |
* In maze: one [[Artisan]], formula for [[Chimpanzee Potion]], some [[Momotaro]] fragments (up to 10) |
||
* Post completion ''Maze Reward'': 1 {{Gem}} |
* Post completion ''Maze Reward'': 1 {{Gem}} |
||
| + | '''Decisive battle! Evil Spirit King!''' Floors 40 (Difficulty 37) - 2 Vigors - Boss fight on last floor |
||
| − | |||
| − | <u>'''Decisive battle! Evil Spirit King!'''</u> |
||
| − | <br />Floors 40 (Difficulty 37) - 2 Vigors - Boss fight on last floor |
||
* In maze: formula for [[Pheasant Potion]], some [[Momotaro]] fragments, [[Momotaro]] |
* In maze: formula for [[Pheasant Potion]], some [[Momotaro]] fragments, [[Momotaro]] |
||
* Post completion ''Maze Reward'': 1 {{Gem}}, 3 Vigor |
* Post completion ''Maze Reward'': 1 {{Gem}}, 3 Vigor |
||
| − | + | '''Endless Mode''' - 3 Vigors |
|
| − | ==Quests / DP== |
||
| − | |||
| − | {| border="0" cellpadding="1" cellspacing="1" class="mw-collapsible mw-collapsed article-table" style="width: 100%;" |
||
| − | |- |
||
| − | ! scope="col" width="25px"| |
||
| − | ! scope="col" width="35%"|Description |
||
| − | ! scope="col" width="25px"|DP |
||
| − | ! scope="col"|Notes |
||
| − | |- |
||
| − | |S |
||
| − | |Get Kunai (named [[Suffering]]) x3 |
||
| − | |2 |
||
| − | |From Ninja's Corpse |
||
| − | |- |
||
| − | |S |
||
| − | |Get [[Elixir]] x3 |
||
| − | |2 |
||
| − | |From Bamboo Princess' Corpse |
||
| − | |- |
||
| − | |S |
||
| − | |Get [[Gold Bellyband]] x3 |
||
| − | |2 |
||
| − | |From Kintaro's Corpse |
||
| − | |- |
||
| − | |S |
||
| − | |Get [[Damselfly Spear]] x3 |
||
| − | |2 |
||
| − | |From Samurai's Corpse |
||
| − | |- |
||
| − | |S |
||
| − | |Get [[Peony Lantern]] x3 |
||
| − | |2 |
||
| − | |From New Saburo's Corpse |
||
| − | |- |
||
| − | |S |
||
| − | |Completely collect and equip the [[Momotaro (Suit)|Momotaro Suit]] |
||
| − | |3 |
||
| − | |Select Weiss in Cherry Tree interaction to randomly get Ronin's Corpse appear, it'll give Armor and Boots; Select Pheasant in Cherry Tree interaction to randomly receive the Helm |
||
| − | |- |
||
| − | |S |
||
| − | |Use [[Magical Mallet]] x3 |
||
| − | |2 |
||
| − | |From One Inch Boy's Corpse |
||
| − | |- |
||
| − | |S |
||
| − | |Use [[Charm Envelope]] x3 |
||
| − | |2 |
||
| − | |From Yin Yang Master's Corpse |
||
| − | |- |
||
| − | |G |
||
| − | |Use [[Takoyaki]] x15 |
||
| − | |2 |
||
| − | | |
||
| − | |- |
||
| − | |G |
||
| − | |Use [[Three-color Dumplings]] x15 |
||
| − | |2 |
||
| − | | |
||
| − | |- |
||
| − | |G |
||
| − | |Use [[Sake]] x15 |
||
| − | |2 |
||
| − | | |
||
| − | |- |
||
| − | |G |
||
| − | |Use [[Oden]] x15 |
||
| − | |2 |
||
| − | | |
||
| − | |- |
||
| − | |G |
||
| − | |Use [[Hand-Pulled Noodles]] x15 |
||
| − | |2 |
||
| − | | |
||
| − | |- |
||
| − | |G |
||
| − | |Use [[Taiyaki]] x15 |
||
| − | |2 |
||
| − | | |
||
| − | |- |
||
| − | |G |
||
| − | |Kill Lantern Demon x200 |
||
| − | |1 |
||
| − | | |
||
| − | |- |
||
| − | |G |
||
| − | |Kill Underwater Monster x200 |
||
| − | |1 |
||
| − | | |
||
| − | |- |
||
| − | |G |
||
| − | |Kill Nurikabe (Painted Wall) x200 |
||
| − | |1 |
||
| − | | |
||
| − | |- |
||
| − | |G |
||
| − | |Kill Coprinus x200 |
||
| − | |1 |
||
| − | | |
||
| − | |- |
||
| − | |G |
||
| − | |Kill Bean Monster x200 |
||
| − | |1 |
||
| − | | |
||
| − | |- |
||
| − | |G |
||
| − | |Kill Ittan-momen x200 |
||
| − | |1 |
||
| − | | |
||
| − | |- |
||
| − | |G |
||
| − | |First kill boss |
||
| − | |3 |
||
| − | | |
||
| − | |- |
||
| − | |G |
||
| − | |Kill boss x5 |
||
| − | |3 |
||
| − | | |
||
| − | |- |
||
| − | |G |
||
| − | |Mop up Hunted Cottage x30 |
||
| − | |2 |
||
| − | | |
||
| − | |- |
||
| − | |S |
||
| − | |Reach floor 60 |
||
| − | |2 |
||
| − | | |
||
| − | |- |
||
| − | |S |
||
| − | |Reach floor 70 |
||
| − | |3 |
||
| − | | |
||
| − | |- |
||
| − | |S |
||
| − | |Reach floor 80 |
||
| − | |3 |
||
| − | | |
||
| − | |- |
||
| − | |G |
||
| − | |Rummage Ronin's Corpse x10 |
||
| − | |1 |
||
| − | | |
||
| − | |- |
||
| − | |G |
||
| − | |Purchased goods in Rooftop x100 |
||
| − | |1 |
||
| − | | |
||
| − | |- |
||
| − | |G |
||
| − | |Partner kills the enemy x200 |
||
| − | |3 |
||
| − | | |
||
| − | |- |
||
| − | |G |
||
| − | |Use Target Combo to kill the enemy x30 |
||
| − | |2 |
||
| − | | |
||
| − | |- |
||
| − | |G |
||
| − | |All partners reach level 10 |
||
| − | |2 |
||
| − | | |
||
| − | |- |
||
| − | |G |
||
| − | |All partners reach level 20 |
||
| − | |3 |
||
| − | | |
||
| − | |- |
||
| − | |G |
||
| − | |All partners reach level 30 |
||
| − | |3 |
||
| − | | |
||
| − | |- |
||
| − | |G |
||
| − | |All abilities of Weiss reaches level 10 |
||
| − | |2 |
||
| − | | |
||
| − | |- |
||
| − | |G |
||
| − | |All abilities of Chimpanzee reaches level 10 |
||
| − | |2 |
||
| − | | |
||
| − | |-|-| |
||
| − | |G |
||
| − | |All abilities of Pheasant reaches level 10 |
||
| − | |2 |
||
| − | | |
||
| − | |-| |
||
| − | |G |
||
| − | |Dispatch Weiss to explore maze buildings x20 |
||
| − | |1 |
||
| − | | |
||
| − | |-| |
||
| − | |G |
||
| − | |Dispatch Chimpanzee to explore maze buildings x20 |
||
| − | |1 |
||
| − | | |
||
| − | |-| |
||
| − | |G |
||
| − | |Dispatch Pheasant to explore maze buildings x20 |
||
| − | |1 |
||
| − | | |
||
| − | |- |
||
| − | |G |
||
| − | |Obtain hidden gumball |
||
| − | |5 |
||
| − | |See hidden gumball section |
||
| − | |} |
||
==Enemies== |
==Enemies== |
||
| + | ===Usual Enemies=== |
||
| − | {| class="article-table" width="100%" |
||
| + | {{Template:Monster General |
||
| − | !rowspan="2"|Enemy |
||
| + | |number of rows=7 |
||
| − | !rowspan="2"| |
||
| − | !rowspan="2"|Skill |
||
| − | !colspan="2"|Stealing List (use [[Bandit]], [[Kaito]], or [[Bloody Wolf]]) |
||
| − | |- |
||
| − | !Common item |
||
| − | !Rare item |
||
| − | |- |
||
| − | | Underwater Monster<br />(Beast) |
||
| − | | [[File:um.png|thumb|left|120px]] |
||
| − | |'''Claw''': Chance to counterattack for 200% damage |
||
| + | |name1=Underwater Monster |
||
| + | |class1=Beast |
||
| + | |image1=[[File:um.png|thumb|left|x80px]] |
||
| + | |skills1='''Claw''': Chance to counterattack for 200% damage |
||
'''Vicious''': When Gumball's HP < 50%, Attack is increased by 100% |
'''Vicious''': When Gumball's HP < 50%, Attack is increased by 100% |
||
| − | | [[Winkie Rice Ball]] |
+ | |other1=May drop [[Winkie Rice Ball]] |
| − | | [[Takoyaki]] |
||
| − | |- |
||
| − | | Painted Wall<br />(Undead) |
||
| − | | [[File:pw.png|thumb|left|120px]] |
||
| − | |'''Wall Boundary''': Damage suffered reduced by 30% |
||
| + | |name2=Painted Wall |
||
| + | |class2=Undead |
||
| + | |image2=[[File:pw.png|thumb|left|x80px]] |
||
| + | |skills2='''Wall Boundary''': Damage suffered reduced by 30% |
||
'''Guardian''': Take damages for party members of other type |
'''Guardian''': Take damages for party members of other type |
||
| − | | [[Winkie Rice Ball]] |
+ | |other2=May drop [[Winkie Rice Ball]] |
| − | | [[Three-color Dumplings]] |
||
| − | |- |
||
| − | | Lantern Demon<br />(Elemental) |
||
| − | | [[File:ld.png|thumb|left|120px]] |
||
| − | |'''Self-explosion''': Self-explosion after 4 rounds, deal triple Damage |
||
| + | |name3=Lantern Demon |
||
| − | '''Solitude''': When there is only oneself, Attack increases by 50% |
||
| + | |class3=Elemental |
||
| − | | [[Salt Rice Ball]] |
||
| + | |image3=[[File:ld.png|thumb|left|x80px]] |
||
| − | | [[Meteor Shower]] |
||
| + | |skills3='''Self-explosion''': Self-explosion after 4 rounds, deal triple Damage |
||
| − | |- |
||
| + | '''Solitude''': When by itself, Attack increases by 50% |
||
| − | | Ittan-momen<br />(Undead) |
||
| + | |other3=May drop [[Salt Rice Ball]] |
||
| − | | [[File:ittan.png|thumb|left|120px]] |
||
| − | |'''Constraint''': Bring Suffocation effect while counterattacking (Lose HP each round, the effects can be stacked, lasting for 6 rounds) |
||
| + | |name4=Ittan-momen |
||
| + | |class4=Undead |
||
| + | |image4=[[File:ittan.png|thumb|left|x80px]] |
||
| + | |skills4='''Constraint''': Bring ''Suffocation'' effect while counterattacking (Lose HP each round, the effects can be stacked, lasting for 6 rounds) |
||
'''Recombination''': Revive with full HP once after being killed |
'''Recombination''': Revive with full HP once after being killed |
||
| − | |Salt Rice Ball |
+ | |other4=May drop [[Salt Rice Ball]] |
| − | | 3x [[Salt Rice Ball]] |
||
| − | |- |
||
| − | | Coprinus<br />(Elemental) |
||
| − | | [[File:coprinus.png|thumb|left|120px]] |
||
| − | |'''Misfortune''': Bring Misfortune effect while counterattacking (Decrease Attack by 50%, decrease Accuracy by 30%, lasting 3 rounds) |
||
| + | |name5=Coprinus |
||
| − | '''Dodge''': High Dodge attribute |
||
| + | |class5=Elemental |
||
| − | | [[Salt Rice Ball]] |
||
| + | |image5=[[File:coprinus.png|thumb|left|x80px]] |
||
| − | | [[Sake]] |
||
| + | |skills5='''Misfortune''': Bring ''Misfortune'' effect while counterattacking (Decrease Attack by 50%, decrease Accuracy by 30%, lasting 3 rounds) |
||
| − | |- |
||
| + | '''Dodge''': High Dodge attribute (30%) |
||
| − | | Bean Monster<br />(Undead) |
||
| + | |other5=May drop [[Salt Rice Ball]] |
||
| − | | [[File:bm.png|thumb|left|120px]] |
||
| − | |'''Bean Throw''': Launch a long-range attack every 2 rounds |
||
| + | |name6=Bean Monster |
||
| + | |class6=Undead |
||
| + | |image6=[[File:bm.png|thumb|left|x80px]] |
||
| + | |skills6='''Bean Throw''': Launch a long-range attack every 2 rounds |
||
'''Noise and Excitement''': When damaged, turn over a slate at random |
'''Noise and Excitement''': When damaged, turn over a slate at random |
||
| − | | [[Winkie Rice Ball]] |
+ | |other6=May drop [[Winkie Rice Ball]] |
| − | | 3x [[Winkie Rice Ball]] |
||
| − | |- |
||
| − | | Tamamo-no-mae (Gumball) |
||
| − | | |
||
| − | | |
||
| − | '''Fox Fire:''' Launch an attack every 3 rounds, dealing 1.5 times Damages to the enemy with the Burning effect (lasts 3 rounds) |
||
| + | |name7=Tamamo-no-mae |
||
| + | |class7=Gumball |
||
| + | |image7=[[File:Gumiho.png|thumb|left|x80px]] |
||
| + | |skills7='''Fox Fire:''' Launch an attack every 3 rounds, dealing 1.5 times Damages to the enemy with the ''Burning'' effect (lasts 3 rounds) |
||
'''Nine Lives:''' Resurrect 8 times with full HP upon death |
'''Nine Lives:''' Resurrect 8 times with full HP upon death |
||
| + | <br>'''Obsession:''' After the resurrection, increases Attack |
||
| + | |other7=Drops [[Foxtail]] when you select "Chimpanzee" at Sessho-seki to encounter Tamamo-no-mae. |
||
| + | [[Gumiho]] trial item [[Fox Fur]] will drop if you main Gumiho and select "On your own" at Sessho-seki |
||
| + | |name8=Evil Spirit (Magenta/ Cyan/ Purple/ Red) |
||
| − | '''Obsession:''' After the resurrection, increases Attack |
||
| + | |class8=Undead |
||
| − | | |
||
| + | |image8=[[File:es1.png|thumb|left|x80px]] |
||
| − | | |
||
| + | |skills8=See boss section |
||
| − | |} |
||
| + | |other8=Boss Minion |
||
| + | |name9=Evil Spirit King |
||
| + | |class9=Undead |
||
| + | |image9=[[File:1533819240116.png|thumb|left|x80px]] |
||
| + | |skills9=See boss section |
||
| + | |other9=Boss |
||
| + | }} |
||
| + | To see more title or gumball-specific monster information, look at [[Cloud Island/Specific]]. |
||
| − | ===Boss |
+ | ===Boss (Evil Spirit King)=== |
| + | [[File:1533819240116.png|thumb]] |
||
| − | {| class="article-table" width="100%" |
||
| + | {| class="article-table" |
||
| − | !rowspan="2"|Enemy |
||
| + | |+Evil Spirit King |
||
| − | !rowspan="2"| |
||
| + | |+''Undead'' |
||
| − | !rowspan="2"|Skill |
||
| − | !colspan="2"|Stealing List (use [[Bandit]], [[Kaito]], or [[Bloody Wolf]]) |
||
|- |
|- |
||
| + | !Floor |
||
| − | !Common item |
||
| + | !Attack |
||
| − | !Rare item |
||
| + | !HP |
||
| + | !Physical <br>Resistance |
||
| + | !Spell <br>Resistance |
||
|- |
|- |
||
| + | |30 |
||
| − | | Evil Spirit (Magenta)<br />(Undead) |
||
| + | | 36 |
||
| − | | [[File:es1.png|thumb|left|120px]] |
||
| + | | 566 |
||
| − | |'''Curse Murder''': Launch an attack every 3 rounds, dealing double Damages to the enemy |
||
| + | |10% |
||
| − | | EP+100 |
||
| + | |10% |
||
| − | | EP+100 |
||
|- |
|- |
||
| + | |40 |
||
| − | | Evil Spirit (Cyan)<br />(Undead) |
||
| + | | 59 |
||
| − | | [[File:es2.png|thumb|left|120px]] |
||
| + | | 1123 |
||
| − | |'''Soul Nourishing''': When present, Evil Spirit King recovers HP by 3% each round |
||
| + | |10% |
||
| − | | EP+100 |
||
| + | |10% |
||
| − | | EP+100 |
||
|- |
|- |
||
| + | |50 |
||
| − | | Evil Spirit (Purple)<br />(Undead) |
||
| + | | 98 |
||
| − | | [[File:es3.png|thumb|left|120px]] |
||
| + | | 2,169 |
||
| − | |'''Support''': When present, Evil Spirit King decreases the Damage suffered by 50% |
||
| + | |10% |
||
| − | | EP+100 |
||
| + | |10% |
||
| − | | EP+100 |
||
| + | |- |
||
| + | |60 |
||
| + | | 164 |
||
| + | | 4,065 |
||
| + | |20% |
||
| + | |20% |
||
| + | |- |
||
| + | |70 |
||
| + | | 257 |
||
| + | | 7,509 |
||
| + | |20% |
||
| + | |20% |
||
| + | |- |
||
| + | |80 |
||
| + | | 434 |
||
| + | | 13,644 |
||
| + | |20% |
||
| + | |20% |
||
|- |
|- |
||
| + | |90 |
||
| − | | Evil Spirit (Red)<br />(Undead) |
||
| + | | 778 |
||
| − | | [[File:es4.png|thumb|left|120px]] |
||
| + | | 24,566 |
||
| − | |'''Evil Spirit Possession''': Launch every round and bring the Corrosion effect to the enemy (Lose HP each round, the effects can be superimposed, lasting 5 rounds) |
||
| + | |30% |
||
| − | | EP+100 |
||
| + | |30% |
||
| − | | EP+100 |
||
|- |
|- |
||
| + | |100 |
||
| − | | Haunted Cottage |
||
| + | | 1,312 |
||
| − | | [[File:hc.png|thumb|left|120px]] |
||
| + | | 41,584 |
||
| − | |''"Souls often hover around this haunted hut. Sometimes, there is a cold and restless atmosphere."'' |
||
| + | |30% |
||
| − | |||
| + | |30% |
||
| − | Summons random Evil Spirit every 5 and 6 rounds unless there's no more available empty tile. |
||
| − | | ''n/a'' |
||
| − | | ''n/a'' |
||
|} |
|} |
||
| + | Skills: |
||
| + | *'''Evil Intention Hammer''': Launch an attack every 3 rounds, dealing triple Damages to the enemy and killing the enemy whose HP is lower than 20% |
||
| + | *'''Wildfire Shield''': Lose HP by 30% each round, and cast Wildfire Shield (Lose HP by only 1 when damaged, invalid to Blood Malaria and Poison Malaria). In practice: Casts ''Wildfire Shield'' for each 30% of max HP lost. The shield requires 10 hits to dissipate. |
||
| + | *'''Evil Spirit Enchantment''': Physical Resistance X%, Spell Resistance +Y% |
||
| + | *'''Soul Nourishing''' (From Cyan Evil Spirit): Recover HP by 3% each round |
||
| + | *'''Support''' (From Purple Evil Spirit): Decrease the damage suffered by 50% |
||
| − | + | <u>Boss Minion</u> |
|
| − | [[File: |
+ | [[File:es1.png|thumb|right|100px]] |
| + | The boss is accompanied by 4 Evil Spirits, which spawns from 2 Haunted Cottages every 5 to 6 turns if there are empty tiles. These Evil Spirits do not have the same HP and Attack. The Cyan and the Purple Evil Spirit provides some buffs to the boss. |
||
{| class="article-table" |
{| class="article-table" |
||
| + | ! rowspan=2 |Floor |
||
| − | |+'''Evil Spirit King'''<br />(Undead) |
||
| + | ! colspan=2 align=center|Red |
||
| + | ! colspan=2 align=center|Purple |
||
| + | ! colspan=2 align=center|Cyan |
||
| + | ! colspan=2 align=center|Magenta |
||
|- |
|- |
||
| − | !Floor |
||
!Attack |
!Attack |
||
!HP |
!HP |
||
| + | !Attack |
||
| − | !Dodge |
||
| + | !HP |
||
| − | !Accuracy |
||
| + | !Attack |
||
| + | !HP |
||
| + | !Attack |
||
| + | !HP |
||
|- |
|- |
||
|30 |
|30 |
||
| − | | |
+ | |12 |
| − | | |
+ | |47 |
| − | | |
+ | |10 |
| + | |57 |
||
| − | |100% |
||
| + | |11 |
||
| + | |52 |
||
| + | |13 |
||
| + | |42 |
||
|- |
|- |
||
|40 |
|40 |
||
| − | | |
+ | |17 |
| + | |67 |
||
| − | |1123 |
||
| − | | |
+ | |14 |
| + | |62 |
||
| − | |100% |
||
| + | |16 |
||
| + | |74 |
||
| + | |19 |
||
| + | |59 |
||
|- |
|- |
||
|50 |
|50 |
||
| − | | |
+ | |29 |
| + | |109 |
||
| − | |2169 |
||
| − | | |
+ | |22 |
| + | |137 |
||
| − | |100% |
||
| + | |25 |
||
| + | |123 |
||
| + | |32 |
||
| + | |96 |
||
|- |
|- |
||
|60 |
|60 |
||
| − | | |
+ | |45 |
| + | |203 |
||
| − | |4065 |
||
| − | | |
+ | |35 |
| + | |258 |
||
| − | |100% |
||
| + | |40 |
||
| + | |231 |
||
| + | |50 |
||
| + | |176 |
||
|- |
|- |
||
|70 |
|70 |
||
| − | | |
+ | |79 |
| + | |384 |
||
| − | |7509 |
||
| − | | |
+ | |60 |
| + | |490 |
||
| − | |100% |
||
| + | |69 |
||
| + | |437 |
||
| + | |88 |
||
| + | |331 |
||
|- |
|- |
||
|80 |
|80 |
||
| − | | |
+ | |132 |
| + | |728 |
||
| − | |????? |
||
| − | | |
+ | |99 |
| + | |932 |
||
| − | |100% |
||
| + | |115 |
||
| + | |830 |
||
| + | |146 |
||
| + | |626 |
||
| + | |- |
||
| + | |90 |
||
| + | |231 |
||
| + | |1294 |
||
| + | |174 |
||
| + | |1660 |
||
| + | |202 |
||
| + | |1477 |
||
| + | |259 |
||
| + | |1111 |
||
| + | |- |
||
| + | |100 |
||
| + | |387 |
||
| + | |2176 |
||
| + | |291 |
||
| + | |2794 |
||
| + | |339 |
||
| + | |2485 |
||
| + | |435 |
||
| + | |1867 |
||
|} |
|} |
||
| + | Skills: |
||
| − | '''Evil Intention Hammer'''<br />Launch an attack every 3 rounds, dealing triple Damages to the enemy and killing the enemy whose HP is lower than 20% |
||
| + | *'''Evil Spirit Possession''' (Red): Launch every round and bring the ''Corrosion'' effect to the enemy (Lose HP each round, the effects can be superimposed, lasting 5 rounds) |
||
| − | |||
| + | *'''Support''' (Purple): When present, Evil Spirit King decreases the Damage suffered by 50% |
||
| − | '''Wildfire Shield'''<br />Lose HP by 30% each round, and cast Wildfire Shield (Lose HP by only 1 when damaged, invalid to Blood Malaria and Poison Malaria) |
||
| + | *'''Soul Nourishing''' (Cyan): When present, Evil Spirit King recovers HP by 3% each round |
||
| − | |||
| + | *'''Curse Murder''' (Magenta): Launch an attack every 3 rounds, dealing double Damages to the enemy |
||
| − | '''Evil Spirit Enchantment:''' |
||
| − | * FL30: Physical Resistance +10%, Spell Resistance +10% |
||
| − | * FL60: Physical Resistance +20%, Spell Resistance +20% |
||
| − | |||
| − | '''Support'''<br />Decrease the damage suffered by 50% |
||
| − | |||
| − | '''Soul Nourishing'''<br />Recover HP by 3% each round |
||
==Partners== |
==Partners== |
||
| Line 445: | Line 296: | ||
*Partners have Target Combo (Requirement: At least 2 Partners recruited) |
*Partners have Target Combo (Requirement: At least 2 Partners recruited) |
||
*These partners count as persistent summons and you therefore cannot use other persistent summons except for [[Image of Demi-Gods and Semi-Devils]] that somehow doesn't count. |
*These partners count as persistent summons and you therefore cannot use other persistent summons except for [[Image of Demi-Gods and Semi-Devils]] that somehow doesn't count. |
||
| + | *The partners do not benefit from [[Talents|talents]] and effects that targets [[Ally|allies]] like for instance [[Paladin's Halo]]. |
||
{| class="article-table" |
{| class="article-table" |
||
! scope="col" |Name |
! scope="col" |Name |
||
| − | ! scope="col" | |
||
! scope="col" |Description |
! scope="col" |Description |
||
! scope="col" |Location/Requirement |
! scope="col" |Location/Requirement |
||
|- |
|- |
||
| + | | '''Weiss''' [[File:weiss.png|thumb|left|100px]] |
||
| − | | Weiss |
||
| − | | [[File:weiss.png|thumb|left|120px]] |
||
|As a partner with you to suppress Evil Spirit King, Weiss is loyal and persevering. It is good at using ninjutsu.<br /><br />Weiss attacks once every 6 rounds. Increase the level for every 5 enemies killed. |
|As a partner with you to suppress Evil Spirit King, Weiss is loyal and persevering. It is good at using ninjutsu.<br /><br />Weiss attacks once every 6 rounds. Increase the level for every 5 enemies killed. |
||
|Found in F2. Give 1 Salt Rice Ball to recruit. |
|Found in F2. Give 1 Salt Rice Ball to recruit. |
||
|- |
|- |
||
| − | | Chimpanzee |
+ | | '''Chimpanzee''' [[File:chimp.png|thumb|left|100px]] |
| − | | [[File:chimp.png|thumb|left|120px]] |
||
|As a partner with you to suppress Evil Spirit King, Chimpanzee is violent and tough. It has superb sword skills.<br /><br />Chimpanzee attacks once every 6 rounds. Increase the level for every 5 enemies killed. |
|As a partner with you to suppress Evil Spirit King, Chimpanzee is violent and tough. It has superb sword skills.<br /><br />Chimpanzee attacks once every 6 rounds. Increase the level for every 5 enemies killed. |
||
|Found in F3. Give 1 Salt Rice Ball to recruit. |
|Found in F3. Give 1 Salt Rice Ball to recruit. |
||
|- |
|- |
||
| + | | '''Pheasant''' [[File:pheas.png|thumb|left|100px]] |
||
| − | | Pheasant |
||
| − | | [[File:pheas.png|thumb|left|120px]] |
||
|As a partner with you to suppress Evil Spirit King, Pheasant is cautious and wise. It can cast mysterious spells.<br /><br />Pheasant attacks once every 6 rounds. Increase the level for every 5 enemies killed. |
|As a partner with you to suppress Evil Spirit King, Pheasant is cautious and wise. It can cast mysterious spells.<br /><br />Pheasant attacks once every 6 rounds. Increase the level for every 5 enemies killed. |
||
|Found in F4. Give 1 Salt Rice Ball to recruit. |
|Found in F4. Give 1 Salt Rice Ball to recruit. |
||
| Line 468: | Line 316: | ||
===Abilities=== |
===Abilities=== |
||
| − | ''Abilities can be upgraded to enhance effect. |
+ | ''Abilities can be upgraded to enhance effect. |
| + | <br />Levels 2-4 uses 3 Salt Rice Ball per level |
||
| − | {| class="article-table" |
||
| + | <br />Levels 5-7 uses 4 Salt Rice Ball per level |
||
| + | <br />Levels 8-10 uses 5 Salt Rice Ball per level'' |
||
| + | {| class="article-table mw-collapsible mw-collapsed sortable" |
||
!Name |
!Name |
||
!Benefit |
!Benefit |
||
!General/Exclusive |
!General/Exclusive |
||
|- |
|- |
||
| − | |Enhance Attack |
+ | | <b>Enhance Attack</b><br />[[image:Enhance Attack.png|center|x50px]] |
| − | |Attack+5 |
+ | |Attack+5% |
| + | <br />'''MAX''': Attack+50% |
||
|General |
|General |
||
|- |
|- |
||
| − | |Enhance Power |
+ | | <b>Enhance Power</b><br />[[image:Enhance Power.png|center|x50px]] |
| − | |Power+3 |
+ | |Power+3% |
| + | <br />'''MAX''': Power+30% |
||
|General |
|General |
||
|- |
|- |
||
| + | | <b>Training</b><br />[[image:Training.png|center|x50px]] |
||
| − | |Training |
||
| − | |Whenever entering the next floor, 3% chance to increase the level |
+ | |Whenever entering the next floor, 3% chance to increase the level |
| + | <br />'''MAX''': 12% chance |
||
|General |
|General |
||
|- |
|- |
||
| − | |Target Combo Enhancement I |
+ | | <b>Target Combo Enhancement I</b><br />[[image:Target Combo Enhancement I.png|center|x50px]] |
| − | |In Combo Position I, the effect of Target Combo +3 |
+ | |In Combo Position I, the effect of Target Combo +3% |
| + | In practice: Increase the effect of the active skill of that partner |
||
| + | <br />'''MAX''': Effect+30% |
||
|General |
|General |
||
|- |
|- |
||
| − | |Target Combo Enhancement II |
+ | | <b>Target Combo Enhancement II</b><br />[[image:Target Combo Enhancement II.png|center|x50px]] |
| − | |In Combo Position II or III, the effect of Target Combo +2 |
+ | |In Combo Position II or III, the effect of Target Combo +2% |
| + | In practice: Increase the effect of the active skill of the other 2 partners |
||
| + | <br />'''MAX''': Effect+20% |
||
|General |
|General |
||
|- |
|- |
||
| + | | <b>Ninjitsu Art - Dodge</b><br />[[image:Ninjitsu Art - Dodge.png|center|x50px]] |
||
| − | |Ninjutsu Arts - Dodge |
||
| − | |While attacking, 9% chance to cast Group Blind (Lasting 3 rounds, invalid to Boss) |
+ | |While attacking, 9% chance to cast Group Blind (Lasting 3 rounds, invalid to Boss) |
| + | <br />'''MAX''': 36% chance |
||
|Exclusive to Weiss |
|Exclusive to Weiss |
||
|- |
|- |
||
| + | | <b>Ninjitsu Art - Pupil</b><br />[[image:Ninjitsu Art - Pupil.png|center|x50px]] |
||
| − | |Ninjutsu Arts - Pupil |
||
| − | |6% chance to detect a key's location each floor |
+ | |6% chance to detect a key's location each floor |
| + | <br />'''MAX''': 24% chance |
||
|Exclusive to Weiss |
|Exclusive to Weiss |
||
|- |
|- |
||
| + | | <b>Ninjitsu Art - Spikes</b><br />[[image:Ninjitsu Art - Spikes.png|center|x50px]] |
||
| − | |Ninjutsu Arts - Spikes |
||
| − | |Whenever entering the |
+ | |Whenever entering the next floor, 12% chance to place Makibisi (When a new enemy appears, lose HP by 50%) |
| + | <br />'''MAX''': 48% chance |
||
|Exclusive to Weiss |
|Exclusive to Weiss |
||
|- |
|- |
||
| + | | <b>Ninjitsu Art - Malaria</b><br />[[image:Ninjitsu Art - Malaria.png|center|x50px]] |
||
| − | |Ninjutsu Arts - Malaria |
||
| + | |"Blood Malaria" Power+5% |
||
| − | |"Blood Malaria" Power+5%<br />When "Blood Malaria" comes into effect, the enemy cannot recover HP<br />'''MAX:''': Power+50% |
||
| + | <br />When "Blood Malaria" comes into effect, the enemy cannot recover HP |
||
| + | <br />'''MAX''': Power+50% |
||
|Exclusive to Weiss |
|Exclusive to Weiss |
||
|- |
|- |
||
| + | | <b>Return Stroke</b><br />[[image:Return Stroke.png|center|x50px]] |
||
| − | |Return Strike |
||
| − | |While attacking, 24% chance to spurt on the enemies around |
+ | |While attacking, 24% chance to spurt on the enemies around |
| + | <br />'''MAX''': 60% chance |
||
|Exclusive to Chimpanzee |
|Exclusive to Chimpanzee |
||
|- |
|- |
||
| + | | <b>Iron Cut</b><br />[[image:Iron Cut.png|center|x50px]] |
||
| − | |Iron Cut |
||
| − | |12% chance to withstand long-range Damages for Gumball |
+ | |12% chance to withstand long-range Damages for Gumball |
| + | <br />'''MAX''': 30% chance |
||
|Exclusive to Chimpanzee |
|Exclusive to Chimpanzee |
||
|- |
|- |
||
| + | | <b>Air Cut</b><br />[[image:Air Cut.png|center|x50px]] |
||
| − | |Air Cut |
||
| − | |"Eight Phases Break" Power+3% |
+ | |"Eight Phases Break" Power+3% |
| + | <br />"Eight Phases Break" Number of times of Slash +1 |
||
| + | <br />'''MAX''': Power+30%, Slash+2 |
||
|Exclusive to Chimpanzee |
|Exclusive to Chimpanzee |
||
|- |
|- |
||
| + | | <b>Sakura</b><br />[[image:Sakura.png|center|x50px]] |
||
| − | |Sakura |
||
| + | |"Flying Ape Dodge" Power+5% |
||
| − | |"Flying Ape Dodge" Power+5%<br />"Flying Ape Dodge" Kills the enemy whose HP is lower than 10%<br />'''MAX:''': Power+50%, HP lower than 20% |
||
| + | <br />"Flying Ape Dodge" Kills the enemy whose HP is lower than 10% |
||
| + | <br />'''MAX''': Power+50%, HP lower than 20% |
||
|Exclusive to Chimpanzee |
|Exclusive to Chimpanzee |
||
|- |
|- |
||
| − | |Rune - Seal Force |
+ | | <b>Rune - Seal Force</b><br />[[image:Rune - Seal Force.png|center|x50px]] |
| − | |Defense+3 |
+ | |Defense+3 |
| + | <br />'''MAX''': Defense+30 |
||
| − | Note: |
+ | Note: Due to a nice bug, if you have a summoned ally, that defense boost is doubled for as long as that ally remains alive. |
| + | |Exclusive to Pheasant |
||
|- |
|- |
||
| − | |Rune - Meditation |
+ | | <b>Rune - Meditation</b><br />[[image:Rune - Meditation.png|center|x50px]] |
| − | |When Pheasant casts a skill, 5% chance to decrease the consumption of rice balls +1 |
+ | |When Pheasant casts a skill, 5% chance to decrease the consumption of rice balls +1 |
| + | <br />'''MAX''': 50% chance |
||
|Exclusive to Pheasant |
|Exclusive to Pheasant |
||
|- |
|- |
||
| − | |Rune - Good Luck |
+ | | <b>Rune - Good Luck</b><br />[[image:Rune - Good Luck.png|center|x50px]] |
| − | |Gain EP +9/12/15... each time you enter the next floor |
+ | |Gain EP +9/12/15... each time you enter the next floor |
| + | <br />'''MAX''': EP+36 |
||
|Exclusive to Pheasant |
|Exclusive to Pheasant |
||
|- |
|- |
||
| − | |Rune - Protection |
+ | | <b>Rune - Protection</b><br />[[image:Rune - Protection.png|center|x50px]] |
| − | |"Light of Life" Effect+5%<br />"Light of Life" Number of rounds +1 |
+ | |"Light of Life" Effect+5%<br />"Light of Life" Number of rounds +1 |
| + | <br />'''MAX''': Effect+50%, Rounds+3 |
||
|Exclusive to Pheasant |
|Exclusive to Pheasant |
||
|} |
|} |
||
| Line 556: | Line 430: | ||
When a partner has an effects that refers to "Combo Position I" actually simply refers to his own active combo whereas any effect that refers to "Combo Position II or III" refers to the combos of the other partners. |
When a partner has an effects that refers to "Combo Position I" actually simply refers to his own active combo whereas any effect that refers to "Combo Position II or III" refers to the combos of the other partners. |
||
| − | {| class="article-table" |
+ | {| class="article-table mw-collapsible mw-collapsed" |
!Name |
!Name |
||
!Details |
!Details |
||
| Line 564: | Line 438: | ||
!Combo Position III |
!Combo Position III |
||
|- |
|- |
||
| − | |Poison Malaria |
+ | | <b>Poison Malaria</b><br />[[image:Poison Malaria.png|center|x50px]] |
|Make all enemies lose HP each floor (the effects can be superimposed, 10 floors at most, lasting 5 rounds) |
|Make all enemies lose HP each floor (the effects can be superimposed, 10 floors at most, lasting 5 rounds) |
||
|2 |
|2 |
||
| Line 571: | Line 445: | ||
| |
| |
||
|- |
|- |
||
| − | |Blood Malaria |
+ | | <b>Blood Malaria</b><br />[[image:Blood Malaria.png|center|x50px]] |
| − | |Make all enemies lose HP each floor, if enemy dies when Blood Malaria sustains, this effect infects all enemies (the effects can be superimposed, 10 floors at most, lasting 5 rounds) |
+ | | Make all enemies lose HP each floor, if enemy dies when Blood Malaria sustains, this effect infects all enemies (the effects can be superimposed, 10 floors at most, lasting 5 rounds).<ref group="notes"><b>Blood Malaria</b> in practice affects all monsters present at the time of casting for 5 rounds and deals damage every round. It uses the Damage over Time debuff slot and therefore replaces and gets replaced by effects like ''Burn'' or ''Poison''. If any monster dies from the effect, Blood Malaria is applied anew on all visible monsters. When Blood malaria is applied on a monster that already has it, the effect is increased (up to rank 10) and the timer is reset.</ref> |
|5 |
|5 |
||
|Weiss |
|Weiss |
||
| Line 578: | Line 452: | ||
|Pheasant |
|Pheasant |
||
|- |
|- |
||
| − | |Substitute Art |
+ | | <b>Substitute Art</b><br />[[image:Substitute Art.png|center|x50px]] |
|Summon Substitute Illusion |
|Summon Substitute Illusion |
||
|2 |
|2 |
||
| Line 585: | Line 459: | ||
| |
| |
||
|- |
|- |
||
| − | |True - Substitute Art |
+ | | <b>True - Substitute Art</b><br />[[image:True - Substitute Art.png|center|x50px]] |
|Summon Substitute Illusion, and the Illusion masters the "Self-explosion" feature, and summon only 1 time each floor |
|Summon Substitute Illusion, and the Illusion masters the "Self-explosion" feature, and summon only 1 time each floor |
||
|5 |
|5 |
||
| Line 592: | Line 466: | ||
|Chimpanzee |
|Chimpanzee |
||
|- |
|- |
||
| + | | <b>Multiple Slash</b><br />[[image:Multiple Slash.png|center|x50px]] |
||
| − | |Double Slash |
||
|Launch 4 slashes, to attack visible enemies (Each slash deals Damage by 30) |
|Launch 4 slashes, to attack visible enemies (Each slash deals Damage by 30) |
||
|2 |
|2 |
||
| Line 599: | Line 473: | ||
| |
| |
||
|- |
|- |
||
| − | |Eight Phases Break |
+ | | <b>Eight Phases Break</b><br />[[image:Eight Phases Break.png|center|x50px]] |
|Launch 6 slashes, to attack visible enemies, and Slash Damage increases by 5% successively (The first slash deals Damage by '''1.2xPower''') |
|Launch 6 slashes, to attack visible enemies, and Slash Damage increases by 5% successively (The first slash deals Damage by '''1.2xPower''') |
||
|5 |
|5 |
||
| Line 606: | Line 480: | ||
|Pheasant |
|Pheasant |
||
|- |
|- |
||
| + | | <b>Iaido</b><br />[[image:Iaido.png|center|x50px]] |
||
| − | |Iaido |
||
| − | |Deal '''3.2xPower''' Damages to the enemy, '''50%''' chance to deal Damage by 2 times |
+ | | Deal '''3.2xPower''' Damages to the enemy, '''50%''' chance to deal Damage by 2 times |
| − | |2 |
+ | | 2 |
|Chimpanzee |
|Chimpanzee |
||
|Pheasant |
|Pheasant |
||
| |
| |
||
|- |
|- |
||
| − | |Flying Ape Dodge |
+ | | <b>Flying Ape Dodge</b><br />[[image:Flying Ape Dodge.png|center|x50px]] |
|Deal '''4.8xPower''' Damages to the enemy, with Severely Injured effect, '''75%''' chance to deal Damage by 2 times (Lasting 3 rounds) |
|Deal '''4.8xPower''' Damages to the enemy, with Severely Injured effect, '''75%''' chance to deal Damage by 2 times (Lasting 3 rounds) |
||
|5 |
|5 |
||
| Line 620: | Line 494: | ||
|Weiss |
|Weiss |
||
|- |
|- |
||
| + | | <b>Wind Blade</b><br />[[image:Wind Blade.png|center|x50px]] |
||
| − | |Wind Blade |
||
|Deal Damage to the enemy within 2 slots by 75 |
|Deal Damage to the enemy within 2 slots by 75 |
||
|2 |
|2 |
||
| Line 627: | Line 501: | ||
| |
| |
||
|- |
|- |
||
| − | |Feather Dance |
+ | | <b>Feather Dance</b><br />[[image:Feather Dance.png|center|x50px]] |
|Deal Damage to all enemies by 112 |
|Deal Damage to all enemies by 112 |
||
|5 |
|5 |
||
| Line 634: | Line 508: | ||
|Weiss |
|Weiss |
||
|- |
|- |
||
| + | | <b>Heal</b><br />[[image:Heal (Pheasant).png|center|x50px]] |
||
| − | |Heal |
||
|Recover HP for Gumball by 20, and decrease the Damage sustained by 31% (lasting 3 rounds) |
|Recover HP for Gumball by 20, and decrease the Damage sustained by 31% (lasting 3 rounds) |
||
|2 |
|2 |
||
| Line 641: | Line 515: | ||
| |
| |
||
|- |
|- |
||
| − | |Light of Life |
+ | | <b>Light of Life</b><br />[[image:Light of Life.png|center|x50px]] |
|Recover HP for Gumball by 62, and cast Life Shield (lasting 3 rounds) |
|Recover HP for Gumball by 62, and cast Life Shield (lasting 3 rounds) |
||
|5 |
|5 |
||
| Line 649: | Line 523: | ||
|} |
|} |
||
| − | == |
+ | ==Maze Occurrences== |
| − | [[File:vasuki.png|thumb|right| |
+ | [[File:vasuki.png|thumb|right|100px]] |
===Vasuki Statue=== |
===Vasuki Statue=== |
||
''"This is Orochi's statue. This huge body with eight heads and eight tails gives you a strong sense of oppression."'' |
''"This is Orochi's statue. This huge body with eight heads and eight tails gives you a strong sense of oppression."'' |
||
| Line 662: | Line 536: | ||
! scope="col" |Source |
! scope="col" |Source |
||
|- |
|- |
||
| − | |[[Sake]] |
+ | | [[Sake]] |
| − | |Alcohol |
+ | | Alcohol |
| − | |Maze Shop |
+ | | Maze Shop |
|- |
|- |
||
| − | |[[Cheap Liquor]] |
+ | | [[Cheap Liquor]] |
| − | |Alcohol |
+ | | Alcohol |
| − | |[[Adventurer]] (villager), [[Pirate]] (chest) |
+ | | [[Adventurer]] (villager), [[Pirate]] (chest) |
|- |
|- |
||
| − | |[[Pirate's Ale]] |
+ | | [[Pirate's Ale]] |
|Alcohol |
|Alcohol |
||
| − | |[[Hamster]], [[Future Cat]] ([[Take-out Phone]]) |
+ | | [[Hamster]], [[Future Cat]] ([[Take-out Phone]]) |
|- |
|- |
||
| − | |[[Sour Beer]] |
+ | | [[Sour Beer]] |
| − | |Alcohol |
+ | | Alcohol |
| − | |[[Red Hood]] (Mr. Wolf) |
+ | | [[Red Hood]] (Mr. Wolf) |
|- |
|- |
||
| − | |[[Brewmaster's Wine]] |
+ | | [[Brewmaster's Wine]] |
| − | |Alcohol |
+ | | Alcohol |
| − | |[[Panda]] |
+ | | [[Panda]] |
|- |
|- |
||
| − | |[[ |
+ | | [[Osmanthus Wine]] |
| + | | Alcohol |
||
| − | |Equipment (1*-2*) |
||
| − | |[[ |
+ | | [[Yang Yuhuan]] |
|- |
|- |
||
| − | |[[ |
+ | | [[First Mate's Spirit]] |
| + | | Alcohol |
||
| − | |Equipment (1*-2*) |
||
| + | | [[Potions]] |
||
| − | |[[Red Hood]] (Mr. Wolf), [[Pinocchio]] (Fairy) |
||
|- |
|- |
||
| − | |[[ |
+ | | [[Demon's Cocktail]] |
| + | | Alcohol |
||
| − | |Equipment (1*-2*) |
||
| − | |[[ |
+ | | [[Potions]] |
|- |
|- |
||
| − | |[[ |
+ | | [[Abyssal Rum]] |
| + | | Alcohol |
||
| − | |Equipment (1*-2*) |
||
| − | |[[ |
+ | | [[Potions]] |
|- |
|- |
||
| − | |[[ |
+ | | [[Bitten Carrot]] |
| − | |Equipment (1*-2*) |
+ | | Equipment (1*-2*) |
| − | |[[ |
+ | | [[Bunny]] |
|- |
|- |
||
| − | |[[ |
+ | | [[Hard Bread]] |
| − | |Equipment ( |
+ | | Equipment (1*-2*) |
| − | |[[ |
+ | | [[Red Hood]] (Mr. Wolf), [[Pinocchio]] (Fairy) |
|- |
|- |
||
| − | |[[ |
+ | | [[Lava Pyracantha]] |
| − | |Equipment ( |
+ | | Equipment (1*-2*) |
| + | | [[Hamster]], [[Adventurer]] |
||
| − | |Maze Shop |
||
|- |
|- |
||
| − | |[[ |
+ | | [[Roasted Lizard]] |
| − | |Equipment ( |
+ | | Equipment (1*-2*) |
| + | | [[Hamster]] |
||
| − | |Maze Shop |
||
|- |
|- |
||
| − | |[[ |
+ | | [[Roasted Meat]] |
| − | | |
+ | | Equipment (1*-2*) |
| + | | [[Hamster]] |
||
| − | |[[Chuchu]] (Infected Ocean) |
||
|- |
|- |
||
| − | |[[ |
+ | | [[Cheese Lobster]] |
| − | | |
+ | | Equipment (3*-4*) |
| − | |[[Hamster]] |
+ | | [[Hamster]], [[Future Cat]] ([[Take-out Phone]]) |
|- |
|- |
||
| − | |[[ |
+ | | [[Oden]] |
| − | | |
+ | | Equipment (3*-4*) |
| + | | Maze Shop |
||
| − | |[[Red Hood]] (Mr. Wolf) |
||
|- |
|- |
||
| − | |[[ |
+ | | [[Taiyaki]] |
| − | | |
+ | | Equipment (3*-4*) |
| + | | Maze Shop |
||
| − | |[[Red Hood]] (Mr. Wolf), [[Pinocchio]] (Fairy) |
||
|- |
|- |
||
| + | | [[Ocean's Meat Floss Buns]] |
||
| − | |[[Dorayaki]] |
||
| − | |x2 Spell Scrolls ( |
+ | | x2 Spell Scrolls (1*) |
| + | | [[Chuchu]] (Infected Ocean) |
||
| − | |[[Future Cat]] ([[Dimension Bag]], [[Take-out Phone]]) |
||
|- |
|- |
||
| − | |[[ |
+ | | [[Rotten Fruit]] |
| − | |x2 Spell Scrolls ( |
+ | | x2 Spell Scrolls (1*) |
| − | |[[Hamster]] |
+ | | [[Hamster]] |
|- |
|- |
||
| − | |[[ |
+ | | [[Stale Biscuit]] |
| − | |x2 Spell Scrolls ( |
+ | | x2 Spell Scrolls (1*) |
| + | | [[Red Hood]] (Mr. Wolf) |
||
| − | |Maze Shop |
||
|- |
|- |
||
| + | | [[Stale Cheese]] |
||
| − | |[[Strange Fruit (Attack/Power)]] |
||
| − | |x2 Spell Scrolls ( |
+ | | x2 Spell Scrolls (1*) |
| − | |[[ |
+ | | [[Red Hood]] (Mr. Wolf), [[Pinocchio]] (Fairy) |
|- |
|- |
||
| + | | [[Dorayaki]] |
||
| − | |[[Strange Fruit (HP/MP)]] |
||
| − | |x2 Spell Scrolls (2*-3*) |
+ | | x2 Spell Scrolls (2*-3*) |
| − | |[[ |
+ | | [[Future Cat]] ([[Dimension Bag]], [[Take-out Phone]]) |
|- |
|- |
||
| − | |[[ |
+ | | [[Fried Cod Fillet]] |
| + | | x2 Spell Scrolls (2*-3*) |
||
| − | |EP (50-150) |
||
| − | |[[Hamster]] |
+ | | [[Hamster]], [[Future Cat]] ([[Take-out Phone]]) |
|- |
|- |
||
| − | |[[ |
+ | | [[Hand-Pulled Noodles]] |
| + | | x2 Spell Scrolls (2*-3*) |
||
| − | |EP (50-150) |
||
| + | | Maze Shop |
||
| − | |[[Hamster]] |
||
|- |
|- |
||
| + | | [[Strange Fruit (Attack/Power)]] |
||
| − | |[[Wild Honey]] |
||
| + | | x2 Spell Scrolls (2*-3*) |
||
| − | |EP (50-150) |
||
| + | | [[Hamster]], [[Adventurer]] (villager) |
||
| − | |Cherry Blossom Tree (Pheasant) |
||
| + | |- |
||
| + | | [[Strange Fruit (HP/MP)]] |
||
| + | | x2 Spell Scrolls (2*-3*) |
||
| + | | [[Hamster]], [[Adventurer]] (villager) |
||
| + | |- |
||
| + | | [[Coconut]] |
||
| + | | EP (50-150) |
||
| + | | [[Hamster]] |
||
| + | |- |
||
| + | | [[Roasted Spider]] |
||
| + | | EP (50-150) |
||
| + | | [[Hamster]] |
||
| + | |- |
||
| + | | [[Wild Honey]] |
||
| + | | EP (50-150) |
||
| + | | Cherry Blossom Tree (Pheasant) |
||
|- |
|- |
||
| [[Half Leftover Pizza]] |
| [[Half Leftover Pizza]] |
||
| − | |EP (50-150) |
+ | | EP (50-150) |
| − | |[[Divine Dragon Wishes]] |
+ | | [[Divine Dragon Wishes]] |
|- |
|- |
||
| − | |[[Contaminated Boar Meat]] |
+ | | [[Contaminated Boar Meat]] |
| − | |EP (150-250) |
+ | | EP (150-250) |
| − | |[[Hamster]] |
+ | | [[Hamster]] |
|- |
|- |
||
| − | |[[Oyster Stew]] |
+ | | [[Oyster Stew]] |
| − | |EP (150-250) |
+ | | EP (150-250) |
| − | |[[Hamster]], [[Future Cat]] ([[Take-out Phone]]) |
+ | | [[Hamster]], [[Future Cat]] ([[Take-out Phone]]) |
|- |
|- |
||
| − | |[[Takoyaki]] |
+ | | [[Takoyaki]] |
| − | |EP (150-250) |
+ | | EP (150-250) |
| − | |Maze Shop |
+ | | Maze Shop |
|- |
|- |
||
| − | |[[Trout Soup]] |
+ | | [[Trout Soup]] |
| − | |EP (150-250) |
+ | | EP (150-250) |
| − | |[[Hamster]], [[Future Cat]] ([[Take-out Phone]]) |
+ | | [[Hamster]], [[Future Cat]] ([[Take-out Phone]]) |
|- |
|- |
||
| − | |[[Cheese]] |
+ | | [[Cheese]] |
| − | |[[Strange Statue]] |
+ | | [[Strange Statue]] |
| − | |[[Hamster]] |
+ | | [[Hamster]] |
|- |
|- |
||
| − | |[[Super Dorayaki]] |
+ | | [[Super Dorayaki]] |
| − | |[[Strange Statue]] |
+ | | [[Strange Statue]] |
| − | |[[Future Cat]] ([[Dimension Bag]], [[Take-out Phone]]) |
+ | | [[Future Cat]] ([[Dimension Bag]], [[Take-out Phone]]) |
|- |
|- |
||
| − | |[[Roasted Squid]] |
+ | | [[Roasted Squid]] |
| − | |Tier 2 Material (5-7) |
+ | | Tier 2 Material (5-7) |
| − | |[[Hamster]] |
+ | | [[Hamster]] |
|- |
|- |
||
| − | |[[Smoked Salmon]] |
+ | | [[Smoked Salmon]] |
| − | |Tier 2 Material (5-7) |
+ | | Tier 2 Material (5-7) |
| − | |[[Hamster]], [[Future Cat]] ([[Take-out Phone]]) |
+ | | [[Hamster]], [[Future Cat]] ([[Take-out Phone]]) |
|- |
|- |
||
| − | |[[Three-color Dumplings]] |
+ | | [[Three-color Dumplings]] |
| − | |Tier 2 Material (5-7) |
+ | | Tier 2 Material (5-7) |
| − | |Maze Shop |
+ | | Maze Shop |
|} |
|} |
||
| − | [[File:Grandma.png|thumb|right| |
+ | [[File:Grandma.png|thumb|right|100px]] |
| + | |||
===Grandma=== |
===Grandma=== |
||
Grandma shows up on floor 1. |
Grandma shows up on floor 1. |
||
| Line 813: | Line 704: | ||
| − | [[File:sessho.png|thumb|right| |
+ | [[File:sessho.png|thumb|right|100px]] |
===Sessho-seki=== |
===Sessho-seki=== |
||
''"This torii is the demarcation point between the domain of god and the world. The breath it emits is the power suppressing ghosts!"'' |
''"This torii is the demarcation point between the domain of god and the world. The breath it emits is the power suppressing ghosts!"'' |
||
| Line 826: | Line 717: | ||
| − | [[File:okiku.png|thumb|right| |
+ | [[File:okiku.png|thumb|right|100px]] |
===O-Kiku=== |
===O-Kiku=== |
||
''"The ghost floats quietly in original place, and seems to have no offensiveness. As you approach to it, a whisper comes to your ear: "Have you seen my lost plate?""'' |
''"The ghost floats quietly in original place, and seems to have no offensiveness. As you approach to it, a whisper comes to your ear: "Have you seen my lost plate?""'' |
||
| Line 834: | Line 725: | ||
| − | [[File:torii.png|thumb|right| |
+ | [[File:torii.png|thumb|right|100px]] |
===Torii=== |
===Torii=== |
||
''"This torii is the demarcation point between the domain of god and the world. The breath it emits is the power suppressing ghosts!"'' |
''"This torii is the demarcation point between the domain of god and the world. The breath it emits is the power suppressing ghosts!"'' |
||
| Line 845: | Line 736: | ||
| − | [[File:shinto.png|thumb|right| |
+ | [[File:shinto.png|thumb|right|100px]] |
===Shinto Shrine=== |
===Shinto Shrine=== |
||
''"A huge shimenawa hangs on the gate of this Shinto shrine. You can visit this place and pray for the blessing of the god!"'' |
''"A huge shimenawa hangs on the gate of this Shinto shrine. You can visit this place and pray for the blessing of the god!"'' |
||
| Line 859: | Line 750: | ||
| − | [[File:dojo.png|thumb|right| |
+ | [[File:dojo.png|thumb|right|100px]] |
===Dojo=== |
===Dojo=== |
||
''"There is a wide range of training facilities in this spacious dojo, where you can have a good workout!"'' |
''"There is a wide range of training facilities in this spacious dojo, where you can have a good workout!"'' |
||
| Line 866: | Line 757: | ||
| − | [[File:stele.png|thumb|right| |
+ | [[File:stele.png|thumb|right|100px]] |
===Stele=== |
===Stele=== |
||
''"The stone tablet is engraved with all knowledge of a master"'' |
''"The stone tablet is engraved with all knowledge of a master"'' |
||
| Line 874: | Line 765: | ||
| − | [[File:cherrytree.png|thumb|right| |
+ | [[File:cherrytree.png|thumb|right|100px]] |
===Cherry Tree=== |
===Cherry Tree=== |
||
''"This huge cherry tree has been existing here for 300 years. Travelers often come here to appreciate it."'' |
''"This huge cherry tree has been existing here for 300 years. Travelers often come here to appreciate it."'' |
||
| Line 880: | Line 771: | ||
*Weiss |
*Weiss |
||
**[[Time Capsule]] (Go back 10 floors) |
**[[Time Capsule]] (Go back 10 floors) |
||
| − | **Ronin's Corpse ([[Warrior Clothing]] and [[Clog]] or random equipment)<ref group="notes">'''Ronin's Corpse''' cannot be obtained unless <b>Weiss</b>'s level is |
+ | **Ronin's Corpse ([[Warrior Clothing]] and [[Clog]] or random equipment)<ref group="notes">'''Ronin's Corpse''' cannot be obtained unless <b>Weiss</b>'s level is at least 15. If level is high enough, chance is around 40 to 50%</ref> |
**[[Beast's Bone]] |
**[[Beast's Bone]] |
||
**EP |
**EP |
||
**Nothing |
**Nothing |
||
*Pheasant |
*Pheasant |
||
| − | **[[Momotaro's Head Band]] <ref group="notes">[[Momotaro's Head Band]] cannot be obtained unless <b>Pheasant</b>'s level is |
+ | **[[Momotaro's Head Band]] <ref group="notes">[[Momotaro's Head Band]] cannot be obtained unless <b>Pheasant</b>'s level is at least 15. If level is high enough, chance is around 20 to 35%</ref> |
**Summon two spiders |
**Summon two spiders |
||
**[[Wild Honey]] |
**[[Wild Honey]] |
||
| Line 897: | Line 788: | ||
| − | [[File:BurntTree.png|thumb|right| |
+ | [[File:BurntTree.png|thumb|right|100px]] |
| + | |||
===Burnt Tree=== |
===Burnt Tree=== |
||
If Armageddon is used when there is a Cherry Tree, the Cherry Tree will turn into a Burnt tree. |
If Armageddon is used when there is a Cherry Tree, the Cherry Tree will turn into a Burnt tree. |
||
| Line 903: | Line 795: | ||
| − | [[File:hspring.png|thumb|right| |
+ | [[File:hspring.png|thumb|right|100px]] |
===Hot Spring=== |
===Hot Spring=== |
||
''"This is a huge hot spring. If you don't mind bathing with the monkeys, you may take a short break here."'' |
''"This is a huge hot spring. If you don't mind bathing with the monkeys, you may take a short break here."'' |
||
| Line 911: | Line 803: | ||
| − | [[File:sacredtree.png|thumb|right| |
+ | [[File:sacredtree.png|thumb|right|100px]] |
===Sacred Tree=== |
===Sacred Tree=== |
||
''"In this stone shrine, a piece of driftwood is enshrined. It is said that it can attract and appease vagrant souls."'' |
''"In this stone shrine, a piece of driftwood is enshrined. It is said that it can attract and appease vagrant souls."'' |
||
| Line 921: | Line 813: | ||
| − | [[File: |
+ | [[File:hc.png|thumb|right|100px]] |
| + | ===Haunted Cottage=== |
||
| + | ''"Souls often hover around this haunted hut. Sometimes, there is a cold and restless atmosphere."'' |
||
| + | Enter the Haunted Cottage and kill enemies guarding a Folded Screen. Items that can be obtained includes various foods and [[Brocade]]. |
||
| + | |||
| + | |||
| + | [[File:ksitigahba.png|thumb|right|100px]] |
||
===Ksitigahba Buddhisattva=== |
===Ksitigahba Buddhisattva=== |
||
''"This is the statue of Ksitigahba Buddhisattva. It wears a bamboo hat and is covered with thick snow."'' |
''"This is the statue of Ksitigahba Buddhisattva. It wears a bamboo hat and is covered with thick snow."'' |
||
| Line 979: | Line 877: | ||
{| class="article-table" border="0" cellpadding="1" cellspacing="1" |
{| class="article-table" border="0" cellpadding="1" cellspacing="1" |
||
|- |
|- |
||
| − | !Corpse |
+ | ! scope="col" width=80px|Corpse |
| − | !Regular Loot |
+ | ! scope="col" |Regular Loot |
| − | ![[Farplane |
+ | ! scope="col" |[[Farplane Ranger]] loot |
|- |
|- |
||
| − | |Ninja's Corpse[[File:Ninja's Corpse.png|center| |
+ | |'''Ninja's Corpse''' (1x) [[File:Ninja's Corpse.png|center|60px]] |
| − | | |
+ | |[[Suffering]] (a.k.a Kunai) item |
|[[Neji's Soul]]: Cast Big Turn Palm (Deal Damage to the enemy by 80 each round and be immune to all long-range Damages, lasting 5 rounds) |
|[[Neji's Soul]]: Cast Big Turn Palm (Deal Damage to the enemy by 80 each round and be immune to all long-range Damages, lasting 5 rounds) |
||
|- |
|- |
||
| − | |Yin Yang Master's Corpse[[File:Yin Yang Master's Corpse.png|center| |
+ | |'''Yin Yang Master's Corpse''' (1x) [[File:Yin Yang Master's Corpse.png|center|60px]] |
| − | | |
+ | |[[Magatama]] and [[Charm Envelope]] |
|[[Soul of Abe no Seimei]]: Directly exile all enemies (Invalid to BOSS) |
|[[Soul of Abe no Seimei]]: Directly exile all enemies (Invalid to BOSS) |
||
|- |
|- |
||
| − | |Bamboo Princess' Corpse[[File:Bamboo Princess' Corpse.png|center| |
+ | |'''Bamboo Princess' Corpse''' (1x) [[File:Bamboo Princess' Corpse.png|center|60px]] |
| − | | |
+ | |[[Elixir]] |
|[[Kaguya's Soul]]: Power+3 |
|[[Kaguya's Soul]]: Power+3 |
||
All Light Spells' effect +5% |
All Light Spells' effect +5% |
||
|- |
|- |
||
| − | |New Saburo's Corpse[[File:New Saburo's Corpse.png|center| |
+ | |'''New Saburo's Corpse''' (1x) [[File:New Saburo's Corpse.png|center|60px]] |
| − | | |
+ | |[[Peony Lantern]] |
|[[Shin Saburo's Soul]]: Attack+2 Power+2 |
|[[Shin Saburo's Soul]]: Attack+2 Power+2 |
||
|- |
|- |
||
| − | |Ronin's Corpse[[File:RoninsCorpse.png|center| |
+ | |rowspan="2"| '''Ronin's Corpse''' (Multiple) [[File:RoninsCorpse.png|center|60px]] |
| − | | |
+ | |[[Warrior Clothing]] and [[Clog]] (1x, from Cherry Tree) |
| − | |[[Broken Traveler's Soul]]: EP |
+ | |rowspan="2"|[[Broken Traveler's Soul]]: 50 - 100 EP |
| − | [[Complete Traveler's Soul]]: EP |
+ | or [[Complete Traveler's Soul]]: 100 - 200 EP |
|- |
|- |
||
| + | | EP |
||
| − | |Samurai's Corpse[[File:SamuraiCorpse.png|center|48px]] |
||
| + | |- |
||
| − | |Receive [[Damselfly Spear]] |
||
| + | |'''Samurai's Corpse''' (1x) [[File:SamuraiCorpse.png|center|60px]] |
||
| + | |[[Damselfly Spear]] |
||
|[[Soul of Honda Tadakatsu]]: Tonbogiri (Damselfly Spear), the ability is enhanced |
|[[Soul of Honda Tadakatsu]]: Tonbogiri (Damselfly Spear), the ability is enhanced |
||
|- |
|- |
||
| − | |Kintaro's Corpse[[File:Kintaro's Corpse.png|center| |
+ | |'''Kintaro's Corpse''' (1x) [[File:Kintaro's Corpse.png|center|60px]] |
| − | | |
+ | |[[Gold Bellyband]] |
|[[Soul of Sakata Kintoki]]: Gold Bellyband, the ability is enhanced |
|[[Soul of Sakata Kintoki]]: Gold Bellyband, the ability is enhanced |
||
|- |
|- |
||
| − | |Kabashima Taro's Corpse |
+ | |'''Kabashima Taro's Corpse''' (1x) |
| − | | |
+ | |[[Empty Box]] |
|[[Kabashima Taro's Soul]]: Empty Box, the ability is enhanced. Enhance 200EP. |
|[[Kabashima Taro's Soul]]: Empty Box, the ability is enhanced. Enhance 200EP. |
||
|- |
|- |
||
| − | |One-inch Boy's Corpse[[File:One Inch Boy's Corpse.png|center| |
+ | |'''One-inch Boy's Corpse''' (1x) [[File:One Inch Boy's Corpse.png|center|60px]] |
| − | | |
+ | |[[Magical Mallet]] |
| − | |[[One-Inch Boy's Soul]]: Obtain 3 |
+ | |[[One-Inch Boy's Soul]]: Obtain 3 [[Hex]] |
|} |
|} |
||
| Line 1,040: | Line 940: | ||
For souls available here using the [[Farplane's Bow]] and [[Farplane Arrow]], see '''[[Farplane Soul List#Cloud Island|here]]'''. |
For souls available here using the [[Farplane's Bow]] and [[Farplane Arrow]], see '''[[Farplane Soul List#Cloud Island|here]]'''. |
||
| − | == |
+ | ==Quests / DP== |
| − | *When in boss floor, you can stop the minions (Evil Spirit) from being summoned again by letting your summons (like zerglings and chess pieces) take up the slots beside the boss. Making it easier to survive and kill the boss. |
||
| + | {| border="0" cellpadding="1" cellspacing="1" class="mw-collapsible mw-collapsed article-table" style="width: 100%;" |
||
| − | *Save [[Peony Lantern]] until you get to F61 and encounter O-Kiku. Also, you'll need [[Qingshan Treasure Plate]] to give her which can be found via GGoT. |
||
| + | |- |
||
| + | ! scope="col" width="25px"| |
||
| + | ! scope="col" width="35%"|Description |
||
| + | ! scope="col" width="25px"|DP |
||
| + | ! scope="col"|Notes |
||
| + | |- |
||
| + | |S |
||
| + | |Get Kunai (named [[Suffering]]) x3 |
||
| + | |2 |
||
| + | |From Ninja's Corpse |
||
| + | |- |
||
| + | |S |
||
| + | |Get [[Elixir]] x3 |
||
| + | |2 |
||
| + | |From Bamboo Princess' Corpse |
||
| + | |- |
||
| + | |S |
||
| + | |Get [[Gold Bellyband]] x3 |
||
| + | |2 |
||
| + | |From Kintaro's Corpse |
||
| + | |- |
||
| + | |S |
||
| + | |Get [[Damselfly Spear]] x3 |
||
| + | |2 |
||
| + | |From Samurai's Corpse |
||
| + | |- |
||
| + | |S |
||
| + | |Get [[Peony Lantern]] x3 |
||
| + | |2 |
||
| + | |From New Saburo's Corpse |
||
| + | |- |
||
| + | |S |
||
| + | |Completely collect and equip the [[Momotaro (Suit)|Momotaro Suit]] |
||
| + | |3 |
||
| + | |Select Weiss in Cherry Tree interaction to randomly get Ronin's Corpse appear, it'll give Armor and Boots; Select Pheasant in Cherry Tree interaction to randomly receive the Helm |
||
| + | |- |
||
| + | |S |
||
| + | |Use [[Magical Mallet]] x3 |
||
| + | |2 |
||
| + | |From One Inch Boy's Corpse |
||
| + | |- |
||
| + | |S |
||
| + | |Use [[Charm Envelope]] x3 |
||
| + | |2 |
||
| + | |From Yin Yang Master's Corpse |
||
| + | |- |
||
| + | |G |
||
| + | |Use [[Takoyaki]] x15 |
||
| + | |2 |
||
| + | | |
||
| + | |- |
||
| + | |G |
||
| + | |Use [[Three-color Dumplings]] x15 |
||
| + | |2 |
||
| + | | |
||
| + | |- |
||
| + | |G |
||
| + | |Use [[Sake]] x15 |
||
| + | |2 |
||
| + | | |
||
| + | |- |
||
| + | |G |
||
| + | |Use [[Oden]] x15 |
||
| + | |2 |
||
| + | | |
||
| + | |- |
||
| + | |G |
||
| + | |Use [[Hand-Pulled Noodles]] x15 |
||
| + | |2 |
||
| + | | |
||
| + | |- |
||
| + | |G |
||
| + | |Use [[Taiyaki]] x15 |
||
| + | |2 |
||
| + | | |
||
| + | |- |
||
| + | |G |
||
| + | |Kill Lantern Demon x200 |
||
| + | |1 |
||
| + | | |
||
| + | |- |
||
| + | |G |
||
| + | |Kill Underwater Monster x200 |
||
| + | |1 |
||
| + | | |
||
| + | |- |
||
| + | |G |
||
| + | |Kill Nurikabe (Painted Wall) x200 |
||
| + | |1 |
||
| + | | |
||
| + | |- |
||
| + | |G |
||
| + | |Kill Coprinus x200 |
||
| + | |1 |
||
| + | | |
||
| + | |- |
||
| + | |G |
||
| + | |Kill Bean Monster x200 |
||
| + | |1 |
||
| + | | |
||
| + | |- |
||
| + | |G |
||
| + | |Kill Ittan-momen x200 |
||
| + | |1 |
||
| + | | |
||
| + | |- |
||
| + | |G |
||
| + | |First kill boss |
||
| + | |3 |
||
| + | | |
||
| + | |- |
||
| + | |G |
||
| + | |Kill boss x5 |
||
| + | |3 |
||
| + | | |
||
| + | |- |
||
| + | |G |
||
| + | |Mop up Hunted Cottage x30 |
||
| + | |2 |
||
| + | | |
||
| + | |- |
||
| + | |S |
||
| + | |Reach floor 60 |
||
| + | |2 |
||
| + | | |
||
| + | |- |
||
| + | |S |
||
| + | |Reach floor 70 |
||
| + | |3 |
||
| + | | |
||
| + | |- |
||
| + | |S |
||
| + | |Reach floor 80 |
||
| + | |3 |
||
| + | | |
||
| + | |- |
||
| + | |G |
||
| + | |Rummage Ronin's Corpse x10 |
||
| + | |1 |
||
| + | | |
||
| + | |- |
||
| + | |G |
||
| + | |Purchased goods in Rooftop x100 |
||
| + | |1 |
||
| + | | |
||
| + | |- |
||
| + | |G |
||
| + | |Partner kills the enemy x200 |
||
| + | |3 |
||
| + | | |
||
| + | |- |
||
| + | |G |
||
| + | |Use Target Combo to kill the enemy x30 |
||
| + | |2 |
||
| + | | |
||
| + | |- |
||
| + | |G |
||
| + | |All partners reach level 10 |
||
| + | |2 |
||
| + | | |
||
| + | |- |
||
| + | |G |
||
| + | |All partners reach level 20 |
||
| + | |3 |
||
| + | | |
||
| + | |- |
||
| + | |G |
||
| + | |All partners reach level 30 |
||
| + | |3 |
||
| + | | |
||
| + | |- |
||
| + | |G |
||
| + | |All abilities of Weiss reaches level 10 |
||
| + | |2 |
||
| + | | |
||
| + | |- |
||
| + | |G |
||
| + | |All abilities of Chimpanzee reaches level 10 |
||
| + | |2 |
||
| + | | |
||
| + | |-|-| |
||
| + | |G |
||
| + | |All abilities of Pheasant reaches level 10 |
||
| + | |2 |
||
| + | | |
||
| + | |-| |
||
| + | |G |
||
| + | |Dispatch Weiss to explore maze buildings x20 |
||
| + | |1 |
||
| + | | |
||
| + | |-| |
||
| + | |G |
||
| + | |Dispatch Chimpanzee to explore maze buildings x20 |
||
| + | |1 |
||
| + | | |
||
| + | |-| |
||
| + | |G |
||
| + | |Dispatch Pheasant to explore maze buildings x20 |
||
| + | |1 |
||
| + | | |
||
| + | |- |
||
| + | |G |
||
| + | |Obtain hidden gumball |
||
| + | |5 |
||
| + | |See hidden gumball section |
||
| + | |} |
||
| − | * '''Blood Malaria''' effects stack when enemies die, so if you cast on all 4 minions, 4 new stacks will be applied to the boss when the minions die. '''Blood Malaria''' with Weiss buffed up to increase its power as much as possible is the easiest way to kill the boss. Be aware however that '''Blood Malaria''' effect uses the DoT debuff slot. ''Burns'' from [[Fire Ball]], ''Wounds'' from [[Evil Dragon Bloodline]] and other Damage over Time effects will replace '''Blood Malaria'''. |
||
| − | |||
| − | * Most persistant summons ([[Athena]]'s, [[Sorcerer]]'s cat) are forbidden once you have the 3 allies. Dharmapala's [[Image of Demi-Gods and Semi-Devils]] is allowed. There might be differences between different versions of the game. Even if allowed, you might want to avoid using persistant summons that deal damage because you want the 3 allies to be credited with kills so that their level can increase. |
||
| − | * Other summons like the black pather is also forbidden. |
||
| + | == Tips == |
||
| + | *Boss tips: |
||
| + | **When on boss floor, you can stop the minions (Evil Spirit) from being summoned again by letting your summons (like zerglings and chess pieces) or [[Conjuror|totems]] take up the slots beside the boss. Making it easier to survive and kill the boss. |
||
| + | **A solution to Boss killing is to use Blood Malaria from Weiss. '''Blood Malaria''' effects stack when enemies die, so if you cast on all 4 minions, 4 new stacks will be applied to the boss when the minions die (this also reset the effect duration on the Boss to 5 rounds). Thereafter, additional Blood Malaria can be used to maintain the DoT and disrupting ray can be used to effectively double the boss damage while using [[Stoneskin]] and Ice Shield for survival. This can sometimes be further improved if you can make it so that some monkeys are summoned again before some other monkey(s) die from the DoT as this would ensure a further refresh of the Blood Malaria on the Boss. |
||
| + | **Be aware however that '''Blood Malaria''' effect uses the DoT debuff slot. ''Burns'' from [[Fire Ball]], ''Wounds'' from [[Evil Dragon Bloodline]] and other Damage over Time effects will replace '''Blood Malaria'''. |
||
| + | *Save [[Peony Lantern]] until you get to F61 and encounter O-Kiku. Also, you'll need [[Qingshan Treasure Plate]] to give her which can be found via GGoT. |
||
| + | * Most persistent summons ([[Athena]]'s, [[Sorcerer]]'s cat) are forbidden once you have the 3 allies. Dharmapala's [[Image of Demi-Gods and Semi-Devils]] is allowed. There might be differences between different versions of the game. Even if allowed, you might want to avoid using persistent summons that deal damage because you want the 3 allies to be credited with kills so that their level can increase. |
||
| + | * Other summons like the black panther is also forbidden. |
||
* Merchant, Gang Cadre, and other will help getting the food needed from the shops for the leveling up of the partners skills. |
* Merchant, Gang Cadre, and other will help getting the food needed from the shops for the leveling up of the partners skills. |
||
| − | * A solution to Boss killing is to use Blood Malaria from Weiss. The DoT effect will kill the 4 minions and stack onto boss (the DoT is not blocked by the shield). Thereafter, additional Blood Malaria can be used to maintain the DoT and disrupting ray can be used to effectively double the boss damage while using stoneskin and ice shield for survival. |
||
* To maximise the Dragon Ball gained from [[Magical Mallet]], you can activate it at the start of a floor. If the Dball is too little, S/L and reuse the [[Magical Mallet]] on the next floor (Dball gained via [[Magical Mallet]] is randomised on each floor). |
* To maximise the Dragon Ball gained from [[Magical Mallet]], you can activate it at the start of a floor. If the Dball is too little, S/L and reuse the [[Magical Mallet]] on the next floor (Dball gained via [[Magical Mallet]] is randomised on each floor). |
||
* For enemy at the bottom row with covered HP values, you can go to the activation screen of a spell (e.g. t1 lightning bolt) to temporary hide the allies ability bubble. |
* For enemy at the bottom row with covered HP values, you can go to the activation screen of a spell (e.g. t1 lightning bolt) to temporary hide the allies ability bubble. |
||
Revision as of 03:15, 17 November 2019
| Cloud Island | |
|---|---|

| |
| Type | Maze |
| Source/Unlock | Purchase from Shop for 50 |
| Normal reward | Momotaro & Orochi gumball |
| Raid boost | Kusanagi Warrior |
| Raid reward | Gumball Pots +1 |
| Gumball Specific | Gumball specific infos |
"There is a huge island on the southern end of the mainland. People live here without much competition. Nowadays, a group of evil spirits break the tranquility of the island..."
Spend 50 ![]() to unlock Cloud Island maze. Obtain 150
to unlock Cloud Island maze. Obtain 150 ![]() upon purchase (Clear Saint's Tower to unlock).
upon purchase (Clear Saint's Tower to unlock).
Complete the Story Mode to get Momotaro Gumball
Hidden Gumball


To get Orochi:
- Buy every single Sake from Rooftop Shop you encounter, you will need 8 Sakes in total.
- Offer a Sake to the Vasuki statue on every floor ending with a 9 when it appears. You need to do it 8 times.
- You can skip giving Sake to the statue without messing up getting Orochi.
- Any form of alcohol will qualify for the unlock. See Special Occurrences for details.
- Vasuki statue will appear until you offer alcohol to it 8 times per run (Portal of Earth can be used to revisit the statues on previous floors).
- Repeat the same process to get 20 Orochi fragments in maze runs.
Story Quests
The birth from Peach Floors 30 (Difficulty 34) - 2 Vigors
Rewards :
- In maze: one Artisan, formula for Peach Juice, some Momotaro fragments (up to 10)
- Post completion Maze Reward: 1

Let's go! Momotaro! Floors 35 (Difficulty 35) - 2 Vigors
Rewards :
- In maze: one Artisan, formula for Weiss Potion, some Momotaro fragments (up to 10)
- Post completion Maze Reward: 1
Devil's Orgy Floors 35 (Difficulty 36) - 2 Vigors
- In maze: one Artisan, formula for Chimpanzee Potion, some Momotaro fragments (up to 10)
- Post completion Maze Reward: 1
Decisive battle! Evil Spirit King! Floors 40 (Difficulty 37) - 2 Vigors - Boss fight on last floor
- In maze: formula for Pheasant Potion, some Momotaro fragments, Momotaro
- Post completion Maze Reward: 1 , 3 Vigor
Endless Mode - 3 Vigors
Enemies
Usual Enemies
| Enemy | Skill | Other info |
|---|---|---|
| Underwater Monster
Beast 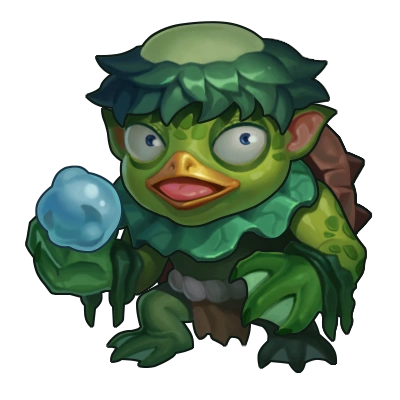  |
Claw: Chance to counterattack for 200% damage
Vicious: When Gumball's HP < 50%, Attack is increased by 100% |
May drop Winkie Rice Ball |
| Painted Wall
Undead   |
Wall Boundary: Damage suffered reduced by 30%
Guardian: Take damages for party members of other type |
May drop Winkie Rice Ball |
| Lantern Demon
Elemental   |
Self-explosion: Self-explosion after 4 rounds, deal triple Damage
Solitude: When by itself, Attack increases by 50% |
May drop Salt Rice Ball |
| Ittan-momen
Undead   |
Constraint: Bring Suffocation effect while counterattacking (Lose HP each round, the effects can be stacked, lasting for 6 rounds)
Recombination: Revive with full HP once after being killed |
May drop Salt Rice Ball |
| Coprinus
Elemental   |
Misfortune: Bring Misfortune effect while counterattacking (Decrease Attack by 50%, decrease Accuracy by 30%, lasting 3 rounds)
Dodge: High Dodge attribute (30%) |
May drop Salt Rice Ball |
| Bean Monster
Undead   |
Bean Throw: Launch a long-range attack every 2 rounds
Noise and Excitement: When damaged, turn over a slate at random |
May drop Winkie Rice Ball |
| Tamamo-no-mae
Gumball   |
Fox Fire: Launch an attack every 3 rounds, dealing 1.5 times Damages to the enemy with the Burning effect (lasts 3 rounds)
Nine Lives: Resurrect 8 times with full HP upon death
|
Drops Foxtail when you select "Chimpanzee" at Sessho-seki to encounter Tamamo-no-mae.
Gumiho trial item Fox Fur will drop if you main Gumiho and select "On your own" at Sessho-seki |
To see more title or gumball-specific monster information, look at Cloud Island/Specific.
Boss (Evil Spirit King)
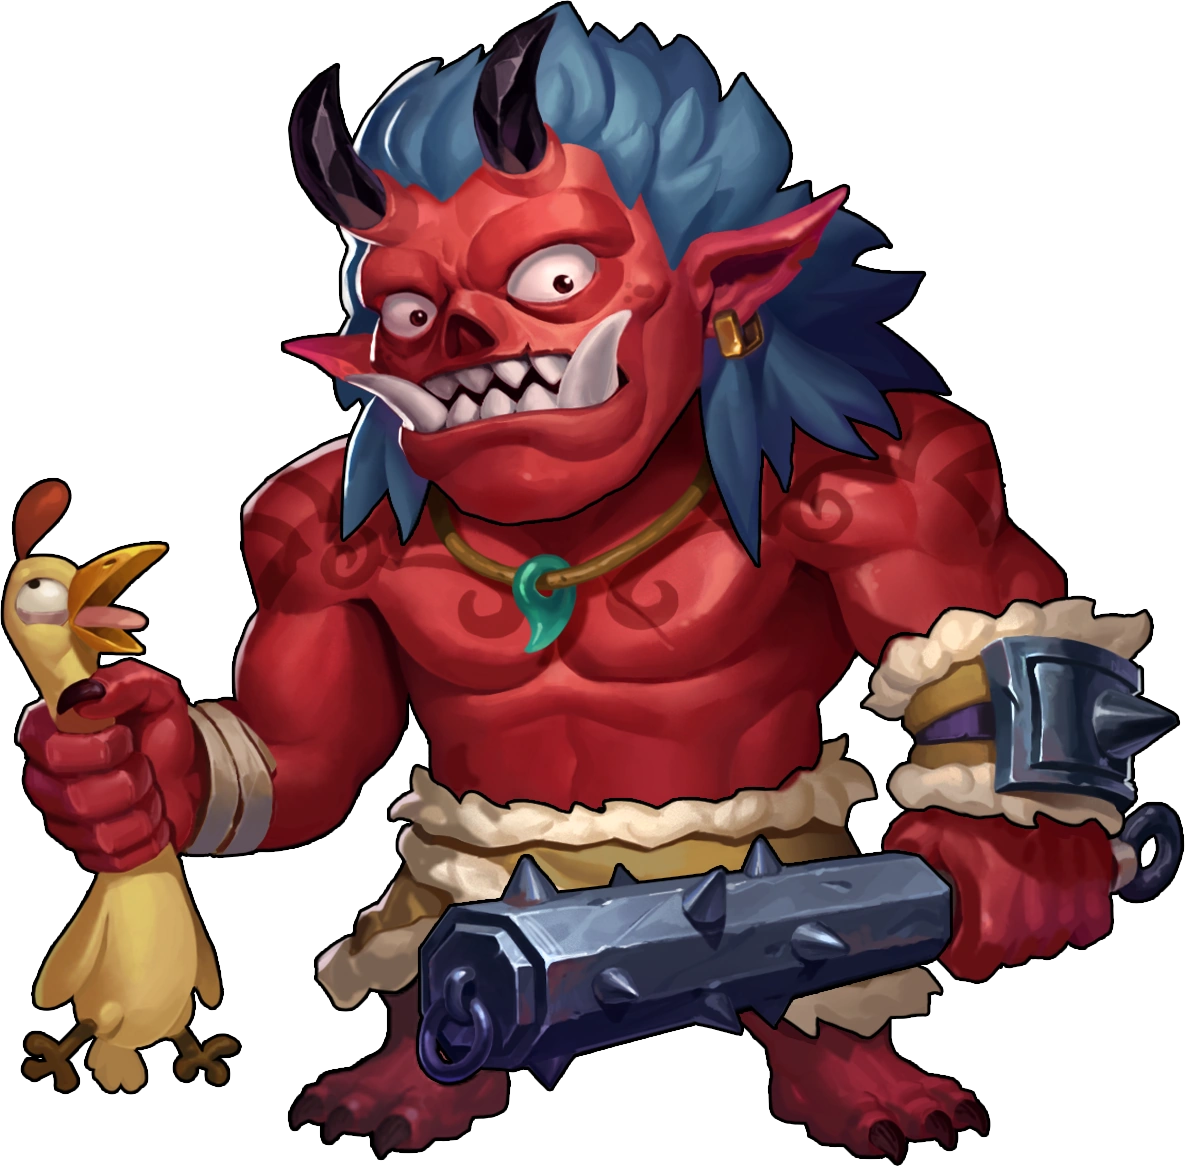

| Floor | Attack | HP | Physical Resistance |
Spell Resistance |
|---|---|---|---|---|
| 30 | 36 | 566 | 10% | 10% |
| 40 | 59 | 1123 | 10% | 10% |
| 50 | 98 | 2,169 | 10% | 10% |
| 60 | 164 | 4,065 | 20% | 20% |
| 70 | 257 | 7,509 | 20% | 20% |
| 80 | 434 | 13,644 | 20% | 20% |
| 90 | 778 | 24,566 | 30% | 30% |
| 100 | 1,312 | 41,584 | 30% | 30% |
Skills:
- Evil Intention Hammer: Launch an attack every 3 rounds, dealing triple Damages to the enemy and killing the enemy whose HP is lower than 20%
- Wildfire Shield: Lose HP by 30% each round, and cast Wildfire Shield (Lose HP by only 1 when damaged, invalid to Blood Malaria and Poison Malaria). In practice: Casts Wildfire Shield for each 30% of max HP lost. The shield requires 10 hits to dissipate.
- Evil Spirit Enchantment: Physical Resistance X%, Spell Resistance +Y%
- Soul Nourishing (From Cyan Evil Spirit): Recover HP by 3% each round
- Support (From Purple Evil Spirit): Decrease the damage suffered by 50%
Boss Minion
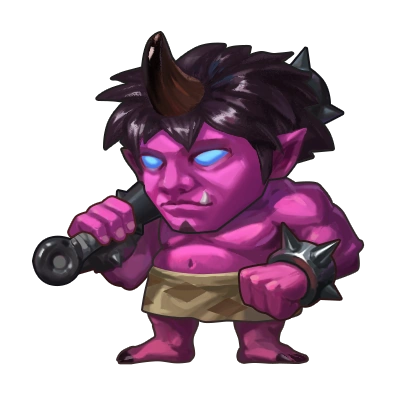

The boss is accompanied by 4 Evil Spirits, which spawns from 2 Haunted Cottages every 5 to 6 turns if there are empty tiles. These Evil Spirits do not have the same HP and Attack. The Cyan and the Purple Evil Spirit provides some buffs to the boss.
| Floor | Red | Purple | Cyan | Magenta | ||||
|---|---|---|---|---|---|---|---|---|
| Attack | HP | Attack | HP | Attack | HP | Attack | HP | |
| 30 | 12 | 47 | 10 | 57 | 11 | 52 | 13 | 42 |
| 40 | 17 | 67 | 14 | 62 | 16 | 74 | 19 | 59 |
| 50 | 29 | 109 | 22 | 137 | 25 | 123 | 32 | 96 |
| 60 | 45 | 203 | 35 | 258 | 40 | 231 | 50 | 176 |
| 70 | 79 | 384 | 60 | 490 | 69 | 437 | 88 | 331 |
| 80 | 132 | 728 | 99 | 932 | 115 | 830 | 146 | 626 |
| 90 | 231 | 1294 | 174 | 1660 | 202 | 1477 | 259 | 1111 |
| 100 | 387 | 2176 | 291 | 2794 | 339 | 2485 | 435 | 1867 |
Skills:
- Evil Spirit Possession (Red): Launch every round and bring the Corrosion effect to the enemy (Lose HP each round, the effects can be superimposed, lasting 5 rounds)
- Support (Purple): When present, Evil Spirit King decreases the Damage suffered by 50%
- Soul Nourishing (Cyan): When present, Evil Spirit King recovers HP by 3% each round
- Curse Murder (Magenta): Launch an attack every 3 rounds, dealing double Damages to the enemy
Partners
Special Summons found in the maze
- Each Partner have 4 Ability slots (Random, Selected Ability is Fixed for the whole run)
- Abilities can be General or Exclusive (Max level: 10 per Ability)
- Partners have Target Combo (Requirement: At least 2 Partners recruited)
- These partners count as persistent summons and you therefore cannot use other persistent summons except for Image of Demi-Gods and Semi-Devils that somehow doesn't count.
- The partners do not benefit from talents and effects that targets allies like for instance Paladin's Halo.


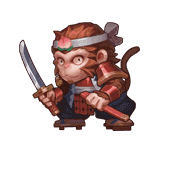


Abilities
Abilities can be upgraded to enhance effect.
Levels 2-4 uses 3 Salt Rice Ball per level
Levels 5-7 uses 4 Salt Rice Ball per level
Levels 8-10 uses 5 Salt Rice Ball per level
| Name | Benefit | General/Exclusive |
|---|---|---|
Enhance Attack |
Attack+5%
|
General |
Enhance Power |
Power+3%
|
General |
Training |
Whenever entering the next floor, 3% chance to increase the level
|
General |
Target Combo Enhancement I |
In Combo Position I, the effect of Target Combo +3%
In practice: Increase the effect of the active skill of that partner
|
General |
Target Combo Enhancement II |
In Combo Position II or III, the effect of Target Combo +2%
In practice: Increase the effect of the active skill of the other 2 partners
|
General |
Ninjitsu Art - Dodge |
While attacking, 9% chance to cast Group Blind (Lasting 3 rounds, invalid to Boss)
|
Exclusive to Weiss |
Ninjitsu Art - Pupil |
6% chance to detect a key's location each floor
|
Exclusive to Weiss |
Ninjitsu Art - Spikes |
Whenever entering the next floor, 12% chance to place Makibisi (When a new enemy appears, lose HP by 50%)
|
Exclusive to Weiss |
Ninjitsu Art - Malaria |
"Blood Malaria" Power+5%
|
Exclusive to Weiss |
Return Stroke |
While attacking, 24% chance to spurt on the enemies around
|
Exclusive to Chimpanzee |
Iron Cut |
12% chance to withstand long-range Damages for Gumball
|
Exclusive to Chimpanzee |
Air Cut |
"Eight Phases Break" Power+3%
|
Exclusive to Chimpanzee |
Sakura |
"Flying Ape Dodge" Power+5%
|
Exclusive to Chimpanzee |
Rune - Seal Force |
Defense+3
Note: Due to a nice bug, if you have a summoned ally, that defense boost is doubled for as long as that ally remains alive. |
Exclusive to Pheasant |
Rune - Meditation |
When Pheasant casts a skill, 5% chance to decrease the consumption of rice balls +1
|
Exclusive to Pheasant |
Rune - Good Luck |
Gain EP +9/12/15... each time you enter the next floor
|
Exclusive to Pheasant |
Rune - Protection |
"Light of Life" Effect+5% "Light of Life" Number of rounds +1
|
Exclusive to Pheasant |
Target Combo
The three Partners are good at cooperative fighting. When they work together to cast skills, various special effects will be generated! (The effects of Target Combo depends on the Partners' position)
It isn't really necessary to know the Combo positions, as soon as you have reached floor 3 and recruited the 3 partners, each partner has 4 combos available.
To freely change a partner's current combo, the easiest is as follow:
- Select the partner
- Click "Target Combo" button at the bottom left
- Click "Change quickly" to cycle between the 4 possible combos
When a partner has an effects that refers to "Combo Position I" actually simply refers to his own active combo whereas any effect that refers to "Combo Position II or III" refers to the combos of the other partners.
| Name | Details | Winkie Rice Ball needed | Combo Position I | Combo Position II | Combo Position III |
|---|---|---|---|---|---|
Poison Malaria |
Make all enemies lose HP each floor (the effects can be superimposed, 10 floors at most, lasting 5 rounds) | 2 | Weiss | Chimpanzee | |
Blood Malaria |
Make all enemies lose HP each floor, if enemy dies when Blood Malaria sustains, this effect infects all enemies (the effects can be superimposed, 10 floors at most, lasting 5 rounds).[notes 1] | 5 | Weiss | Chimpanzee | Pheasant |
Substitute Art |
Summon Substitute Illusion | 2 | Weiss | Pheasant | |
True - Substitute Art |
Summon Substitute Illusion, and the Illusion masters the "Self-explosion" feature, and summon only 1 time each floor | 5 | Weiss | Pheasant | Chimpanzee |
Multiple Slash |
Launch 4 slashes, to attack visible enemies (Each slash deals Damage by 30) | 2 | Chimpanzee | Weiss | |
Eight Phases Break |
Launch 6 slashes, to attack visible enemies, and Slash Damage increases by 5% successively (The first slash deals Damage by 1.2xPower) | 5 | Chimpanzee | Weiss | Pheasant |
Iaido |
Deal 3.2xPower Damages to the enemy, 50% chance to deal Damage by 2 times | 2 | Chimpanzee | Pheasant | |
Flying Ape Dodge |
Deal 4.8xPower Damages to the enemy, with Severely Injured effect, 75% chance to deal Damage by 2 times (Lasting 3 rounds) | 5 | Chimpanzee | Pheasant | Weiss |
Wind Blade |
Deal Damage to the enemy within 2 slots by 75 | 2 | Pheasant | Chimpanzee | |
Feather Dance |
Deal Damage to all enemies by 112 | 5 | Pheasant | Chimpanzee | Weiss |
Heal |
Recover HP for Gumball by 20, and decrease the Damage sustained by 31% (lasting 3 rounds) | 2 | Pheasant | Weiss | |
Light of Life |
Recover HP for Gumball by 62, and cast Life Shield (lasting 3 rounds) | 5 | Pheasant | Weiss | Chimpanzee |
Maze Occurrences
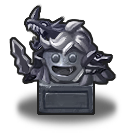
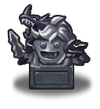
Vasuki Statue
"This is Orochi's statue. This huge body with eight heads and eight tails gives you a strong sense of oppression."
- Appears on every floor ending in "9"
- Offer alcohol 8 times in per maze run to recruit Orochi or get 20 fragments. After the 8th alcohol offering, the statue will no longer spawn for the remainder of the run.
- Offer other food items for EP, scrolls, or equipment.


Grandma
Grandma shows up on floor 1. Selecting "Ok" gives:
- 5 Salt Rice Ball and 3 Winkie Rice Ball
Selecting "Not Good":
- You are asked to reconsider


Sessho-seki
"This torii is the demarcation point between the domain of god and the world. The breath it emits is the power suppressing ghosts!"
- Main Gumiho and select "On your own" option to receive the trial item for her
- Will start fight with Tamamo-no-mae (Gumiho clone). You must defeat her 9 times in order to receive Fox Fur, Gumiho's trial item.
- Can be found F61+
- Selecting "On your own" without Gumiho as main or using a partner has different results:
- On your own: Nothing
- Weiss: Obtain Sessho-seki
- Pheasant: Pheasant gains a stat boost and one random skill level.
- Chimpanzee: Summon Tamamo-no-mae. Drops Foxtail instead of Fox Fur.


O-Kiku
"The ghost floats quietly in original place, and seems to have no offensiveness. As you approach to it, a whisper comes to your ear: "Have you seen my lost plate?""
- Can be found in F61
- Use Peony Lantern to interact then give the Qingshan Treasure Plate (Found in Haunted Cottages using God of Thieves Venture title).
- Gives 3 gems once, and a random stat buff on future interactions.


Torii
"This torii is the demarcation point between the domain of god and the world. The breath it emits is the power suppressing ghosts!"
Screen gets a slow-blinking shade. Color benefits:
- Gale (Green): HPs of all visible enemies decreased by 30% and unable to revive
- Damp (Blue): Dodges of all visible enemies decreased by 50% and unable to conduct self-explosion
- Scorching Sun (Light Orange): Attacks of all visible enemies decreased by 30% and 30% chance unable to counterattack
- Mist (Violet): All enemies cannot guard the slate


Shinto Shrine
"A huge shimenawa hangs on the gate of this Shinto shrine. You can visit this place and pray for the blessing of the god!"
Gives 1 Random Buff (only valid on that floor):
- Status Inari: Obtain 5 EP for every slate turned over
- Status Spring God: Every 5 rounds automatically cast Chain Lightning
- Status Amaterasu: All companions' Attacks increase by 30%
Gives items randomly:
- Amulet 100% chance to be immune to deadly Damage (The item is damaged after it takes effect immediately in the bag) No Equipping
- Joss Stick Use: Have a look at your fortune (awards gems (max:3), buffs stats, gives EP, or next damage to the player for that floor)

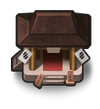
Dojo
"There is a wide range of training facilities in this spacious dojo, where you can have a good workout!"
- If Partner option is chosen, Partner will gain 1 level and possibly a random skill level.
- If "Go Yourself" is chosen, Random stats boost


Stele
"The stone tablet is engraved with all knowledge of a master"
- Partners option enhances one of the selected Partner's stat, may also increase one skill level.
- On your own - nothing except for some specific gumballs:


Cherry Tree
"This huge cherry tree has been existing here for 300 years. Travelers often come here to appreciate it." Randomly gives:
- Weiss
- Time Capsule (Go back 10 floors)
- Ronin's Corpse (Warrior Clothing and Clog or random equipment)[notes 2]
- Beast's Bone
- EP
- Nothing
- Pheasant
- Momotaro's Head Band [notes 3]
- Summon two spiders
- Wild Honey
- Hive
- Chimpanzee
- Cherry Tree Branch Use: Cast Powerful Blessing
- Self
- 2x Winkie Rice Ball + 2x Salt Rice Ball
- Cherry Blossom Petals (if Chef is in team)
Cast Armageddon to change the tree into a Burnt Tree.

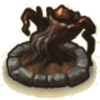
Burnt Tree
If Armageddon is used when there is a Cherry Tree, the Cherry Tree will turn into a Burnt tree.
- Gives Burnt Branch (Use: Ignition state (Deal Damage by 2-8 times when casting Fire Ball, lasting 10 rounds))


Hot Spring
"This is a huge hot spring. If you don't mind bathing with the monkeys, you may take a short break here."
- Rest - Restores HP
- With Magatama equipped, an event may trigger. Select "Ordinary Magatama" (option may read "General Magatama" to replace Magatama with Yasakani no Magatama: (Power +5, increases the effect of all spells by 10%, 10% extra damage to undeads).
- May rarely increase max HP by 20 for the run.


Sacred Tree
"In this stone shrine, a piece of driftwood is enshrined. It is said that it can attract and appease vagrant souls."
- Weiss - Beast's Bone
- Chimpanzee - Lighting damage; Get 3x Salt Rice Balls
- Pheasant - Receive 5 random souls including from Rare Enemies
- Gumball - Nothing except for some specific Gumballs:

Haunted Cottage
"Souls often hover around this haunted hut. Sometimes, there is a cold and restless atmosphere." Enter the Haunted Cottage and kill enemies guarding a Folded Screen. Items that can be obtained includes various foods and Brocade.


Ksitigahba Buddhisattva
"This is the statue of Ksitigahba Buddhisattva. It wears a bamboo hat and is covered with thick snow."
- Clean snow - Usually gives 300 EP. If you have gumballs from the following list in the current party (main or soul-link), it gives 10 fragments (one-time only) for all gumballs that qualify in the party:
- Aoluwei's Blade: Momotaro
- Canas Enlightenment: Future Cat
- Ranger's Song: Kusanagi Warrior, Masamune, Musashi, Nobunaga
- Abyss Roar: Geisha, Kairo Concubine, Kairo Monarch, Orochi
Kabashima Taro


- To heal Kabashima before he dies, you must defeat all enemies on the floor and interact with him before his timer runs out (10 turns) and give him the Elixir item found on Bamboo Princess' Corpse.
- He will give you "the location of the Dragon Palace".
- A few floors later, you will find the Dragon Palace, enter and receive 4 gems (one-time only), some gold, and other materials. (No special interaction with God of Thieves). Future visits to the Dragon Palace will only award spell scrolls and treasures (seems to be T3-5 Spells and treasures with no out-of-maze loot).
- Failing to heal him gives Empty Box.
Nightwalk Troops

"This is a grand gathering belonging to the monsters. You can follow them and may find many valuable things."
- Can (rare) steal Demon King Shoulder Pad from the Boss. Equip before "Joining the Parade" to receive one Gold Pot (one-time only) and multiple pieces of maze food.
- If the Shoulder Pad is not equipped, this will summon 3 enemies.
Rooftop (Shop)
| Item | EP Cost |
|---|---|
| Salt Rice Ball | 50 each |
| Winkie Rice Ball | 100 each |
| Three-color Dumplings | 200 |
| Takoyaki | 200 |
| Taiyaki | 400 |
| Sake | 200 |
| Oden | 400 |
| Hand-Pulled Noodles | 400 |
Corpses
| Corpse | Regular Loot | Farplane Ranger loot |
|---|---|---|
Ninja's Corpse (1x)  |
Suffering (a.k.a Kunai) item | Neji's Soul: Cast Big Turn Palm (Deal Damage to the enemy by 80 each round and be immune to all long-range Damages, lasting 5 rounds) |
Yin Yang Master's Corpse (1x)  |
Magatama and Charm Envelope | Soul of Abe no Seimei: Directly exile all enemies (Invalid to BOSS) |
Bamboo Princess' Corpse (1x)  |
Elixir | Kaguya's Soul: Power+3
All Light Spells' effect +5% |
New Saburo's Corpse (1x)  |
Peony Lantern | Shin Saburo's Soul: Attack+2 Power+2 |
Ronin's Corpse (Multiple)  |
Warrior Clothing and Clog (1x, from Cherry Tree) | Broken Traveler's Soul: 50 - 100 EP
or Complete Traveler's Soul: 100 - 200 EP |
| EP | ||
Samurai's Corpse (1x)  |
Damselfly Spear | Soul of Honda Tadakatsu: Tonbogiri (Damselfly Spear), the ability is enhanced |
Kintaro's Corpse (1x)  |
Gold Bellyband | Soul of Sakata Kintoki: Gold Bellyband, the ability is enhanced |
| Kabashima Taro's Corpse (1x) | Empty Box | Kabashima Taro's Soul: Empty Box, the ability is enhanced. Enhance 200EP. |
One-inch Boy's Corpse (1x)  |
Magical Mallet | One-Inch Boy's Soul: Obtain 3 Hex |
Out-of-Maze Loot
Get these items in the maze and use them outside:
- Heart of Ancient Tree (boss loot)
- Blue Crystal Gel, Fairy Spring, Fantasy Fruit and Star Mint (floor loot)
- Tower Flower, Crystal Egg, Evil Pumpkin
- Gumball Pot as boss loot
- Melee Relics and Adventure Relics
- Lots of one-time special rewards (see above)
- And all the usual (Fruit of World Tree, main and hidden Gumball fragments, coins, whatever you can get with your Compass, whatever you can get from your gumballs exclusive skills, Rare Enemies and Divine Dragon Wishes ...)
For raid results, see Bandit's Raid#Result Table
Title specific loots
For items available here through the God of Thieves title, see here.
For souls available here using the Farplane's Bow and Farplane Arrow, see here.
Quests / DP
| Description | DP | Notes | |
|---|---|---|---|
| S | Get Kunai (named Suffering) x3 | 2 | From Ninja's Corpse |
| S | Get Elixir x3 | 2 | From Bamboo Princess' Corpse |
| S | Get Gold Bellyband x3 | 2 | From Kintaro's Corpse |
| S | Get Damselfly Spear x3 | 2 | From Samurai's Corpse |
| S | Get Peony Lantern x3 | 2 | From New Saburo's Corpse |
| S | Completely collect and equip the Momotaro Suit | 3 | Select Weiss in Cherry Tree interaction to randomly get Ronin's Corpse appear, it'll give Armor and Boots; Select Pheasant in Cherry Tree interaction to randomly receive the Helm |
| S | Use Magical Mallet x3 | 2 | From One Inch Boy's Corpse |
| S | Use Charm Envelope x3 | 2 | From Yin Yang Master's Corpse |
| G | Use Takoyaki x15 | 2 | |
| G | Use Three-color Dumplings x15 | 2 | |
| G | Use Sake x15 | 2 | |
| G | Use Oden x15 | 2 | |
| G | Use Hand-Pulled Noodles x15 | 2 | |
| G | Use Taiyaki x15 | 2 | |
| G | Kill Lantern Demon x200 | 1 | |
| G | Kill Underwater Monster x200 | 1 | |
| G | Kill Nurikabe (Painted Wall) x200 | 1 | |
| G | Kill Coprinus x200 | 1 | |
| G | Kill Bean Monster x200 | 1 | |
| G | Kill Ittan-momen x200 | 1 | |
| G | First kill boss | 3 | |
| G | Kill boss x5 | 3 | |
| G | Mop up Hunted Cottage x30 | 2 | |
| S | Reach floor 60 | 2 | |
| S | Reach floor 70 | 3 | |
| S | Reach floor 80 | 3 | |
| G | Rummage Ronin's Corpse x10 | 1 | |
| G | Purchased goods in Rooftop x100 | 1 | |
| G | Partner kills the enemy x200 | 3 | |
| G | Use Target Combo to kill the enemy x30 | 2 | |
| G | All partners reach level 10 | 2 | |
| G | All partners reach level 20 | 3 | |
| G | All partners reach level 30 | 3 | |
| G | All abilities of Weiss reaches level 10 | 2 | |
| G | All abilities of Chimpanzee reaches level 10 | 2 | |
| G | All abilities of Pheasant reaches level 10 | 2 | |
| G | Dispatch Weiss to explore maze buildings x20 | 1 | |
| G | Dispatch Chimpanzee to explore maze buildings x20 | 1 | |
| G | Dispatch Pheasant to explore maze buildings x20 | 1 | |
| G | Obtain hidden gumball | 5 | See hidden gumball section |
Tips
- Boss tips:
- When on boss floor, you can stop the minions (Evil Spirit) from being summoned again by letting your summons (like zerglings and chess pieces) or totems take up the slots beside the boss. Making it easier to survive and kill the boss.
- A solution to Boss killing is to use Blood Malaria from Weiss. Blood Malaria effects stack when enemies die, so if you cast on all 4 minions, 4 new stacks will be applied to the boss when the minions die (this also reset the effect duration on the Boss to 5 rounds). Thereafter, additional Blood Malaria can be used to maintain the DoT and disrupting ray can be used to effectively double the boss damage while using Stoneskin and Ice Shield for survival. This can sometimes be further improved if you can make it so that some monkeys are summoned again before some other monkey(s) die from the DoT as this would ensure a further refresh of the Blood Malaria on the Boss.
- Be aware however that Blood Malaria effect uses the DoT debuff slot. Burns from Fire Ball, Wounds from Evil Dragon Bloodline and other Damage over Time effects will replace Blood Malaria.
- Save Peony Lantern until you get to F61 and encounter O-Kiku. Also, you'll need Qingshan Treasure Plate to give her which can be found via GGoT.
- Most persistent summons (Athena's, Sorcerer's cat) are forbidden once you have the 3 allies. Dharmapala's Image of Demi-Gods and Semi-Devils is allowed. There might be differences between different versions of the game. Even if allowed, you might want to avoid using persistent summons that deal damage because you want the 3 allies to be credited with kills so that their level can increase.
- Other summons like the black panther is also forbidden.
- Merchant, Gang Cadre, and other will help getting the food needed from the shops for the leveling up of the partners skills.
- To maximise the Dragon Ball gained from Magical Mallet, you can activate it at the start of a floor. If the Dball is too little, S/L and reuse the Magical Mallet on the next floor (Dball gained via Magical Mallet is randomised on each floor).
- For enemy at the bottom row with covered HP values, you can go to the activation screen of a spell (e.g. t1 lightning bolt) to temporary hide the allies ability bubble.
Notes
- ↑ Blood Malaria in practice affects all monsters present at the time of casting for 5 rounds and deals damage every round. It uses the Damage over Time debuff slot and therefore replaces and gets replaced by effects like Burn or Poison. If any monster dies from the effect, Blood Malaria is applied anew on all visible monsters. When Blood malaria is applied on a monster that already has it, the effect is increased (up to rank 10) and the timer is reset.
- ↑ Ronin's Corpse cannot be obtained unless Weiss's level is at least 15. If level is high enough, chance is around 40 to 50%
- ↑ Momotaro's Head Band cannot be obtained unless Pheasant's level is at least 15. If level is high enough, chance is around 20 to 35%