| Chaos Abyss | |
|---|---|

| |
| Type | Maze |
| Source/Unlock | Unlock with at least 560 dp after clearing Hell Frontier |
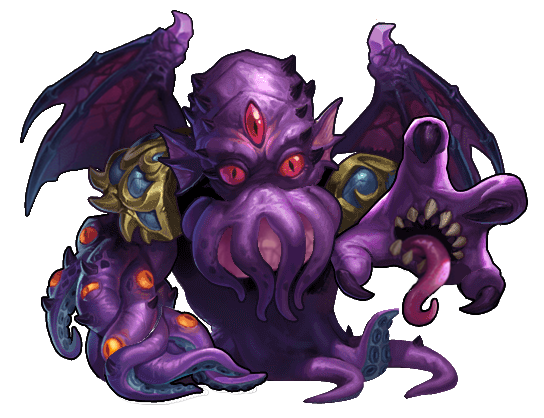
| Normal reward | Cthulhu & Cyclops gumball |
| Raid boost | Orochi |
| Raid reward | 30000 Coins |
| Gumball Specific | Gumball specific infos |
Complete this maze to receive Cthulhu Gumball
To Unlock[]
Defeat Hell Frontier maze and have 560 DP.
Note: you also receive 1 ![]() upon unlocking it.
upon unlocking it.
Hidden Gumball[]

To obtain Cyclops Gumball, you have to find all Five Monkeys and then visit their Boardroom with the Invitation Letter given by the last monkey found:
- Peter - Random Enemy, has to be defeated in 1 turn
- Yorick - Hidden in Spike Cave (Use Sentry Guard item)
- Vincent - Torture Device (Red Sanity)
- Ben - Purchase items in Devil Businessman Shop, the shop owner will propose a special deal for 1000 EP (no discount possible)
- Danny - Boss Reward from Floor 60 or higher
See Five Monkeys for details of the rewards each Monkey gives.
Story Quests[]
Destruction Land of the Gods
Floors 40 (Difficulty 48) - 2 ![]()
Rewards :
- In maze: Formula for Ancient God Curse, 1 Artisan
- Post completion Maze Reward: 1

Sneak into! Devil's Court!
Floors 45 (Difficulty 49) - 2 ![]()
Rewards :
- In maze: Formula for Spring of Mind
- Last floor reward 1 Artisan, 5 Cthulhu fragments
- Post completion Maze Reward: 1
Heart and Wisdom Test
Floors 45 (Difficulty 49) - 2 ![]()
- In maze: Formula for Hallucinogenic Reagent
- Last floor reward: 1 Artisan, 5 Cthulhu fragments, 5 Tower Flower
- Post completion Maze Reward: 1
Bloody Battle! Ancient One!
Floors 50 (Difficulty 50) - 2 ![]() - Boss fight on last floor
- Boss fight on last floor
- In maze: Cthulhu Gumball, Formula for Destruction Secret Medicine
- Boss Stats on floor 50: Attack 112, HP 2468
- Last floor reward: Cthulhu, 10x Cthulhu fragment
- Post completion Maze Reward: 1 , 3
Endless Mode (Difficulty 50) - 3 ![]()
Enemies[]
Usual Enemies[]
| Enemy | Skill | Other info |
|---|---|---|
| Dark Tentacle
Demon   |
Infect: When counterattacking, reduce the enemy's Mental by 1
Spread: For each additional same kind on the field, the infection effect is increased by 100%. |
May drop some Chaos Drives |
| Beholder
Demon   |
Eye Ray: Launch a long-range attack every 2 rounds.
Insight: When counterattacking, add Mark effect to the enemy (Damage suffered is increased by 30% for 3 rounds) |
May drop some Chaos Drives |
| Succubus
Demon   |
Charm: When present, make all creatures summoned by the enemy unable to move
Light: High Dodge Attribute (30%) |
May drop some Chaos Drives |
| Shadow Fiend
Demon   |
Soul Eater: Increase Attack by 2 and Soul Ability by 1 each round
Elegy of the Soul: Consume Soul Ability to revive at the time of death, HP recovered by 20% for each point of Soul Ability (100% HP at most, once only) |
May drop some Chaos Drives |
| Blood Seeker
Demon   |
Bloodlust: When counterattacking, add Blood-leech effect (recover HP by 30% of the Damage dealt)
Blood Rage: Attack doubles when HP drops below 50% |
May drop some Chaos Drives |
| Hidden Demon
Demon   |
Concealed Murder: Launch an attack every 5 rounds, deal triple damage
Sneak: Conceal the existence of oneself |
May drop some Chaos Drives
Can be targeted when sanity is <= 50 or Sentry Guard is active. Can always be attacked via untargeted spells like Death Ripple. |
To see more title or gumball-specific monster information, look at Chaos Abyss/Specific.
Special Enemies[]
| Enemy | Skill | Other info |
|---|---|---|
| Peter
Beast   |
Flee: Escape after 1 round
Black Technology: Immune to all control states (including Time Stop) |
Drops Special Chaos Drive Peter's Golden Finger
May appear on Turn 1 of a floor. If he flees, he will keep reappearing in later floors until killed. |
| Giant Toad
Beast   |
Frog Poison: Launch an attack per round, dealing 1.5 times damages, and add Poison effect (lose HP per round, for 3 rounds)
Tinea Skin: Physical Resistance +30% |
Drops Dirty Tinea Skin |
| Vine Cirrus
Plant   |
Thorns: Launches an attack each round | 1 spawns every turn when your sanity is <25 and there is a Devil Vine revealed.
Up to 20 spawn per Devil Vine revealed at Red Sanity. |
Boss (Old Days Dominator)[]
| Floor | Attack | HP | Physical Resistance |
Spell Resistance |
|---|---|---|---|---|
| 30 | 42 | 654 | 30% | 20% |
| 40 | 69 | 1293 | 30% | 20% |
| 50 | 113 | 2491 | 30% | 20% |
| 60 | 190 | 4664 | 40% | 30% |
| 70 | 237 | 8610 | 40% | 30% |
| 80 | 400 | ???? | 40% | 30% |
| 90 | 714 | ???? | 50% | 40% |
| 100 | ???? | ???? | 50% | 40% |
Skills:
- Spiritual Control: Launch an attack every 3 rounds, deal triple damages, and decrease Mental by 5
- Nightmare: Impose the effects according to the enemy's Mental (Effects can be superimposed)
- <=100: Decrease the enemy Mental by 1 per round
- <50: The enemy is unable to recover HP
- <25: Spiritual control can eliminate the enemy's Buff
- Dark Realm: Physical Resistance +30%, Spell Resistance +20%, and deal damage to the enemy by (?%) of Max HP (the lower the Mental, the higher the damage)
- 75 - 100: 2% of Max HP
- 50 - 74: 4% of Max HP
- 1 - 49: 6% of Max HP
When a Vine is used to kill the boss, the first time, the boss drops a Special Chaos Drive Ruler's Source Force. On subsequent kills with a Vine the boss drops a random Rank 3 Chaos Drive.
Maze Mechanics[]


Mental[]
In the abyss, your mental will be tested! The world you face will change with your mind, and when your Mental turns to be zero, you will face Death!
(When mental is lower than a certain value, Debuff is obtained)
By clicking on the Brain icon, you get a menu where can use Stone of Light or Stone of Dark to influence Mental; doing so doesn't consume a round:
- Stone of Light: Come to senses (+5 Mental)
- Stone of Dark: -5 Mental
| Sanity | Status | Effect |
|---|---|---|
| 100-75 (Blue) |
Normal | No effect |
| 74-50 (Green) |
Irritability | Reduce the recovery amount by 30% when picking up the recovery bottle |
| 49-25 (Yellow) |
Chaos | Reduce the recovery amount by 30% when picking up the recovery bottle
Encounter more kinds of traps |
| 24-1 (Red) |
Mad | Reduce the recovery amount by 30% when picking up the recovery bottle
Encounter more kinds of traps When attacking, damage fluctuates between 70-200% |
| 0 (Plaid) |
Dead | Dead as a Doornail |
Traps[]


Random tiles can be trapped with a spike trap. If you explore a tile containing one, you will take damage and -1 Mental. As your sanity goes down, you will encounter more traps. Traps can be revealed with Sentry Guard, and do not need to be exposed to clear a floor.
Chaos Drive[]


You acquire drives throughout the maze from enemies, various interactions and from the Devil Businessman's shop. Most of the time, you acquire Rank I or Rank III versions of those drives.
A bag in inventory lets you see all the drives you own. Through the use of that bag, you can also combine two identical drives into the corresponding drive of the next rank (up to rank V). Each rank increases the effect of the Chaos Drive.
The fifth tab is for Special Chaos Drives. Each special drive must be obtained in a specific manner (see table below) and cannot be upgraded. Special Chaos Drives do not have ranks but special encounters whose effects scale with the rank of a sacrificed drive will typically see those as akin to a rank V drive or maybe even slightly better.
Drives are associated to spells at the #Mysterious Platform. The effects of the drives are triggered when the associated spell is cast in the "normal" manner. Breath Chaos Drives (and maybe a few others ?) can also be triggered when the associated spell is cast through a Breath Chaos Drive effect; this is called Chaining. Spells casts through items or suits like Knight's Suit do not trigger drives associated to those spells.
| Icon | Type | Name | Effect (Rank I - V) |
|---|---|---|---|
  |
Additional Spell | Breath of Cthugha | 20/40/60/80/100% chance to cast Fire Ball additionally (can be chained at lower rate) |
  |
Additional Spell | Breath of Aphoom | 20/40/60/80/100% chance to cast Icicle additionally (can be chained at lower rate) |
  |
Additional Spell | Breath of Shaikorth | 20/40/60/80/100% chance to cast Cure additionally (can be chained at lower rate) |
  |
Additional Spell | Breath of Pazunia | 20/40/60/80/100% chance to cast Chain Lightning additionally (can be chained at lower rate) |
  |
Stat Gain | Mordiggian's Tentacle | A total of 30/25/20/15/10 enemies are killed, Attack +1 |
  |
Stat Gain | Ghatanothoa's Tentacle | A total of 30/25/20/15/10 enemies are killed, Power +1 |
  |
Stat Gain | Faugn's Tentacle | Cast the spell 30/25/20/15/10 times in total, Attack +1 |
  |
Stat Gain | Nacha's Tentacle | Cast the spell 30/25/20/15/10 times in total, Power +1 |
  |
Spell Effect | Nyogtha's Will | When casting damage spells, spell effect +60/120/180/240/300%,
obtain the inhibition effect (for 3 rounds) |
  |
Spell Effect | Knossos' Will | When casting damage spells, spell effect +40/80/120/160/200%,
consumption of spell scrolls +1 |
  |
Spell Effect | Aforgomon's Will | When casting the aid spells, spell effect +10/20/30/40/50% |
  |
Spell Effect | Shudde M'ell's Will | When casting the healing spells, 20/40/60/80/100% chance to add Shield |
  |
Extra | Ithaqua's Stare | After casting the spell, receive EP by 4/6/8/10/12 |
  |
Extra | Basatan's Stare | After casting the spell, 40/55/70/85/100% chance to recover Mental by 2 |
  |
Extra | Hgla's Stare | After casting the spell, 8/12/16/20/24% chance to obtain 1 spell scroll at random |
  |
Extra | Eihort's Stare | After casting the spell, 60/70/80/90/100% chance to place Sentry Guard |
  |
Special | Blood Wax Block | When additional spell is cast, prioritize enemy with lowest HP
(From Wax Head hidden in Spike Cave) |
  |
Special | Light Contract | After casting the spell, 20% chance to receive 1 Stone of Light (From Prayer Room God of Light when Blue - Green Sanity) |
  |
Special | Dark Contract | After casting the spell, 20% chance to receive 1 Stone of Dark (From Prayer Room God of Dark when Yellow - Red Sanity) |
  |
Special | Warmonster's Blood | When casting damage spells, spell attack range +1%[notes 1]
(From Warmonster Corpse (Red Sanity)) |
  |
Special | Giant Dragon Scale | After killing the enemy, there is a 1% chance to get a Dragon Ball
(From Vine on Yellow Sanity) |
  |
Special | Peter's Golden Finger | Rounds of the spell +2
(From Peter) |
  |
Special | Primitive Energy | 25% chance additional cast Implosion
(From Yellow Sanity Abyss Furnace - Sacrifice 6* Item) |
  |
Special | Ruler's Source Force | After casting the spell, effects of all spells cast next time +50%
(From killing Boss with Vine item or Rare Steal from Boss) |
  |
Special | Seed of Vine | After casting the spell, recover exclusive skill energy by 10 (it will be automatically destroyed after 50 cast)
From Devil Vine at Blue (and probably Green) Sanity with World Tree or Explosive Pumpkin as main (or probably any Plant Gumball) |
Maze Occurrences[]
Mysterious Platform[]


Appears revealed, adyacent or diagonal to the entry door every non-special floor. Here, you can:
- Associate Chaos Drives to your spells (One single drive to any Rank 1 to 5 spell except Portal of Earth.)
- Upgrade existing Chaos Drives tied to your spells (see below)
- Improvement of spells via Energy absorption (see below)
- Change the Chaos Drives tied to spells (the formerly associated Chaos Drive is lost)
Upgrade :
- When a spell is associated to a rune Z of rank X, you can use a rune Z of rank X to increase the association to rank X+1. (Up to a maximum of rank 5 association)
Energy Absorption:
- Available after Bloody notes from Wizard's Wreck has been used (see #Corpses)
- Each Absorption rank grant +5% effect to the spell
- Only spells with an associated Chaos Drive can be improved via absorption (even though the improvement impacts the spell itself and not the effect of the Chaos Drive).
- For spells of level 1/2/3/4/5, the first absorption rank costs 200/250/300/350/400 points and each subsequent rank costs 20/25/30/35/40 more than the previous one.
- Points for absorption improvements are granted by sacrificing Chaos Drives. You gain 20/40/80/160/320 points for sacrifices of Drives of rank 1/2/3/4/5
Abyss Furnace[]


Blue/Green Sanity:
- Upgrade one equipment from any Melee suit or Mage suit for free.
Yellow/Red Sanity:
- Convert equipment into Chaos Drives (Equipment Rank 1/2/3/4/5 -> Chaos Drive I/I/2x I/II/2x II)
- On yellow, convert 6 star or higher equipment for a chance get special Chaos Drive Primitive Energy (25% chance additional cast implosion) or 2 Chaos Drive III.
Chaotic Altar[]


Sacrifice different Chaos Drives to lose 1 sanity and achieve different effects depending on sanity level.
Blue to Green Sanity:
- Sacrifice yield a random mix of Stone of Light and Stone of Dark. One stone per rank of the drive sacrificed. Sacrificing a Special Chaos Drive will yield 7 Stones.
Yellow Sanity:
- Sacrifice yields stats gain
- Rank 1 to 3 Chaos Drive, boost one or two stats (can also boost dodge or defense). About proportional to the rank of the Chaos Drive sacrificed.
- Rank 4 Chaos Drive for +3 Attack and +30 HP or +3 Power and +30 MP or Dodge +5% or Defense +3
- Rank 5 Chaos Drive for +4 Attack, +4 Power, +40 HP, +40 MP
- Special Chaos Drive for +5 Attack, +5 Power, +50 HP, +50 MP
Red Sanity:
- 1x Rank 5 (or Special) Chaos Drive = 1x Magic Ware set equipment.
- Works as yellow sanity once all 4 Magic Ware set items are collected
Prayer Room[]


This dilapidated prayer room looks very rudimentary, but it has no impact on your prayer to the gods!
- God of Light
- Blue - Green Sanity: +10 Mental and Light Scrolls or Special Chaos Drive Light Contract
- Yellow - Red Sanity: +10 Mental
- May also give: Scepter VII
- God of Dark
- Blue - Green Sanity: -10 Mental
- Yellow - Red Sanity: -10 Mental and Dark Scrolls or Special Chaos Drive Dark Contract
Torture Device[]


Note: The setting of the Torture Device is fixed when you enter the floor. Unlike the other floor items, you cannot adjust your Sanity level and have it change between functions.
Blue to Yellow Sanity: Torture Device:
- Remove a random revealed monster from the floor.
- Cannot be used if no monster is left.
Red Sanity, Whine Instrument:
- Release a random monster or Vincent (Monkey)
- Released monster will be at a lower health, and will drop a Chaos Drive when killed
Note: It is possible to S/L on a floor with a torture device to get Vincent to appear (this may take a few tries).
Horror totem[]


Blue/Green Sanity:
- (When present, the damage all enemies suffered decreases by 20%)
- (When present all enemies recover 10% HP each round)
- Purification: -1 Mental, convert to a Purified totem, may instead recive Scepter II
If you don't get the scepter, you can do a S/L and kill a different number of enemies before purifying the totem for another chance at it.
Yellow Sanity:
- (When present, all enemies recover HP by 20% per round)
- (When present, all enemies Attack increase by 50%)
- Destroy: -1 Mental, destroys Horror totem.
Red Sanity:
- (When present, all enemies recover HP by 30% per round)
- (When present, all enemies Attack increase by 80%)
- (When present, the damage all enemies suffered decreases by 50%)
Purified Totems[]
Totem of fear:


- When present, damage suffered by all enemies increase by 10%, lasts for 15 rounds)
Soul Totem:
- When present, restore 2 HP to Gumballs' each turn (lasts for 15 rounds)
Weakness Totem:
- When present, all enemys attack -10% (lasts for 15 rounds)
Alchemy (Chaotic) Lab[]


Blue/Green Sanity, 1x/run: Alchemy Lab
- Take it away: Obtain Edward's Manuscript (Use Edward's Manuscript to gain Mechanical Arm).
Blue/Green Sanity, other times: Alchemy Lab
- Smelt: Smelt different equipment to acquire spell scrolls
Yellow/Red Sanity: Chaotic Lab
- Smelt: Smelt different equipment to acquire spell scrolls of the same rank, smelt 6 stars items on yellow sanity or lower for a chance to get Time Acceleration - Rank 6 Air Spell or 1 (limited).
- Sometimes, Alchemy Lab would explode upon smelting. This would flip open all slate along with damage to every enemy in it. Sometimes, when Lab will explode you will get 1 (limited).
Holy Well[]


Blue/Green Sanity: Holy Well
- Take a sip: Recover 30% HP/MP or Encounter Water Elf
Yellow Sanity: Polluted Spring Water
- Take a sip: -1 to sanity, Berserk status (Attack +100%, Damage suffered +30%, uses standard buff slot)
Red Sanity: Abomination Spring
- Take a sip: Mental -5, Max HP -30, Raise Random Stat
Entropy Ship[]


- Sacrifice different Chaos Drives to travel backwards in floors (3 floors per rank)
- Sacrifice Special Chaos Drive travel 20 floors back
- It only appears one per run. If you skip it, it won't reappear even with POE.
Chalk Door[]

- Requires Golden Key to interact with Chalk Door.
- Golden Key obtained by obtaining Task Book from Ophelia Wreckage, then Investigating an Evil Old Tree to make a Giant Toad appear, then feeding the Giant Toad with 3 Rotten Meat to obtain the Golden Key.
- "Unlock with Golden Key":
- First time: Gain 10 , 200k
- Subsequent runs: Spell Scrolls, Runes and Equipment
- First time: Gain 10
Withered Tree[]


Blue/Green Sanity: Withered Tree
- Break off: Gain Twig
Yellow Sanity: Doom Old Tree
- Shaking Old Tree (3 uses): Deal damage to a random enemy and yourself.
Red Sanity: Evil Old Tree
- Pick: Gain Evil Fruit
- Investigate (once only and only after finding Ophelia's Task Book): Encounter Giant Toad
- Feed 3 Rotten Meat Pieces - Gain Golden Key
- Turn aggressive with AoE and then kill Giant Toad (Warning: Giant Toad has 3,000 health and does 400 damage per round) for Golden Key and Dirty Tinea Skin
- Clown's Laughing Gas makes it leave immediately, without going hostile. It drops the key but not the skin.
Devil Vine[]


Blue sanity:
- Dig: Gain Vine & -1 to Sanity
- Touch: With Explosive Pumpkin or Sunflower (or probably any Plant gumball), gain the Special Chaos Drive Seed of Vine
Yellow Sanity: Devil Vine
- Fell: Random item (including the following special items):
- A gumball villager that gives the Special Chaos Drive Giant Dragon Scale
- Scepter V
Red Sanity: Death Vine
(The vine summons 1 vine tentacle per round up to a maximum of 20)
- Feed 1 Rotten Meat: Stops summoning vine tentacles
Extras
- Use Armageddon or The End of Destruction spells to destroy it and receive 2-3 Vine.
Spike Cave[]


Enter to fight monsters.
At the center, you'll find either a Storage Chest or a Warmonster's Corpse.
Storage Chest possible loot:
With GoT or Sentry Guard, you can find the following special interactions in addition to normal items:
- Yorick (Monkey) - Requires Sentry Guard to actually interact with to gain random spells
- The Statue of Death
- Wax Statue
- Typewriter: Manuscript full of Words


Wax Statue
- Observe: -5 Mental, Special Chaos Drive Blood Wax Block
The Statue of Death


- View: Obtain Book of the Dead - Master the Rank 6 Dark spell Call of the Dead
Typewriter


- Search: Manuscript full of Words
Loose Brick
- Search: Sentry Guard x3
Devil Businessman (Shop)[]

| Item | EP Cost |
|---|---|
| Stone of Light | 50 each |
| Stone of Dark | 50 each |
| Sentry Guard | 50 each |
| Chaos Drive Rank 1 | 100 each |
| Chaos Drive Rank 3 | 400 each |
| Scepter VI | 300 |
| Ben (Unlocks after several purchases) | 1000 |
Special Gang Cadre's blackmail result: 5x Stone of Light + 5x Stone of Dark
After several boughts, the businessman will offer an special deal for 1000EP for Ben. If the offer its accepted, the shop will disapear and the rest of items cant be bought. If you didn't buy Ben, the Devil Businessman will offer him again after another certain amount of EP spent.
'Quests'[]
Chaos Abyss has multiple 'quests' that require interactions from different maze occurrences to complete. Below are compiled lists to help players complete these 'quests'.
Five Monkeys[]
Locate all Five Monkeys and the fifth one will give you an Invitation to their Boardroom to collect plans for the hidden gumball, Cyclops. Each Monkey also gives a special reward.
- Peter - Random Enemy - Peter's Golden Finger - Special Chaos Drive
- Yorick - Hidden in Spike Cave (Use Sentry Guard item) - Random Spells
- Vincent - Torture Device (Red Sanity) - Scepter I
- Ben - Purchase items in Devil Businessman Shop, the shop owner will propose a special deal for 1000 EP (no discount possible) - Ben gives a random Chaos Drive
- Danny - Boss Level 60 or higher - Dragon Ball Radar (Receive 2-4 Dragon Balls randomly)
7-section Scepter[]
Locate all Seven pieces of the scepter and combine them to receive 7-section Scepter and the Rank 6 Light Spell - Holy Light Guardian. If you cast the spell, the 7-section Scepter is destroyed.
- Scepter I - Rescue Vincent from Torture Device (Red Sanity)
- Scepter II (Transcribes Death Ripple) - Random reward from Purifying Horror Totem (Blue/Green Sanity)
- Scepter III (Transcribes Fire Ball) - Found in chest in a Spike Cave
- Scepter IV (Transcribes Chain Lightning) - Random reward from a Mage Corpse (Red Sanity)
- Scepter V (Transcribes Earth Spike) - Random reward from Devil Vine (Yellow Sanity)
- Scepter VI (Transcribes Ice Shield) - Purchase from Devil Businessman
- Scepter VII (Transcribes Holy Bolt) - Random reward from Prayer Room (Light) (Blue/Green Sanity)
Special Chaos Drives[]
Blood Wax Block - can randomly find with GoT or Sentry Guard in a Spike Cave.
Peter's Golden Finger - attained when you defeat a randomly appearing Peter in the maze.
Light Contract - From Prayer Room God of Light when Blue - Green Sanity
Dark Contract - From Prayer Room God of Dark when Yellow - Red Sanity
Warmonster's Blood - From Warmonster Corpse (Red Sanity)
Primitive Energy - From Yellow Sanity Abyss Furnace - Sacrifice 6* Item
Giant Dragon Scale - From Vine on Yellow Sanity
Seed of Vine - From Devil Vine at Blue (and probably Green) Sanity with World Tree or Explosive Pumpkin as main (or probably any Plant Gumball)
Ruler's Special Force - From killing Boss with Vine item or Rare Steal from Boss
Rank 6 spells[]
There are 6 rank 6 spells available in Chaos Abyss. All Gumballs can cast them regardles of the scroll rank limit. They cost 0 Mp and aren't affected by power. There is no reward for collecting all of them, but each is powerful and worth obtaining.
- Gaia's Blessing Rank 6 Earth Spell - Appears randomly in Scroll Shop, costs 1000 EP
- Elf Paean Rank 6 Water Spell - Sacrifice at least a level 3 Chaos Drive to Water Elf at the Holy Well at blue/green sanity.
- The End of Destruction Rank 6 Fire Spell - Equip the full Magic Ware suit (obtained by sacrificing rank 5 or special Chaos Drives to the Chaotic Altar on Red Sanity).
- Time Acceleration Rank 6 Air Spell - Smelt 6 stars items at the Alchemy Lab at yellow sanity or lower
- Holy Light Guardian Rank 6 Light Spell - Collect all 7 pieces of the scepter (See above) and assemble.
- Call of the Dead Rank 6 Dark Spell - Obtain Book of the Dead from the Statue of Death hidden in a Spike Cave (requires GGoT or Sentry Guard)
Gaia's Blessing[]
The Rank 6 Earth spell will transport you to a room with a Lord of Elemental (Earth) with 0 Attack and 9999 HP. You will have 5 turns to deal as much damage as you can - Timestill will not buy you extra turns. The more damage you deal, the better the rewards you will receive. If you manage to deal 30k damage or more in total, you will get Earth Shield Wing Plane.
Once you have enough base Power, you can hit 30K damage by:
- Use Mysterious Platform to enhance Electrostatic Field with Aforomon's Will (red tab)
- Use Mysterious Platform to enhance Implosion with Nyogtha's Will (red tab)
- Use Gaia's Blessing
- Cast Time Acceleration
- Cast Electrostatic Field
- Cast Disruption Ray
- Cast Implosion
There is also a ranking board showing combos used to achieve top damage - Sculptor, Pandora and Orochi. A quick video on how to deal 1 million damage or more Youtube video
Corpses[]
Note - Red Sanity will stop all non-unique corpses from dropping Souls if you are using Farplane Ranger.
| Corpse | Regular Loot | Farplane Ranger loot |
|---|---|---|
Knight's Remains(1x)[notes 3]  |
Stone of Light, Stone of Dark, and random Chaos Drives | Knight's Soul: Receive 200 EP |
Ophelia Wreckage (1x)   |
Task Book | Ophelia's Soul: Fantasy state (Have a vision with a mental value of 100, valid in the target floor) |
Nail Head's Wreckage (1x)   |
Hell Cube | Nail Head's Soul: Gumball's Attack +5, Mental -20 |
Silver-haired Girl's Corpse (1x)   |
Crowbar | Nyaruko's Soul: Crowbar, improve the ability |
Ghost's Corpse (1x)   |
Steel Claw Gloves | Freddy's Soul: Steel Claw Gloves, improve the ability |
Doll's Corpse (1x)   |
Teardrop Blood Gem | Doll's Soul: Gumball's HP and MP +50, Decrease 10% EP consumption while upgrading Magic Title |
Wizard's Wreck (1x, F50+)   |
Bloody notes | Wizard's Soul: Get 5 low-rank Chaos Drive |
Warmonster's Corpse (Multiple)   |
Blue/Green Sanity: Rotten Meat, Huge Eyeball or Tusk | Broken Demon's Soul: Increase effects of all spells by 15% (target floor only)
or Complete Demon's Soul: Increase effects of all damage spells by 1% |
| Yellow Sanity: Search: 1-2 Chaos Drive and/or Rotten Meat | ||
| Red Sanity: Salvation: Gumball's Attack +1 and +1 Mental or +2 Attack. Chance of Special Chaos Drive Warmonster's Blood (1x) | NA | |
Adventurer's Remains (Multiple)   |
Blue/Green Sanity: EP |
Broken Traveler's Soul: Receive 50-100 EP at random
or Complete Traveler's Soul: Receive 100-200 EP at random |
| Yellow Sanity: Random Equipment | ||
| Red Sanity: Salvation: Gumball's HP and MP +10 to +19, and +1 Mental | NA | |
Mage's Remains (Multiple)   |
Blue/Green Sanity: Random scrolls | Broken Mage's Soul: Power +10 (target floor only)
or Complete Mage's Soul: Power +1 |
| Yellow Sanity: Random Chaos Drives | ||
| Red Sanity: Salvation: Gumball's Power +3, and +1 Mental. Chance of Scepter IV (1x). | NA |
Out-of-Maze Loot[]
Get these items in the maze and use them outside:
- Dragon's Rib (boss loot)
- Tower Flower, Crystal Egg, Evil Pumpkin
- Gumball Pot as boss loot
- Melee Relics, Magic Relics and Adventure Relics as boss loot
- And all the usual (Fruit of World Tree, main and hidden Gumball fragments, coins, whatever you can get with your Compass, whatever you can get from your gumballs exclusive skills, Rare Enemies and Divine Dragon Wishes ...)
For raid results, see Bandit's Raid#Result Table
Title specific loots[]
For items available here through the God of Thieves title, see here or check the Spike Cave section, as a maze mechanic (Sentry Guard) allows revealing hidden items without the title.
For souls available here using the Farplane's Bow and Farplane Arrow, see here.
Tips[]
- All maze occurrences affected by sanity (except Torture Device) can be adjusted on the floor itself. Torture device is not affected due to the spawn being fixed the moment you arrive at floor. The Red Sanity Torture Device and the Blue to Yellow Sanity Torture Device are considered 2 different object so not even changing Mental prior flipping tile affect this.
- Reviving with Holy Rebirth increases Mental by 15.
- Sacrificing Rank 4 Chaos Drives at the Chaotic Altar at Yellow Sanity sometimes gives you Defense +3 or Dodge +5%. It is advisable to try to get a few boosts in Defense (for lower floors) and Dodge, before switching back to sacrificing Rank 5 Chaos Drives.
- Note that at 50 Mental, your status is green but you still can see the Hidden Demon.
- Torture device may be used to kill a Hidden Demon when its hidden.
- Shadow fiend dosent revive when killed by Torture device.
- While Hidden Demon is hidden, he doesn't guard nearby slates.
- If you have the full Magic Ware set, you can use Death Vine at Red Sanity to grind for stats, as it spawns 20 Death Vines, which counts for two-thirds of the Magic Ware stat boost requirement.
- For the 30k damage quest, the damage can be spread over multiple targets. Thus, one method of clearing it can be done using Future Cat gumball. First, find a floor with a Death Vine at Red Sanity, and use Earthquake to flip all the tiles. Waste 20 turns to allow all Death Vines to spawn. Then use Electrostatic Field, Shrinking Light (all target Disrupting Ray from Future Cat), then Death Ripple. Having equipment to boost the spells, like Great Druid's Cloak or Nether Boots help as well.
- For calculation:
- Mob number: 5(assume minimum)+20(vinespawn) = 25
- Minimum damage necessary per target: 30000/25= 1200
- Disrupting ray multiplier(assume minimum)= +100%
- Damage per target required after Disrupting ray: 1200/2(from 200% power)= 600
- Electrostatic Field multiplier(assume minimum):20%
- Base damage needed prior to buff: 600*5/6= 500
- (optional) Base damage required after great druid cloak boost: 500/3 = 166.666...
Quests / DP[]
Kill level 100 boss for one time Boss Package worth 20x Cyclops ![]() and 20x Dragon's Rib.
and 20x Dragon's Rib.
| Description | DP | Notes | |
|---|---|---|---|
| S | Get Teardrop Blood Gem x3 | 2 | From Doll's Corpse |
| S | Get Hell Cube x3 | 2 | From Nail Head's Wreckage |
| S | Get Steel Claw Gloves x3 | 2 | From Ghost's Corpse |
| S | Get Crowbar x3 | 2 | From Silver-haired Girl's Corpse |
| S | Complete the task of Ophelia | 3 | From Ophelia Wreckage. Red Sanity: Evil Old Tree, feed frog 3 meat, or aoe to turn agressive. |
| S | Completely collect and equip the Magic Ware suit | 3 | From Chaotic Altar |
| G | Use Rotten Meat x10 | 1 | From Warmonster's Corpse at blue sanity |
| G | Use Huge Eyeball x10 | 1 | From Warmonster's Corpse at blue sanity |
| G | Use Tusk x10 | 1 | From Warmonster's Corpse at blue sanity |
| G | Use Evil Fruit x10 | 1 | From Withered Tree at red sanity |
| G | Use Sentry Guard x10 | 1 | Buy from merchant or find in cave |
| G | Use Stone of Light to recover Mental x20 | 1 | From merchant, caves, chaotic altar at green/blue sanity... |
| G | Use Stone of Dark to reduce Mental x20 | 1 | From merchant, caves, chaotic altar at green/blue sanity... |
| G | Use Vine to kill the enemy x30 | 2 | Get from Devil Vine at Blue/Green sanity |
| G | Kill Dark Tentacle x200 | 1 | |
| G | Kill Beholder x200 | 1 | |
| G | Kill Succubus x200 | 1 | |
| G | Kill Shadow Fiend x200 | 1 | |
| G | Kill Blood Seeker x200 | 1 | |
| G | Kill Hidden Demon x200 | 1 | |
| G | Kill first BOSS | 3 | |
| G | Kill BOSS x5 | 3 | |
| G | Clean up the Spike Cave x30 | 2 | |
| S | Reach Floor 70 of the maze | 2 | |
| S | Reach Floor 80 of the maze | 3 | |
| S | Reach Floor 90 of the maze | 3 | |
| G | Trigger the trap x30 | 1 | |
| G | Buy items in Devil Businessman x50 | 1 | |
| G | Synthesize Rank 5 Chaos Drive x10 | 3 | |
| G | Trigger the chase spell 3 times when casting spell | 2 | Have purple chaos drives link to each other or one spell link to itself with a purple chaos drive (use 100%) |
| G | Deal damage by 30,000 in a single round of spell casting | 2 | Can be done at any floor of the maze. |
| G | Get any 5 special Chaos Drive | 3 | You need to find 5 Special Drives during a run. You do not however need to own them at the same time. Sacrificed drives still count for this. |
| G | Master Rank 6 Water Spells | 3 | Sacrifice at least a level 3 Chaos Drive at the pool when the water elf appears (50+ sanity needed)l |
| G | Master Rank 6 Earth Spells | 3 | Rank 6 scroll appears at random in the spell shop. Cost 1000 EP |
| G | Master Rank 6 Fire Spells | 3 | Equip the full maze suit (obtained by sacrificing rank 5 chaos drives to the pentagram on Red Sanity) |
| G | Master Rank 6 Air Spells | 3 | Smelt 6 stars items on yellow sanity or lower at the Alchemy Lab |
| G | Master Rank 6 Light Spells | 3 | Collect all 7 pieces of the scepter and assemble |
| G | Master Rank 6 Dark Spells | 3 | Obtain book of the Dead from the Statue of Death (looks like Aioria) (Requires GGoT/Sentry Guard) |
| G | Obtain hidden Gumball | 5 | Find all 5 monkeys and use the invitation item. |
Notes[]
- ↑ Warmonster's Blood increase by 1 the range of the damaged spell it is associated with. For instance, if used on Lightning Bolt, that spell will now damage the target creature as well as any creatures horizontally or vertically immediately next to it.
- ↑ Note: Casting Elf Paean will remove any active Little Demon and of course, Casting Little Demon when Elf Paean is active will remove it as well.
- ↑ Can be found a second time during story quest
Bug?
If you equip 7-section scepter then unequip it without casting the rank 6 light, the scepter will return to inventory with 1 piece missing; some piece could be regained the same way you gain it first time. be warned though, this will also cancel the rank 6 Light mastery DP quest(at least mine canceled)
also if you shop at devil businessman, there is a chance your gumball window will stay there instead of disappearing. this will obstruct you from selecting your mental bar(the hitbox smaller)