m (→Allies) |
|||
| (22 intermediate revisions by 3 users not shown) | |||
| Line 13: | Line 13: | ||
[[File:Dark_Dragon.png|thumb|150px]]To get the [[Dark Dragon]] gumball |
[[File:Dark_Dragon.png|thumb|150px]]To get the [[Dark Dragon]] gumball |
||
*Use [[Death Knight]] as leader (you'll need his item) |
*Use [[Death Knight]] as leader (you'll need his item) |
||
| − | *Upgrade three maze items to max (lvl 10), then use |
+ | *Upgrade three maze items to max (lvl 10), then use [[Bone Staff]] to summon Drake. |
*Let the [[Bone Staff|Drake]] die and collect one [[Dragonling Skull]]. |
*Let the [[Bone Staff|Drake]] die and collect one [[Dragonling Skull]]. |
||
**Drake needs to be summoned on each floor since it does not travel to the next floor. |
**Drake needs to be summoned on each floor since it does not travel to the next floor. |
||
**After an enemy kills the drake (like the Boss), another drake can be summoned on the same floor. |
**After an enemy kills the drake (like the Boss), another drake can be summoned on the same floor. |
||
| − | *When you meet the dark dragon statue (random floor after obtaining one Skull), sacrifice [[Undead Contract (Treasure)|Undead Contract]] and Dragonling Skull at altar to get |
+ | *When you meet the dark dragon statue (random floor after obtaining one Skull), sacrifice [[Undead Contract (Treasure)|Undead Contract]] and Dragonling Skull at altar to get [[Dark Dragon]] (or {{Cost|20|Fragments}} if you have it already). Putting skull only will net you {{Cost|1|Fragments}}. |
==Enemies== |
==Enemies== |
||
| Line 83: | Line 83: | ||
{| class="article-table" |
{| class="article-table" |
||
| + | |+Nightmare Dragon |
||
| + | |+''Undead'' |
||
!Floor |
!Floor |
||
| ⚫ | |||
!HP |
!HP |
||
| + | !Nightmare<br> Shield Def |
||
| ⚫ | |||
| ⚫ | |||
|- |
|- |
||
|30 |
|30 |
||
| + | |20 |
||
|401 |
|401 |
||
| − | | |
+ | |1 |
| ⚫ | |||
|- |
|- |
||
|40 |
|40 |
||
| − | |807 |
||
|34 |
|34 |
||
| − | | |
+ | |807 |
| ⚫ | |||
|- |
|- |
||
|50 |
|50 |
||
| ⚫ | |||
|58 |
|58 |
||
| ⚫ | |||
| ⚫ | |||
| ⚫ | |||
|- |
|- |
||
|60 |
|60 |
||
| ⚫ | |||
|98 |
|98 |
||
| ⚫ | |||
| ⚫ | |||
| ⚫ | |||
|- |
|- |
||
|70 |
|70 |
||
| − | |5464 |
||
|155 |
|155 |
||
| + | |5,464 |
||
| ⚫ | |||
| + | |2 |
||
|- |
|- |
||
|80 |
|80 |
||
| + | |262 |
||
|9,937 |
|9,937 |
||
| − | | |
+ | |2 |
| ⚫ | |||
|- |
|- |
||
|90 |
|90 |
||
| ⚫ | |||
|471 |
|471 |
||
| ⚫ | |||
| ⚫ | |||
| + | |3 |
||
|- |
|- |
||
|100 |
|100 |
||
| + | |796 |
||
|30,311 |
|30,311 |
||
| − | | |
+ | |3 |
| ⚫ | |||
|} |
|} |
||
Skills |
Skills |
||
| − | *'''Dragon's Breath''': Launch attack every 4 rounds to cause 200% damage to enemies and bring corrosive effect (halve attack and lose |
+ | *'''Dragon's Breath''': Launch attack every 4 rounds to cause 200% damage to enemies and bring corrosive effect (halve attack and lose X HP each round, lasts 3 rounds). X is 80% of the Boss' attack at the time of casting. |
| − | *'''Nightmare Shield''': Physical |
+ | *'''Nightmare Shield''': Physical Resistance +50%, Spell Resistance +50%. Shield can be destroyed by attacks by undead creatures. |
| + | **Shield may require multiple attacks from '''Skeleton Hound''' to break. See above table for number of attacks require to break shield. |
||
*'''Maniac''': Double attack when Nightmare Dragon Whelp is visible |
*'''Maniac''': Double attack when Nightmare Dragon Whelp is visible |
||
| ⚫ | |||
| + | <font size="3"><u>Boss Minions</u></font> |
||
| ⚫ | |||
| + | |||
| ⚫ | |||
| ⚫ | |||
| + | |||
| + | [[File:龙蛋.png|thumb|right|x80px]] |
||
| + | [[File:梦魇幼龙.png|thumb|right|x80px]] |
||
| + | {| class="article-table" |
||
| + | |+4 Nightmare Dragon Whelp |
||
| + | |+''Undead'' |
||
| + | !Floor |
||
| + | !Attack |
||
| + | !HP |
||
| ⚫ | |||
| ⚫ | |||
| + | |30 |
||
| + | |5 |
||
| + | |34 |
||
| ⚫ | |||
| ⚫ | |||
| + | |40 |
||
| + | |14 |
||
| + | |54 |
||
| ⚫ | |||
| + | |- |
||
| + | |50 |
||
| + | |22 |
||
| + | |99 |
||
| + | |7 |
||
| + | |- |
||
| + | |60 |
||
| + | |41 |
||
| + | |196 |
||
| + | |6 |
||
| + | |- |
||
| + | |70 |
||
| + | |60 |
||
| + | |385 |
||
| + | |6 |
||
| + | |- |
||
| + | |80 |
||
| + | |127 |
||
| + | |743 |
||
| + | |6 |
||
| + | |- |
||
| + | |90 |
||
| + | | |
||
| + | | |
||
| + | |5 |
||
| + | |- |
||
| + | |100 |
||
| + | |374 |
||
| + | |2,251 |
||
| + | |5 |
||
| + | |} |
||
| + | |||
| + | ==Allies== |
||
| ⚫ | |||
| + | |||
| + | {| class="mw-collapsible mw-collapsed article-table sortable" style="width: 100%;" cellspacing="1" cellpadding="1" border="0" |
||
| + | |- |
||
| + | ! width="80px" | Ally |
||
| + | ! width="5%" | Type |
||
| + | ! width="60%" | Ability |
||
| + | ! width="20%" | Summoned by |
||
| + | |- |
||
| + | |'''Skeleton Husky'''[[File:Skeleton_Husky.PNG|thumb|left|80px]] |
||
| + | | Single Floor |
||
| + | |'''Bite''': X% Chance of Blood Leech when attacking (Transfer 100% of damage to HP). |
||
| + | X is [[Scourge Bone Chime]] level *10 |
||
| + | |||
| + | Inherits your dodge skill. |
||
| + | |Use [[Bone Staff]] |
||
| + | |- |
||
| + | |'''Skeleton Drake'''[[File:Skeleton_Drake.PNG|thumb|left|80px]] |
||
| + | | Single Floor |
||
| + | |'''Bite''': 30% chance of Blood Leech when attacking (Transfer 100% of damage to HP) |
||
| + | '''Thump''': 25% chance to cause 200% damage when attacking |
||
| + | |||
| + | Inherits your dodge skill. |
||
| + | |||
| + | Note: May drop [[Dragonling Skull]] when killed. |
||
| + | |Use [[Bone Staff]] when wearing fully upgraded [[Undead Armor]], [[Lich's Bone Boots]], and [[Scourge Bone Chime]]. |
||
| + | |} |
||
| + | |||
| ⚫ | |||
| + | ===Various Occurrences=== |
||
| ⚫ | |||
[[image:Undead Experiment Table - Boots.png|right|thumb|x70px|Boots table]] |
[[image:Undead Experiment Table - Boots.png|right|thumb|x70px|Boots table]] |
||
The Undead Experiment Table appears on every non-boss floor and allows you to forge and is used to upgrade the Maze-specific equipment. It cycles in the order of Bone Staff, Scrouge Bone Staff, Lich Bone Boots and Undead Armor between floors. Do note, the upgrade succession rate falls greatly as the level of equipment goes higher. Each equipment requires 10 successful upgrades to reach the maximum level. |
The Undead Experiment Table appears on every non-boss floor and allows you to forge and is used to upgrade the Maze-specific equipment. It cycles in the order of Bone Staff, Scrouge Bone Staff, Lich Bone Boots and Undead Armor between floors. Do note, the upgrade succession rate falls greatly as the level of equipment goes higher. Each equipment requires 10 successful upgrades to reach the maximum level. |
||
| Line 144: | Line 231: | ||
*a consumable that creates a floor limited undead ally. |
*a consumable that creates a floor limited undead ally. |
||
*[[Scourge Bone Chime]] - Skull x3, Breastbone x3 |
*[[Scourge Bone Chime]] - Skull x3, Breastbone x3 |
||
| − | *Gives up to +10 Power, increases skeleton ally's ''Leech'' ability, grants immunity to ''Poison'' (at level 5+) and a 10% chance to put a very weak ''Poison'' effect on the enemy when attacking.<ref group="notes">The ''Poison'' effect placed by [[Scourge Bone Chime]] is presumed to use the ''Damage over Time'' debuff slot.</ref> |
+ | *Gives up to +10 Power, increases skeleton ally's ''Leech'' ability, grants immunity to ''Poison'' (at level 5+) and a 10% chance to put a very weak ''Poison'' effect on the enemy for 3 rounds when attacking.<ref group="notes">The ''Poison'' effect placed by [[Scourge Bone Chime]] is presumed to use the ''Damage over Time'' debuff slot.</ref> |
*[[Lich's Bone Boots]] - Skull x3, Shin bone x3 |
*[[Lich's Bone Boots]] - Skull x3, Shin bone x3 |
||
| − | *Gives up to +10 Attack, increases skeleton ally's Attack, grants immunity to ''Curse'' (at level 5+) and a 10% chance to put a 50% attack reduction curse on the enemy when attacking.<ref group="notes" name="slot"/> |
+ | *Gives up to +10 Attack, increases skeleton ally's Attack, grants immunity to ''Curse'' (at level 5+) and a 10% chance to put a 50% attack reduction curse on the enemy for 4 rounds when attacking.<ref group="notes" name="slot"/> |
*[[Undead Armor]] - Breastbone x3, Shin bone x3 |
*[[Undead Armor]] - Breastbone x3, Shin bone x3 |
||
*Gives up to 10 defense, increases skeleton ally's HP and gives 10% chance to cast ''[[Disrupting Ray]]'' when attacking<ref group="notes" name="slot">It is worth noting that both the ''Curse'' effect (placed by [[Lich's Bone Boots]]) and the ''Disrupting Ray'' (placed by [[Undead Armor]]) use the standard debuff slot and will therefore remove most debuffs currently on the enemy including better ones like stuns or the normal [[Curse]] spell.</ref> |
*Gives up to 10 defense, increases skeleton ally's HP and gives 10% chance to cast ''[[Disrupting Ray]]'' when attacking<ref group="notes" name="slot">It is worth noting that both the ''Curse'' effect (placed by [[Lich's Bone Boots]]) and the ''Disrupting Ray'' (placed by [[Undead Armor]]) use the standard debuff slot and will therefore remove most debuffs currently on the enemy including better ones like stuns or the normal [[Curse]] spell.</ref> |
||
| − | === |
+ | ====Land of Bones==== |
| − | [[File:Skeleton_Husky.PNG|thumb|left|130px]][[File:Skeleton_Drake.PNG|thumb|130px]]when you use ''bone staff'' you will summon a floor limited: ''Skeleton H'usky'' If you are wearing maxed [[Undead Armor]], [[Lich's Bone Boots]], and [[Scourge Bone Chime]], you get a ''Skeleton Drake'' undead ally instead. |
||
| − | |||
| ⚫ | |||
| − | |||
| − | ===Land of Bones=== |
||
[[File:Cave_Grave.png|right|thumb|x70px|Land of Bones]] |
[[File:Cave_Grave.png|right|thumb|x70px|Land of Bones]] |
||
Fight some enemies inside to find: |
Fight some enemies inside to find: |
||
| Line 162: | Line 244: | ||
*Skull Altar (See corpses section) |
*Skull Altar (See corpses section) |
||
| − | ===Emily's Grave=== |
+ | ====Emily's Grave==== |
[[File:Emily's_Grave.png|right|thumb|x70px]] |
[[File:Emily's_Grave.png|right|thumb|x70px]] |
||
| − | At Emily's Grave, you can submit any Ring equipment. |
+ | At Emily's Grave, you can submit any Ring equipment. Submitting the [[Diamond Ring]] obtained from a Pile of Bones to obtain [[Wedding Dress]], which gives you a [[Pandora]] fashion. On subsequent runs, you will get 3 [[Hex]] and 1 [[Implosion]] scroll. |
| + | |||
| + | If you submit another ring: |
||
| + | * Rank 1 to 3: 150 EP |
||
| + | * Rank 4 to 5: 6 bones + 1x [[Cross]] |
||
| + | * Rank 6 and more: 3x [[Hex]] + 1x [[Implosion]] |
||
| − | Note: Pandora does not need to be the main or soul-linked gumball but you must have her unlocked or you will just get |
+ | Note: Pandora does not need to be the main or soul-linked gumball to get the fashion but you must have her unlocked or you will just get the spells. |
===Corpses=== |
===Corpses=== |
||
| Line 189: | Line 276: | ||
|- |
|- |
||
| rowspan="3"|'''Pile of Bones''' (Multiple) [[File:Huge_Bones.png|thumb|center|x60px]] |
| rowspan="3"|'''Pile of Bones''' (Multiple) [[File:Huge_Bones.png|thumb|center|x60px]] |
||
| − | | rowspan="3"| |
+ | | rowspan="3"| 2/3 bones (80% chance to get 2) and get ''Poisoned''<br /><br /> Get [[Diamond Ring]] (once) on 3rd pile searched or first pile after floor 90. |
|[[Broken Scoundrel's Soul]]: Cast [[Stoneskin]] |
|[[Broken Scoundrel's Soul]]: Cast [[Stoneskin]] |
||
|- |
|- |
||
| Line 234: | Line 321: | ||
==Tips== |
==Tips== |
||
* Always try to have two [[Bone Staff]]s before entering a boss floor. Use the first to deal double damage to the eggs. Once the Dragon Whelps are gone, use the other to remove the Boss' shield. |
* Always try to have two [[Bone Staff]]s before entering a boss floor. Use the first to deal double damage to the eggs. Once the Dragon Whelps are gone, use the other to remove the Boss' shield. |
||
| − | * [[Farplane's Bow]] is mostly useless |
+ | * [[Farplane's Bow]] is mostly useless as only the BOSS and the Necromancer have [[:category:Souls|Souls]]. The [[Demon Hunter (Title)]] can still be useful if you choose the [[Great Elf King]] or [[Legendary Hunter]] paths. |
* Given the relatively good items you'll forge, it is probably best not to take an artifact for the slots Armor, Feet and Treasure. (Treasure is mostly ok if you are immune to poison). |
* Given the relatively good items you'll forge, it is probably best not to take an artifact for the slots Armor, Feet and Treasure. (Treasure is mostly ok if you are immune to poison). |
||
| + | * To max the pieces of equipment, take [[Farplane Ranger]] ([[Farplane's Lantern]]'s path) for [[Frankenstein's Soul]]. Don't raise the [[Undead Armor]]. When you fail on updating the boots or [[Scourge Bone Chime]] and don't want to wait for a S/L30, do a simple S/L then "consume" the bad dice roll to raise the [[Undead Armor]] by just 1 level when you next see the proper bench. With your armor at very low level, there is a good chance that the same bad roll that wasn't enough to raise a high level equipment will be enough for a low level one. Once you have maxed the boots and chime and have enough bones at hand, use the [[Frankenstein's Soul]] when you next encounter the altar for the armor. You'll probably still need one decent [[Portal of Earth]]. |
||
| − | * [[Farplane's Lantern]] is pretty useful |
||
| − | + | *The piles of bones are counted as corpses |
|
| − | + | *The soul from Huge Remains (Frankenstein's monster) gives 100% success rate at the altar on one floor. |
|
| − | + | * [[Wirt's Soul]] (early floor corpse that gives you his leg) will transport you to Tristan. Fight some angry cows an collect parts of the [[Bull Demon King (Suit)|Bull Demon King]] equipment set. Getting the whole is however impossible so you might not want do this more than once. |
|
| − | **See [[Farplane Soul List#Borderland|Farplane Soul List]] |
||
==Quests / DP== |
==Quests / DP== |
||
Revision as of 11:04, 16 June 2020
| Borderland | |
|---|---|

| |
| Type | Maze |
| Source/Unlock | Unlock with at least 30 dp after clearing Lost Temple |
| Normal reward | Bandit & Dark Dragon gumball |
| Raid boost | Franken |
| Raid reward | Mithril, Arcane Crystal +2 |
| Gumball Specific | Gumball specific infos |
Finish this maze to get the Bandit gumball
Hidden Gumball
To get the Dark Dragon gumball
- Use Death Knight as leader (you'll need his item)
- Upgrade three maze items to max (lvl 10), then use Bone Staff to summon Drake.
- Let the Drake die and collect one Dragonling Skull.
- Drake needs to be summoned on each floor since it does not travel to the next floor.
- After an enemy kills the drake (like the Boss), another drake can be summoned on the same floor.
- When you meet the dark dragon statue (random floor after obtaining one Skull), sacrifice Undead Contract and Dragonling Skull at altar to get Dark Dragon (or 20
 if you have it already). Putting skull only will net you 1
  .
.
Enemies
Usual Enemies
| Enemy | Skill | Other info |
|---|---|---|
| Skeleton Hound
Undead   |
Venom: While countering, inflicts Poison effect (Lose HP each round, lasts for 3 rounds) | May drop Shin Bone |
| Skeleton Swordsman
Undead   |
Curse: While countering, inflicts Curse effect (decrease Attack by 50%, lasts for 3 rounds) | May drop Breastbone |
| Skeleton Warlock
Undead 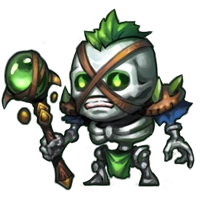  |
Death Pact: At the time of death, increase Attack and HP of all visible companions. | May drop Skull |
| Calamity Pumpkin
Undead   |
Self-explode: Explode after 3 rounds and cause 400% damage | |
| Necromancer
Undead   |
Magic Missiles: Launches a long-range attack every 2 rounds.
Necormancy: All friendly skeletons present can revive once. |
|
| Dragon Egg
Undead 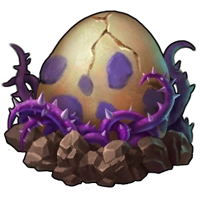  |
Hard Shell: Immune to all spells, loses 1 HP when attacked (2HP when attacked by undead creature)
Hatch: Hatch Nightmare Dragon Whelp after 5-8 rounds |
Boss Minion
Start with 4HP |
| Nightmare Dragon Whelp
Undead 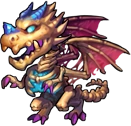  |
Breath: Launch a long-range attack every 2 rounds | Boss Minion
Hatch from Dragon Egg |
To see more title or gumball-specific monster information, look at Borderland/Specific.
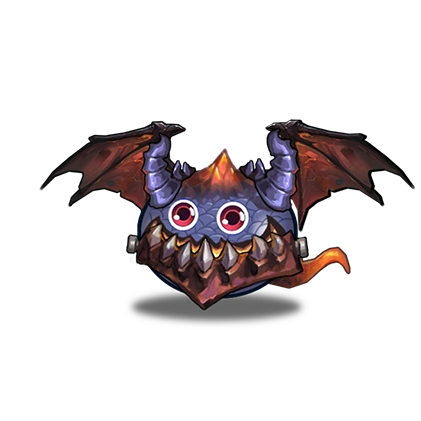
Boss (Nightmare Dragon)
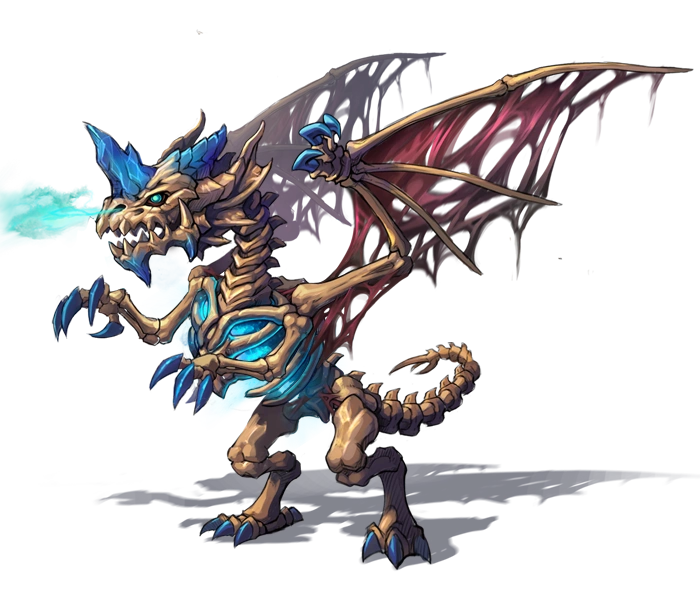
| Floor | Attack | HP | Nightmare Shield Def |
|---|---|---|---|
| 30 | 20 | 401 | 1 |
| 40 | 34 | 807 | 1 |
| 50 | 58 | 1,570 | 1 |
| 60 | 98 | 2,953 | 2 |
| 70 | 155 | 5,464 | 2 |
| 80 | 262 | 9,937 | 2 |
| 90 | 471 | 17,901 | 3 |
| 100 | 796 | 30,311 | 3 |
Skills
- Dragon's Breath: Launch attack every 4 rounds to cause 200% damage to enemies and bring corrosive effect (halve attack and lose X HP each round, lasts 3 rounds). X is 80% of the Boss' attack at the time of casting.
- Nightmare Shield: Physical Resistance +50%, Spell Resistance +50%. Shield can be destroyed by attacks by undead creatures.
- Shield may require multiple attacks from Skeleton Hound to break. See above table for number of attacks require to break shield.
- Maniac: Double attack when Nightmare Dragon Whelp is visible
Boss Minions
The boss is accompanied by 4 Dragon Eggs, which will eventually hatch into Nightmare Dragon Whelp. 2 of them will hatch after X rounds and the other 2 after X+1 rounds. X varies with the level (see table below).
| Floor | Attack | HP | Rounds to Hatch |
|---|---|---|---|
| 30 | 5 | 34 | 7 |
| 40 | 14 | 54 | 7 |
| 50 | 22 | 99 | 7 |
| 60 | 41 | 196 | 6 |
| 70 | 60 | 385 | 6 |
| 80 | 127 | 743 | 6 |
| 90 | 5 | ||
| 100 | 374 | 2,251 | 5 |
Allies
There are two possible allies in this maze. The stats of the ally depends on its type, the level of the three equipment listed above and the current floor.
| Ally | Type | Ability | Summoned by |
|---|---|---|---|
Skeleton Husky  |
Single Floor | Bite: X% Chance of Blood Leech when attacking (Transfer 100% of damage to HP).
X is Scourge Bone Chime level *10 Inherits your dodge skill. |
Use Bone Staff |
Skeleton Drake  |
Single Floor | Bite: 30% chance of Blood Leech when attacking (Transfer 100% of damage to HP)
Thump: 25% chance to cause 200% damage when attacking Inherits your dodge skill. Note: May drop Dragonling Skull when killed. |
Use Bone Staff when wearing fully upgraded Undead Armor, Lich's Bone Boots, and Scourge Bone Chime. |
Maze Occurrences
Various Occurrences
Undead Experiment Table


Boots table
The Undead Experiment Table appears on every non-boss floor and allows you to forge and is used to upgrade the Maze-specific equipment. It cycles in the order of Bone Staff, Scrouge Bone Staff, Lich Bone Boots and Undead Armor between floors. Do note, the upgrade succession rate falls greatly as the level of equipment goes higher. Each equipment requires 10 successful upgrades to reach the maximum level.
Bones required for each forge/upgrade level and the effect it has:
- Bone Staff - Skull x1, Breastbone x1, Shin Bone x1
- a consumable that creates a floor limited undead ally.
- Scourge Bone Chime - Skull x3, Breastbone x3
- Gives up to +10 Power, increases skeleton ally's Leech ability, grants immunity to Poison (at level 5+) and a 10% chance to put a very weak Poison effect on the enemy for 3 rounds when attacking.[notes 1]
- Lich's Bone Boots - Skull x3, Shin bone x3
- Gives up to +10 Attack, increases skeleton ally's Attack, grants immunity to Curse (at level 5+) and a 10% chance to put a 50% attack reduction curse on the enemy for 4 rounds when attacking.[notes 2]
- Undead Armor - Breastbone x3, Shin bone x3
- Gives up to 10 defense, increases skeleton ally's HP and gives 10% chance to cast Disrupting Ray when attacking[notes 2]
Land of Bones


Land of Bones
Fight some enemies inside to find:
- Pile of Bones (See corpses section)
- Huge Remains (See corpses section): Get Electrical Helmet
- Skull Altar (See corpses section)
Emily's Grave

At Emily's Grave, you can submit any Ring equipment. Submitting the Diamond Ring obtained from a Pile of Bones to obtain Wedding Dress, which gives you a Pandora fashion. On subsequent runs, you will get 3 Hex and 1 Implosion scroll.
If you submit another ring:
Note: Pandora does not need to be the main or soul-linked gumball to get the fashion but you must have her unlocked or you will just get the spells.
Corpses
| Corpse | Regular Loot | Farplane's Lantern Soul |
|---|---|---|
Adventurer's Remains (1x)   |
Skull x5, Breastbone x5 and Shin Bone x5 | Wirt's Soul: Wirt's Leg opens a portal to Tristan (fight some angry cows and collect parts of the Bull Demon King equipment set) The 8 cows also each drop 100 EP. (But you lose the 3x5 bones from the original Wirt's) |
Woman's Remains (1x)   |
T-Virus | Gill's Soul: Cause extra 20% damage when you attack undead |
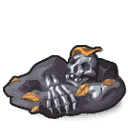
Huge Remains (1x, in cave)   |
Electrical Helmet | Frankenstein's Soul: Mad Scientist status (Increases the success rate for enhancing on the Undead Experiment Table by 100%, valid on floor) |
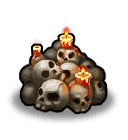
Pile of Bones (Multiple)   |
2/3 bones (80% chance to get 2) and get Poisoned Get Diamond Ring (once) on 3rd pile searched or first pile after floor 90. |
Broken Scoundrel's Soul: Cast Stoneskin |
| Broken Mage's Soul: Power +10 (Only valid in the target floor) | ||
| Broken Mercenary's Soul: Recover 30 HP | ||
Skull Altars (Multiple)
  |
1 Stat up and get Cursed (Decrease Attack by 50%) | Complete Scoundrel's Soul: Cast Blade of Ruin |
| Complete Mage's Soul: Power+1 | ||
| Complete Mercenary's Soul: HP +20 |
Title specific loots
For items available here through the God of Thieves title, see here.
For souls available here using the Farplane's Bow and Farplane Arrow, see here.
Gumball specific info
Out-of-Maze Loot
Get these items in the maze and use them outside:
- Pandora's Fashion (Ghost Bride Dress)
- Bone of Moonlight (boss loot)
- Blue Crystal Gel (high chance)
- Any other T2 Ingredient as boss loot
- Fragments for God of Thieves' Boots, Code of Dark Priest & Gloves of Dark Arbiter
- Evil Pumpkin (boss loot)
- Gumball Pot (boss loot)
- And all the usual (Fruit of World Tree, main and hidden Gumball fragments, coins, whatever you can get with your Compass, whatever you can get from your gumballs exclusive skills, Rare Enemies and Divine Dragon Wishes ...)
- Formula for Ghoul's Potion
- Circus Quest Ticket
For raid results, see Bandit's Raid#Result Table
Special Note: This is the maze you where you will receive the Mercenary Camp access
Tips
- Always try to have two Bone Staffs before entering a boss floor. Use the first to deal double damage to the eggs. Once the Dragon Whelps are gone, use the other to remove the Boss' shield.
- Farplane's Bow is mostly useless as only the BOSS and the Necromancer have Souls. The Demon Hunter (Title) can still be useful if you choose the Great Elf King or Legendary Hunter paths.
- Given the relatively good items you'll forge, it is probably best not to take an artifact for the slots Armor, Feet and Treasure. (Treasure is mostly ok if you are immune to poison).
- To max the pieces of equipment, take Farplane Ranger (Farplane's Lantern's path) for Frankenstein's Soul. Don't raise the Undead Armor. When you fail on updating the boots or Scourge Bone Chime and don't want to wait for a S/L30, do a simple S/L then "consume" the bad dice roll to raise the Undead Armor by just 1 level when you next see the proper bench. With your armor at very low level, there is a good chance that the same bad roll that wasn't enough to raise a high level equipment will be enough for a low level one. Once you have maxed the boots and chime and have enough bones at hand, use the Frankenstein's Soul when you next encounter the altar for the armor. You'll probably still need one decent Portal of Earth.
- The piles of bones are counted as corpses
- The soul from Huge Remains (Frankenstein's monster) gives 100% success rate at the altar on one floor.
- Wirt's Soul (early floor corpse that gives you his leg) will transport you to Tristan. Fight some angry cows an collect parts of the Bull Demon King equipment set. Getting the whole is however impossible so you might not want do this more than once.
Quests / DP
| Description | DP | Notes | |
|---|---|---|---|
| S | Obtain Electrical Helmet x3 | 2 | |
| S | Obtain T-Virus x3 | 2 | |
| S | Obtain Wirt's Leg x3 | 2 | |
| G | Obtain Dragonling Skull x2 | 3 |
Dropped when Skeleton Drake summon is killed (Requires Level 10 in Armor, Boot, & Chim to summon). Best done in the boss room. S/L method works if it dies and drops nothing. Once one skull is picked up, no more will drop. However, it is possible to let multiple dragonlings die (with out picking up the skull!!!) on one floor to collect more than one skull per maze. |
| G | Use Bone Staff x30 | 2 | |
| G | Kill Skeleton Hound x 80 | 1 | |
| G | Kill Skeleton Swordsman x80 | 1 | |
| G | Kill Skeleton Warlock x80 | 1 | |
| G | Kill the Calamity Pumpkin x80 | 1 | |
| G | Kill Wrath Mage x40 | 1 | |
| G | Break Dragon Egg x20 | 3 | |
| G | Kill first boss | 3 | |
| G | Kill boss x3 | 3 | |
| G | Clear Land of Bones x15 | 2 | |
| S | Reach floor 40 | 1 | |
| S | Reach floor 50 | 2 | |
| S | Reach floor 60 | 3 | |
| G | Search Pile of Bones x20 | 3 | |
| G | Worship Skull Altar x20 | 3 | |
| G | Skeleton Husky killed enemy x30 | 3 | Summon with normal Bone Staff |
| G | Skeleton Drake killed enemy x30 | 3 | |
| G | Summon Skeleton Drake | 3 | Requires to wear: Level 10 in Armor, Boot, & Chime in order to summon with normal Bone Staff. |
| G | Upgrade Scourge Bone Chimes rank x20 | 2 | |
| G | Upgrade Lich's Bone Boot's rank x20 | 2 | |
| G | Upgrade Undead Armor's rank x20 | 2 | |
| G | Scourge Bone Chime upgrade failed x10 | 2 | |
| G | Lich's Bone Boots upgrade failed x10 | 2 | |
| G | Undead Armor upgrade failed x10 | 2 | |
| G | Upgrade Bone Chime to lvl 10 | 3 | |
| G | Upgrade Lich's Bone Boots to lvl 10 | 3 | |
| G | Upgrade Undead Armor to lvl 10 | 3 | |
| G | MP reaches 200 | 3 | |
| G | Use soul-link x5 | 3 | |
| G | Obtain hidden gumball | 5 | See hidden gumball section |
Notes
<references group="notes">
Cite error: <ref> tags exist for a group named "notes", but no corresponding <references group="notes"/> tag was found